

Overview
This is a getting started tutorial with Raspberry Pi Pico W, a brand new exciting Microcontroller board based on RP2040 Microcontroller & CYW43439 WiFi+BLE Chip. The Raspberry Pi Pico W is a low-cost Arm-based microcontroller that we can program using C/C++ and MicroPython.
Raspberry Pi Pico W also adds on-board single-band 2.4GHz wireless interfaces (802.11n) using the Infineon CYW43439 while retaining the Pico form factor, so in addition to the basic GPIO function, it can also connect to the network so we can use it for some IoT projects. For example, using IFTTT for a security system, building a cloud player and a cloud service bell system using MQTT, and so on.

The tutorial covers the overview of Raspberry Pi Pico W, its features & specifications. The detailed guide of Raspberry Pi Pico W Pins like ADC pins, I2C Pins, SPI Pins, UART, etc can help you to interface any sensors or module with this powerful board.
Later we will we through the MicroPython Setup & programming like Blinking of LED, Scanning WiFi Networks & Connecting to the WiFI Network.
RP2040 Microcontroller
Earlier all the Raspberry Pi boards like Raspberry Pi 3 or 4 or Raspberry Pi Zero featured Broadcom Processors like BCM2835, BCM2836, BCM2711 etc. The RP2040 chip was announced on 21st January 2021 and is the first processor designed by the Raspberry Pi Foundation.
The RP2040 is a 32-bit dual ARM Cortex-M0+ microcontroller integrated circuit released at the same time as part of the Raspberry Pi Pico board. The processor is a low-cost microcontroller and costs around US$4. The chip is 40nm silicon in a 7×7 mm QFN-56 package.
The RP2040 contains two ARM Cortex-M0+ cores clocked at 133 MHz together with 264 KB of RAM. The Program memory is external and supports up to 16 MB. The device has everything you expect from a modern microcontroller like UARTS, SPI, and I2C ports, and there are timers, PWM, DMA, and a 12-bit analog-to-digital converter (ADC).
CYW43439 Wi-Fi 4 (802.11n) + Bluetooth 5.2
The Raspberry Pi Pico W Board has a CYW43439 Wi-Fi + BLE Chip. Infineon’s AIROC CYW43439 single-chip combo device features 1×1 single-band 2.4 GHz Wi-Fi 4 (802.11n) and Bluetooth 5.2. The CYW43439 adds updated Bluetooth capabilities, WPA3, DPP for Wi-Fi Easy Connect, enhanced Soft AP, and shared SDIO host interface for Wi-Fi + Bluetooth.

WiFi Features
- Wi-Fi 4 (802.11n), Single-band (2.4 GHz)
- 1×1 SISO
- 20 MHz channels, up to 96 Mbps PHY data rate
- Integrated internal PA, LNA, and T/R switch supports a single antenna shared between Wi-Fi and Bluetooth
Introduction to Raspberry Pi Pico W
Raspberry Pi Pico W brings wireless connectivity to the Raspberry Pi Pico product line. It is built around our RP2040 microcontroller & CYW43439 WiFi Chip.

Raspberry Pi Pico W offers 2.4GHz 802.11 b/g/n wireless LAN support, with an onboard antenna, and modular compliance certification. It is able to operate in both station and access-point modes. Full access to network functionality is available to both C and MicroPython developers.
Raspberry Pi Pico W pairs RP2040 with 2MB of flash memory, and a power supply chip supporting input voltages from 1.8–5.5V. It provides 26 GPIO pins, three of which can function as analog inputs, on 0.1”-pitch through-hole pads with castellated edges.
The CYW43439 wireless chip is connected via SPI to the RP2040. While the CYW43439 supports both 802.11 wireless and Bluetooth, initially Pico W does not have Bluetooth support. Support may be added later, and will use the same SPI interface. If support is added existing hardware may require a firmware update to support Bluetooth, but there will be no hardware modifications needed.
Features of Raspberry Pi Pico W
Following are the features of the Raspberry Pi Pico W Board.
- 21 mm × 51 mm form factor
- RP2040 microcontroller chip designed by Raspberry Pi in the UK
- Dual-core Arm Cortex-M0+ processor, flexible clock running up to 133 MHz
- 264kB on-chip SRAM
- 2MB on-board QSPI flash
- 2.4GHz 802.11n wireless LAN
- 26 multifunction GPIO pins, including 3 analog inputs
- 2 × UART, 2 × SPI controllers, 2 × I2C controllers, 16 × PWM channels
- 1 × USB 1.1 controller and PHY, with host and device support
- 8 × Programmable I/O (PIO) state machines for custom peripheral support
- Supported input power 1.8–5.5V DC
- Operating temperature -20°C to +70°C
- Castellated module allows soldering directly to carrier boards
- Drag-and-drop programming using mass storage over USB
- Low-power sleep and dormant modes
- Accurate on-chip clock
- Temperature sensor
- Accelerated integer and floating-point libraries on-chip
Raspberry Pi Pico W Pinout
This is a top view of the pinouts on the Raspberry Pi Pico W. The pin labels are on the bottom of the board.

There are 40-pin on the Raspberry Pi Pico. The functionality of all the pins is explained below.
- GP0-GP28: These are General-purpose input/output pins. It act as either input or output and have no fixed purpose of its own
- GND: This is a 0 volts ground Several GND pins around Pico W to make wiring easier.
- RUN: It enables or disables Pico. You can start and stop Pico W from another microcontroller.
- GPxx_ADCx: General-purpose input/output or analog input. It can be used as an analog input as well as a digital input or output – but not both at the same time.
- ADC_VREF: Analog-to-digital converter (ADC) voltage reference. A special input pin that sets a reference voltage for any analog inputs.
- AGND: Analog-to-digital converter (ADC) 0 volts ground. A special ground connection for use with the ADC_VREF pin.
- 3V3(O): 3.3 volts power. A source of 3.3V power, the same voltage your Pico W runs at internally, generated from the VSYS input.
- 3v3(E): Enables or disables the power. Switch on or off the 3V3(O) power, can also switches your Pico W off.
- VSYS: 2-5 volts power. A pin directly connected to your Pico’s internal power supply, which cannot be switched off without also switching Pico W off.
- VBUS: 5 volts power. A source of 5 V power taken from your Pico’s micro USB port and used to power hardware which needs more than 3.3 V.
Before you start using Raspberry Pi Pico W, you have to solder 40-pin male headers, 20 on each side of the board.
Programming & Installing MicroPython on Raspberry Pi Pico W
The Raspberry Pi Pico W can be programmed using C/C++ or MicroPython, among other languages. Pico W is adaptable to a vast range of applications and skill levels, and getting started is as easy as dragging and dropping a file. If you are working with C, then it is recommended to use a Linux-based system like a Raspberry Pi Computer as it is easy to download the SDK and write C Programs in Linux.

But I will recommend using MicroPython to program the Raspberry Pi Pico W Board. MicroPython is a Python Language Interpreter that is developed for Microcontrollers and embedded systems. The Syntax for MicroPython is very similar to Python. So, if you worked with Python, then working with MicroPython will be very easy.
To program the Raspberry Pi Pico using Micropython, we will use Thonny IDE:
But before getting started with Raspberry Pi Pico W, you have to install MicroPython on Raspberry Pi Pico W Board.
Push and hold the BOOTSEL button on the Pico W, & then immediately connect the Pico W Board to your computer using a micro USB cable. Release BOOTSEL once the drive RPI-RP2 appears on your computer.

Open the RPI-RP2 drive that appears in the Drives tab.

Visit the Raspberry Pi Pico W Official Documentation page from here: Raspberry Pi Datasheets.

Download the MicroPython UF2 file from the MicroPython tab.

Drag and drop the UF2 file onto the RPI-RP2 drive. The Raspberry Pi Pico W will reboot and will now run MicroPython.

Now you can start using the Raspberry Pi Pico W with MicroPython on Thonny IDE & make unlimited IoT projects.

Getting Started with Raspberry Pi Pico W using MicroPython
Now let us get started with Raspberry Pi Pico W using MicroPython on Thonny IDE. First you have to download Thonny from the https://thonny.org/

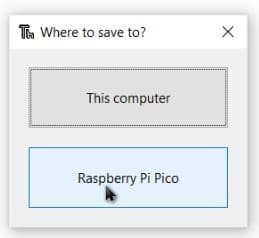
Connect the Raspberry Pi Pico W to your computer. Then from Thonny go to Tools > Options and click on the Interpreter tab. From the interpreter dropdown list, select MicroPython (Raspberry Pi Pico). The port dropdown menu can be left to automatically detect the Pico. Click Ok to close.

After a successful connection, the MicroPython version and Raspberry board will appear in the Python Shell. To test we can write a quick print function to say “Hello World”. Press Enter to run the code. You will get Hello World as a response.

You can also check the device information by following commands.
|
1 2 |
import sys sys.implementation |
The directory can also be viewed using following command.
|
1 2 |
import uso uso.listdir() |

Writing a blink program for the onboard LED of Pico W
Unlike the original Raspberry Pi Pico, the on-board LED on Pico W is not connected to a pin on RP2040, but instead to a GPIO pin on the CYW43439 wireless chip. MicroPython has been modified accordingly.
|
1 2 3 4 5 6 7 8 9 10 |
import machine import time led= machine.Pin('LED', machine.Pin.OUT) while (True): led.on() time.sleep(0.5) led.off() time.sleep(0.5) |
Save the program on the Raspberry Pi Pico W and give a name like main.py
The Python shell will following message which means the program will run without any error.

The program will run and you can see the LED toggling in the board

Scanning WiFi Access Points
The Raspberry Pi Pico W has CYW43439 2.4-GHz Wi-Fi chip from Infineon. So the Board can connect to the WiFi network and all the features related to WiFi can be accessed as well.
Lets scan all the available Network Access Points using the Raspberry Pi Pico W working in a station Mode.
In the Thonny editor, paste the following code and save it with any name like main.py.
|
1 2 3 4 5 6 |
import network wlan=network.WLAN(network.STA_IF) wlan.active(True) accesspoints = wlan.scan() for ap in accesspoints: print(ap) |
Now hit the run button to run the code.

The WiFi chip will scan all the available network and shows the list of all the network in Shell Window.
Connecting to the Internet (WLAN/WiFi Network)
Now let’s see how Raspberry Pi Pico W connects to the Wi-Fi network.
Create a new script by clicking the New button on Thonny IDE. Copy and paste the following code. Replace the WiFi credentials by changing the SSID and PASSWORD to your own.
|
1 2 3 4 5 |
import network wlan = network.WLAN(network.STA_IF) wlan.active(True) wlan.connect("SSID","PASSWORD") print(wlan.isconnected()) |
Now Run current script. If the connection is successful, true will be printed.

Timeout Judgment & Showing Raspberry Pi Pico W IP Address
Considering some poor network conditions, let’s add some timeout judgment to the code and also print the IP Address of the network to which the Pico W get connected.
Create a new script by clicking the New button on Thonny IDE. Copy and paste the following code. Replace the WiFi credentials.
|
1 2 3 4 5 6 7 8 9 10 11 12 13 14 15 16 17 18 19 20 21 22 |
import network import time wlan = network.WLAN(network.STA_IF) wlan.active(True) wlan.connect("SSID","PASSWORD") # Wait for connect or fail wait = 10 while wait > 0: if wlan.status() < 0 or wlan.status() >= 3: break wait -= 1 print('waiting for connection...') time.sleep(1) # Handle connection error if wlan.status() != 3: raise RuntimeError('wifi connection failed') else: print('connected') print('IP: ', wlan.ifconfig()[0]) |
Now run the script.

The Thonny Shell will display the IP Address of the Pico W.
wlan.status()function: Returns the current status of the wireless connectionwlan.ifconfig()function: Obtains IP addresses, subnet masks, gateways, and DNS servers. This method will return a 4-tuple containing the above information when called directly. In this case, we only print the IP address.
For more information about the WiFi commands, refer to the class WLAN MicroPython documentation.
Storing WiFi Credentials on Secret File & Simplify WiFi Connection
When you share your Pico W project, you should not want others to see your Wi-Fi password or API key. For good security, we can create a secrets.py file to store your private information.
Considering that each of our next projects will require a network connection, why don’t we create a new do_connect.py file and write the relevant functions into it for reuse, which can greatly streamline the code of complex projects.
secrets.py
Copy the following code into a new script file on Thonny. Note to change SSID and PASSWORD to yours. Set the file name to secrets.py
|
1 2 3 4 |
secrets = { 'ssid': 'SSID', 'password': 'PASSWORD', } |
do_connect.py
Copy the following code into a new script file, and save it to Raspberry Pi Pico as do_connect.py.
|
1 2 3 4 5 6 7 8 9 10 11 12 13 14 15 16 17 18 19 20 21 22 23 24 25 26 |
import network import time from secrets import * def do_connect(ssid=secrets['ssid'],psk=secrets['password']): wlan = network.WLAN(network.STA_IF) wlan.active(True) wlan.connect(ssid, psk) # Wait for connect or fail wait = 10 while wait > 0: if wlan.status() < 0 or wlan.status() >= 3: break wait -= 1 print('waiting for connection...') time.sleep(1) # Handle connection error if wlan.status() != 3: raise RuntimeError('wifi connection failed') else: print('connected') ip=wlan.ifconfig()[0] print('network config: ', ip) return ip |
main.py
Calling the above script in other scripts by the following will allow the Raspberry Pi Pico W to connect to the network.
|
1 2 |
from do_connect import * do_connect() |
After running all the 3 scripts, the Pico W will connect to the WiFi Network.

Video Tutorial & Guide

Recommended Kit for Raspberry Pi Pico W
If you are a beginner or an electronics Hobbyist and wanna get started with Raspberry Pi Pico/W Kit, we would recommend SunFounder Raspberry Pi Pico W Ultimate Starter Kit. You can get it from Amazon at 69$ only.

The Kit contains 450+ components including all the active-passive components, sensors, modules, ICs, etc. Using the kit you can make a total of 117 projects using MicroPython & C/C++ Code.

List of IoT Projects using Raspberry Pi Pico W
- Sending DHT11 Sensor Data to Thingspeak with Pico W
- RGB LED Control with Pico W Web Server
- IoT Online Weather Station with OpenWeather Map & Pico W
- IoT Controlled NeoPixel LED Strip with Pico W & Adafruit IO
- BME280 & Raspberry Pi Pico W Web Server Weather Station
- IoT Controlled Relay using Raspberry Pi Pico W Web Server
- IoT Control LED using Blynk 2.0 App & Pi Pico W
- IoT Soil Moisture Monitor with Raspberry Pi Pico W & Blynk
- Home Automation using Raspberry Pi Pico W & Blynk 2.0
- Raspberry Pi Pico W send BME280 Sensor Data to Blynk 2.0


4 Comments
Great tutorial thanks sir 🙂
I would like to design my own Dashboard to monitor Room Temperature in RT, do you have any pointers on how to go about this?
none of this works o=your tutorial sucks
If you have trouble with this tutorial, then you might want to try another hobby.