

Overview
In this project, we will interface an LM35 Temperature Sensor with a Raspberry Pi Pico using MicroPython to create a digital thermometer. Earlier we used temperature sensors like MLX90614, DS18B20 & DHT11 with Raspberry Pi Pico.
The LM35 Temperature Sensor is an analog sensor whose output is proportional to the temperature in Centigrade. It offers a temperature measurement range from -55°C to +150°C with an accuracy of +/- 0.75°C. This wide range and high accuracy make the LM35 an excellent choice for a variety of temperature-sensing applications.
Similar to utilizing an internal temperature sensor, MicroPython code can be written to accurately read the ADC input value provided by the LM35 Temperature Sensor. To bring this project to life, we will write a MicroPython script that runs on the Raspberry Pi Pico. This script will read the analog output from the LM35 sensor, convert this reading into a temperature, and then communicate the result.
Components Required
We need following components for this tutorial.
| S.N. | Components | Quantity | Purchase Link |
|---|---|---|---|
| 1 | Raspberry Pi Pico | 1 | Amazon | AliExpress | SunFounder |
| 2 | LM35 Temperature Sensor | 1 | Amazon | AliExpress| SunFounder |
| 3 | Jumper Wires | 10 | Amazon | AliExpress | SunFounder |
| 4 | Breadboard | 1 | Amazon | AliExpress | SunFounder |
LM35 Temperature Sensor

The LM35 series are precise temperature sensors with an output voltage linear to the Centigrade temperature, eliminating the need to subtract a constant voltage for Centigrade scaling unlike Kelvin-calibrated sensors. It achieves typical accuracies of ±0.25°C at room temperature and ±0.75°C across a -55°C to 150°C range without external calibration.

Its cost-effectiveness is ensured by wafer-level trimming and calibration. The LM35’s low-output impedance, linear output, and inherent calibration facilitate easy interfacing with circuitry. It operates on single or dual power supplies, drawing only 60 µA, which minimizes self-heating to under 0.1°C in still air.
Features
- Calibrated directly in Degree Celsius (Centigrade)
- Linear at 10.0 mV/°C scale factor
- 0.5°C accuracy guarantee-able (at a25°C)
- Rated for full -55°C to a 150°C range.s
- Suitable for remote applications
- Low cost due to wafer-level trimming
- Operates from 4 to 30 volts
- Less than 60 mA current drain
- Low self-heating, 0.08°C instill an air
- Non-linearity only 0.25°C typical
- Low impedance output, 0.1Ωfor 1 mA load
Interfacing LM35 Temperature Sensor with Raspberry Pi Pico
Let’s interface the LM35 Temperature Sensor with the Raspberry Pi Pico. The process for connecting the sensor is straightforward.

- Connect the VCC of the LM35 to the 3.3V (Vin) on the Pico.
- Connect the GND of the LM35 to a GND pin on the Pico.
- Finally, connect the Vout (output) of the LM35 to one of the Pico’s analog input pins (e.g., GP26)

For making the connections, a breadboard can be useful, allowing you to use jumper wires to easily connect the LM35 to the Raspberry Pi Pico board without soldering.
MicroPython Code
Lets write a MicroPython Code to interface LM35 Temperature Sensor with Raspberry Pi Pico & get the temperature readings.
The following code initializes an LM35 temperature sensor connected to an ADC pin of a Raspberry Pi Pico using MicroPython. It continuously reads analog values from the LM35, averages them over ten samples to reduce noise, and then calculates the temperature in both Celsius and Fahrenheit, adjusting for any systematic error through a calibration offset. The computed temperatures are printed out every 1 second.
|
1 2 3 4 5 6 7 8 9 10 11 12 13 14 15 16 17 18 19 20 21 22 23 24 25 26 27 28 29 30 31 32 33 34 35 36 37 38 39 40 41 42 43 44 45 46 47 48 49 50 |
# Import required libraries import machine # For interfacing with hardware components like ADC import utime # For time-related functions, such as sleep # Initialize the ADC (Analog to Digital Converter) on pin 26 for reading LM35 temperature sensor LM35 = machine.ADC(26) # Define a calibration offset value. This is determined through practical testing to correct systematic error. Cal_Offset = -1650 # Function to compute temperature from the averaged analog readings def Compute_Temp(Avg_A): # Add calibration adjustment to the average ADC value LM35_A = Avg_A + Cal_Offset # Convert the adjusted analog reading to voltage (assuming each ADC unit represents .00005 Volts) LM35_V = LM35_A * .00005 # Convert the voltage to temperature in Celsius (since LM35 has a scale factor of 10mV/°C) Tmp_C = round((LM35_V * 100), 1) # Convert temperature from Celsius to Fahrenheit Tmp_F = round((Tmp_C * 1.8 + 32), 1) # Return both Celsius and Fahrenheit temperatures return Tmp_C, Tmp_F # Initialize variables for accumulating samples and counting the number of samples Samples = 0 Num_Samples = 1 # Main loop to continuously read temperature while True: # Check if fewer than 10 samples have been collected if Num_Samples <= 10: # Read the current temperature sensor value from the ADC LM35_A = LM35.read_u16() # Add the current reading to the total samples accumulator Samples += LM35_A # Increment the counter for the number of samples collected Num_Samples += 1 else: # Calculate the average of the collected samples Avg_A = Samples / 10 # Reset the samples accumulator and samples counter for the next batch of readings Samples = 0 Num_Samples = 1 # Compute the temperature in Celsius and Fahrenheit from the average ADC value T_c, T_f = Compute_Temp(Avg_A) # Print the calculated temperatures print("Celcius=", T_c, " Fahrenheit=", T_f) # Wait for 0.1 seconds before the next loop iteration to limit the rate of temperature reading utime.sleep(.1) |
Save the code to the Raspberry Pi Pico board. Then run the code.
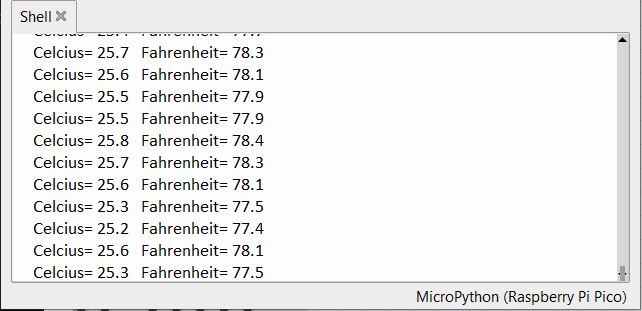
The Python Shell will display the temperature of your room. Optionally, compare the sensor’s readings with a known accurate thermometer to verify its accuracy. To observer the rise in temperature reading, heat the LM35 sensor with any heat source like soldering iron.
To build a Web Server, refer to LM35 Raspberry Pi Pico W guide, where the temperatures readings can be displayed on a Webpage dynamically.


