

Overview
The Triad Spectroscopy Sensor AS7265x from Sparkfun is a powerful optical spectral sensor to study light features. We can interface AS7265x with Arduino & any other microcontroller. Using the Triad Spectroscopy Sensor AS7265x, we can make our own Spectrophotometer. The sensor has the ability to measure and characterize how various types of materials absorb or reflect 18 different frequencies of light ranging from 410nm to 940nm. In one of our previous post, we learnt about about the Color Sensor TCS3200 and a UV Sensor ML8511 which can also measure color frequency.
The term Spectroscopy means the study of the interaction between matter and electromagnetic radiation as a function of the wavelength or frequency of the radiation. In simpler terms, spectroscopy is the precise study of color as generalized from visible light to all bands of the electromagnetic spectrum. By performing this dissection and analysis of an object’s light, the researcher can infer the physical properties of that object such as temperature, mass, luminosity, and composition.

In this guide, we will interface Triad Spectroscopy Sensor AS7265x with Arduino Board and perform the basic readings of all 18 channels. We will also read the raw data as well as the temperature. Since this is basic beginners guide for AS7265x, we will learn about the construction, working, internal architecture all other functionalities of the sensor. The sensor is made by the combination of visible, UV & IR LEDs or 3 different sensors like AS72651 (UV), AS72652 (VIS), and AS72653 (NIR) so it is called Triad Spectroscopy. Later you can design a Colorimeter using AS7265x and an ESP32 Microcontroller.
Bill of Materials
To learn more about the Spectroscopy and the spectral Sensor AS7265x, we have to interface the sensor with Arduino. So we may need a few components as shown in the table below. All the components can be easily purchased from Amazon. The components purchase link is given below.
| S.N. | Components Name | Quantity | Purchase Links |
|---|---|---|---|
| 1 | Arduino Nano Board | 1 | Amazon | AliExpress |
| 2 | AS7265x Triad Spectrometer Sensor | 1 | Amazon | AliExpress |
| 3 | 5V DC Power Supply | 1 | Amazon | AliExpress |
| 4 | Connecting Wires | 10 | Amazon | AliExpress |
| 5 | Breadboard | 1 | Amazon | AliExpress |
What is Light Spectroscopy?

The term “spectroscopy” is a technique that uses radiation to obtain information on the structure and properties of matter. The basic principle of the spectroscopic technique is to shine a beam of electromagnetic radiation onto a sample of the material and observe how it responds to such a stimulus. The response is usually recorded as a function of radiation wavelength. A plot of the response as a function of wavelength is referred to as a spectrum.
Applications of Spectroscopy
Spectroscopy is used in physical and analytical chemistry to detect, determine, or quantify the molecular or structural composition of a sample. Each type of molecule and atom will reflect, absorb, or emit electromagnetic radiation in its own characteristic way. Spectroscopy uses these characteristics to deduce and analyze the composition of a sample.
Some of the application areas of Spectroscopy are as follows.
1. Determining the atomic structure of a sample
2. Determining the metabolic structure of a muscle
3. Monitoring dissolved oxygen content in aquatic ecosystems
4. Studying spectral emission lines of distant galaxies
5. Altering the structure of drugs to improve the effectiveness
6. Characterization of proteins
7. Soil Nutrient Analysis
8. Respiratory gas analysis in hospitals
AS7265x Triad Spectroscopy Sensor

The AS7265x is the simplest Triad Spectroscopy Sensor from Sparkfun which can also be called a Spectrophotometer. The sensor is formed by combining three sensors AS72651, AS72652 & AS72653. The AS72651 is for measuring the visible light spectrum. Similarly, AS72652 is for measuring UV Light. The AS72653 is an IR Sensor for measuring IR Radiation. The sensor also has a 4Mbit EEPROM which is loaded by the firmware which drives the system. The EEPROM is read by the AS72651 at power on.

The AS7265x Triad Spectroscopy Spectral Sensor detects the light from a wavelength of 410nm to 940nm. The sensor has the ability to measure 18 individual light frequencies with precision down to 28.6 nW/cm2 and accuracy of +/-12%. The sensor operates at a typical voltage of 3.3V. The sensor has I2C pins as SDA (Serial Data) & SCL (Serial Clock) with an I2C address of 0x49. The default baud rate for the sensor is 115200.

The sensor also has a UART interface which can be accessed by doing simple modifications on hardware. The serial interface uses an AT command set which can be found in AS7265x Datasheet.
LEDs/Bulbs on AS7265x Sensor
The sensor contains 3 diifferent LED, i.e white LED (5700K), UV LED (405nm) & IR LED (875nm). The main purpose of these LEDs is to illuminate the targeted object with the largest swath of visible or invisible light.

Apart from the 3 illumination LEDs, the sensor has a power LED and a status LED. The blue status LED indicates various states of the AS72651 sensor. This LED can be disabled through the SparkFun library. The red power LED is provided to indicate the board is properly powered up or not. You can disable the red led by cutting its neighboring jumper if the red light is interfering with sensor readings.
AS7265x UART/I2C Interface
By default, the Sensor is enabled with I2C Interface. The I2C Address for the sensor 0x49. All you need is to connect the sensor with the I2C pin of any microcontroller and read the data using Sparkfun Library.
A UART serial interface is also available for this board. You can use the AT commands to access the Serial data. The list of AT Commands can be found in AS7265x Datasheet. To enable the serial interface & disable the I2C interface you must modify two jumpers.

1. The I2C jumper on the front of the board must be opened to remove the pull-up resistors from the TX and RX lines.
2. The JP2 on the rear of the board must be closed with a solder jumper.
Reading AS7265x Serial Data using AT Commands
In order to read serial data from AS7265x, you need to enable UART interface using the above method first. Then connect the FTDI Module to the sensor. The Serial Basic is set to 3.3V by default, so connect 3.3V on VCC and uses 3.3V logic signals on UART pins.

The serial interface operates at the baud rate of 115200. To test the connection, open Serial Monitor on Arduino IDE or Putty Terminal. Send the command “AT” and look for an “OK” response.

From the datasheet, you can get all AT Commands. You can send them one by one. Some of the AT Commands are below.
1. AT: get a response
2. ATVERSW: Return the current software version number
3. ATVERHW: Returns the system hardware as a HEX value of the form PRDTx where P=PartID and R=ChipRevision and DT= DeviceType
4. ATTEMPT: Read the current device temperature in degrees Celsius
5. ATDATA: Read all six raw vales per device(<65535)
6. ATCDATA: Read all six calibrated values per device. Returns comma-separated 32-bit floating-point values

You can test various other AT Commands and their response by referring to the datasheet.
Interfacing Triad Spectroscopy Sensor AS7265x with Arduino
Now, let us learn about the Interfacing of Triad Spectroscopy Sensor AS7265x with Arduino. We will use the I2C interface of AS7265x Sparkfun Spectral Sensor with Arduino to read the data. The connection between Arduino & AS7265x is given below.

Connect the 3.3V pin of AS7265x to the 3.3V pin of the Arduino & GND to GND. Also, connect the Serial Data(SDA) & Serial Clock(SCL) pin of AS7265x to A4 & A5 of Arduino respectively. I used the Arduino Nano Board with AS7265x. You can use any other Arduino Board.

After the hardware connection is done, you can start programming the Arduino Board and learn more about the AS7265x Smart Spectral Sensor.
AS7265x Arduino Library
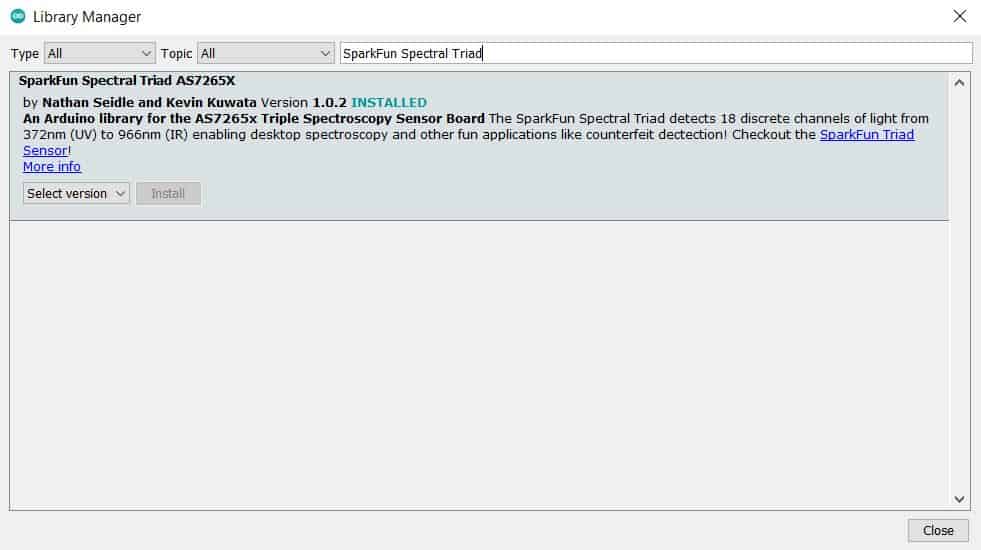
The AS7265x sensor is developed by Sparkfun. So, they have written an Arduino library to get reading from the AS7265x Spectral Sensor. The easiest way to install the library is by searching SparkFun Spectral Triad within the Arduino library manager.
You can also get the library from Github. This Arduino library can be used to control the Sparkfun AS7265x Spectral Sensors, which can be configured via I2C.
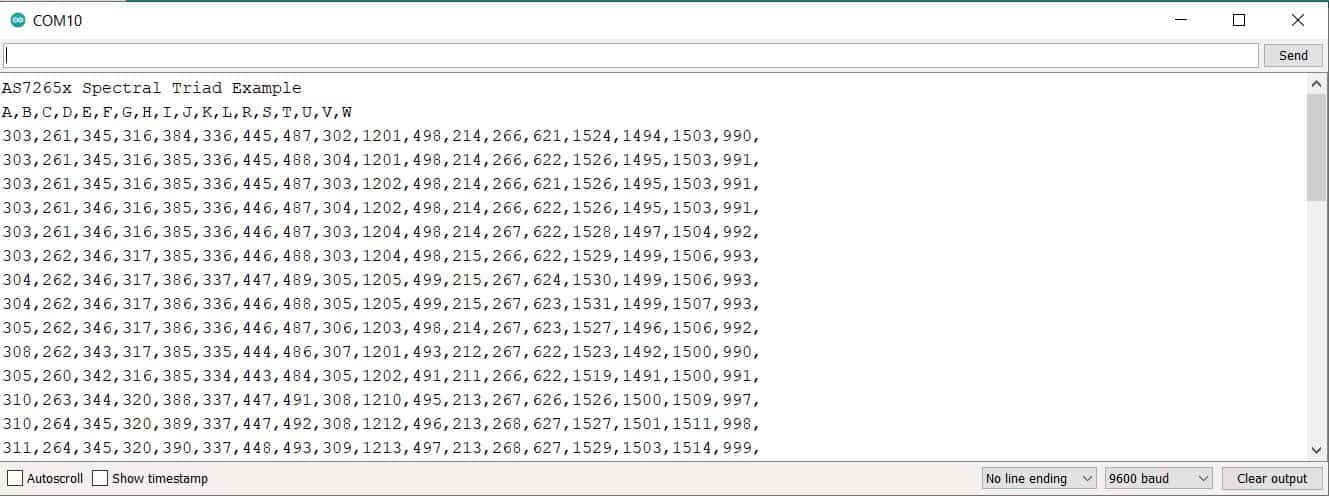
Source Code 1: Basic Reading of all 18 Channel
This example takes all 18 readings, 372nm to 966nm, over I2C and outputs them to the serial port.
|
1 2 3 4 5 6 7 8 9 10 11 12 13 14 15 16 17 18 19 20 21 22 23 24 25 26 27 28 29 30 31 32 33 34 35 36 37 38 39 40 41 42 43 44 45 46 47 48 49 50 51 52 53 54 55 56 57 58 59 60 |
#include "SparkFun_AS7265X.h" AS7265X sensor; void setup() { Serial.begin(9600); Serial.println("AS7265x Spectral Triad Example"); if(sensor.begin() == false) { Serial.println("Sensor does not appear to be connected. Please check the wiring. Freezing..."); while(1); } Serial.println("A,B,C,D,E,F,G,H,I,J,K,L,R,S,T,U,V,W"); } void loop() { sensor.takeMeasurements(); //This is a hard wait while all 18 channels are measured Serial.print(sensor.getCalibratedA()); Serial.print(","); Serial.print(sensor.getCalibratedB()); Serial.print(","); Serial.print(sensor.getCalibratedC()); Serial.print(","); Serial.print(sensor.getCalibratedD()); Serial.print(","); Serial.print(sensor.getCalibratedE()); Serial.print(","); Serial.print(sensor.getCalibratedF()); Serial.print(","); Serial.print(sensor.getCalibratedG()); Serial.print(","); Serial.print(sensor.getCalibratedH()); Serial.print(","); Serial.print(sensor.getCalibratedI()); Serial.print(","); Serial.print(sensor.getCalibratedJ()); Serial.print(","); Serial.print(sensor.getCalibratedK()); Serial.print(","); Serial.print(sensor.getCalibratedL()); Serial.print(","); Serial.print(sensor.getCalibratedR()); Serial.print(","); Serial.print(sensor.getCalibratedS()); Serial.print(","); Serial.print(sensor.getCalibratedT()); Serial.print(","); Serial.print(sensor.getCalibratedU()); Serial.print(","); Serial.print(sensor.getCalibratedV()); Serial.print(","); Serial.print(sensor.getCalibratedW()); Serial.print(","); Serial.println(); } |
After uploading code, open the Serial Monitor. The sensor will read data of all 18 channels and display them quickly on Serial Monitor.

Source Code 2: Basic Reading with LEDs
This example takes all 18 readings and blinks the illumination LEDs as it goes.
|
1 2 3 4 5 6 7 8 9 10 11 12 13 14 15 16 17 18 19 20 21 22 23 24 25 26 27 28 29 30 31 32 33 34 35 36 37 38 39 40 41 42 43 44 45 46 47 48 49 50 51 52 53 54 55 56 57 58 59 60 61 62 63 64 65 66 67 68 |
#include "SparkFun_AS7265X.h" AS7265X sensor; #include <Wire.h> void setup() { Serial.begin(9600); Serial.println("AS7265x Spectral Triad Example"); Serial.println("Point the Triad away and press a key to begin with illumination..."); while(Serial.available() == false) {} //Do nothing while we wait for user to press a key Serial.read(); //Throw away the user's button if(sensor.begin() == false) { Serial.println("Sensor does not appear to be connected. Please check wiring. Freezing..."); while(1); } sensor.disableIndicator(); //Turn off the blue status LED Serial.println("A,B,C,D,E,F,G,H,I,J,K,L,R,S,T,U,V,W"); } void loop() { sensor.takeMeasurementsWithBulb(); //This is a hard wait while all 18 channels are measured Serial.print(sensor.getCalibratedA()); Serial.print(","); Serial.print(sensor.getCalibratedB()); Serial.print(","); Serial.print(sensor.getCalibratedC()); Serial.print(","); Serial.print(sensor.getCalibratedD()); Serial.print(","); Serial.print(sensor.getCalibratedE()); Serial.print(","); Serial.print(sensor.getCalibratedF()); Serial.print(","); Serial.print(sensor.getCalibratedG()); Serial.print(","); Serial.print(sensor.getCalibratedH()); Serial.print(","); Serial.print(sensor.getCalibratedI()); Serial.print(","); Serial.print(sensor.getCalibratedJ()); Serial.print(","); Serial.print(sensor.getCalibratedK()); Serial.print(","); Serial.print(sensor.getCalibratedL()); Serial.print(","); Serial.print(sensor.getCalibratedR()); Serial.print(","); Serial.print(sensor.getCalibratedS()); Serial.print(","); Serial.print(sensor.getCalibratedT()); Serial.print(","); Serial.print(sensor.getCalibratedU()); Serial.print(","); Serial.print(sensor.getCalibratedV()); Serial.print(","); Serial.print(sensor.getCalibratedW()); Serial.print(","); Serial.println(); } |
After uploading the code, send any command by pressing the key from Serial Monitor. The LED will start lightning up and will read all the 18 values. We recommend you point the Triad away from your eyes, the LEDs are too bright.

Source Code 3: Read Raw Vlaues
This example shows how to output the raw sensor values. This is probably never needed since the calibrated values are tuned to each sensor. But it does run faster (2 bytes per channel instead of 4).
|
1 2 3 4 5 6 7 8 9 10 11 12 13 14 15 16 17 18 19 20 21 22 23 24 25 26 27 28 29 30 31 32 33 34 35 36 37 38 39 40 41 42 43 44 45 46 47 48 49 50 51 52 53 54 55 56 57 58 59 60 61 62 63 64 65 66 67 |
#include "SparkFun_AS7265X.h" //Click here to get the library: http://librarymanager/All#SparkFun_AS7265X AS7265X sensor; #include <Wire.h> void setup() { Serial.begin(9600); Serial.println("AS7265x Spectral Triad Example"); if(sensor.begin() == false) { Serial.println("Sensor does not appear to be connected. Please check the wiring. Freezing..."); while(1); } //Once the sensor is started we can increase the I2C speed Wire.setClock(400000); sensor.disableIndicator(); Serial.println("A,B,C,D,E,F,G,H,I,J,K,L,R,S,T,U,V,W"); } void loop() { sensor.takeMeasurementsWithBulb(); //This is a hard wait while all 18 channels are measured Serial.print(sensor.getA()); Serial.print(","); Serial.print(sensor.getB()); Serial.print(","); Serial.print(sensor.getC()); Serial.print(","); Serial.print(sensor.getD()); Serial.print(","); Serial.print(sensor.getE()); Serial.print(","); Serial.print(sensor.getF()); Serial.print(","); Serial.print(sensor.getG()); Serial.print(","); Serial.print(sensor.getH()); Serial.print(","); Serial.print(sensor.getI()); Serial.print(","); Serial.print(sensor.getJ()); Serial.print(","); Serial.print(sensor.getK()); Serial.print(","); Serial.print(sensor.getL()); Serial.print(","); Serial.print(sensor.getR()); Serial.print(","); Serial.print(sensor.getS()); Serial.print(","); Serial.print(sensor.getT()); Serial.print(","); Serial.print(sensor.getU()); Serial.print(","); Serial.print(sensor.getV()); Serial.print(","); Serial.print(sensor.getW()); Serial.print(","); Serial.println(); } |
Source Code 4: Reading Temperature of the ICs
This example shows how to read the temperature of the ICs.
|
1 2 3 4 5 6 7 8 9 10 11 12 13 14 15 16 17 18 19 20 21 22 23 24 25 26 27 28 29 30 31 32 33 |
#include "SparkFun_AS7265X.h" AS7265X sensor; #include <Wire.h> void setup() { Serial.begin(9600); Serial.println("AS7265x Spectral Triad Example"); if(sensor.begin() == false) { Serial.println("Sensor does not appear to be connected. Please check wiring. Freezing..."); while(1); } //Once the sensor is started we can increase the I2C speed Wire.setClock(400000); } void loop() { int oneSensorTemp = sensor.getTemperature(); //Returns the temperature of master IC Serial.print("Main IC temp: "); Serial.println(oneSensorTemp); float threeSensorTemp = sensor.getTemperatureAverage(); //Returns the average temperature of all three ICs Serial.print("Average IC temp: "); Serial.println(threeSensorTemp, 2); Serial.println(""); delay(3000); } |

These are the 4 examples that can be useful to you to learn the basics of AS7265x Triad Spectroscopy Sensor. You can find a few more examples on its Library example. I used the example 2 to design a Colorimeter using AS7265x and ESP32 Microcontroller.
Video Tutorial & Guide


")


1 Comment
how to turn 1 LED light at time though ? example 2 seems useful but i need to shut 2 LEDs and only operate with one at time.