

Overview
In this article, we will develop Gesture Controlled Virtual Mouse with ESP32-CAM & OpenCV. The ESP32 Camera Module along with a Python program can be used to control the mouse tracking and clicking operations wirelessly.
To get started one must have sound knowledge of Python, Image processing, Embedded Systems as well as the Internet of Things. First, we will understand how to control the mouse tracking and clicking, and what all requirements are needed to run the python program. We will first test the whole python script with a webcam or internal camera of a laptop.
In the second part, we will use an ESP32-CAM Module and run the Python code. So, the ESP32-CAM will be used as an input device instead of a PC camera or any other external camera.
Earlier we learned about Gesture Recognition & its application in Machine Learning. And we also developed Gesture Controlled Robot using Accelerometer. The same motion detection feature has been implemented in ESP32-CAM Based Squid Game using OpenCV.
Bill of Materials
The following is the list of Bill of Materials for making a Gesture Controlled Virtual Mouse. You can purchase all these components from Amazon.
| S.N. | Components | Quantity | Purchase Links |
|---|---|---|---|
| 1 | ESP32-CAM Board AI-Thinker | 1 | Amazon | AliExpress |
| 2 | FTDI Module | 1 | Amazon | AliExpress |
| 3 | Micro-USB Cable | 1 | Amazon | AliExpress |
| 4 | Jumper Wires | 10 | Amazon | AliExpress |
Controlling Mouse Tracking & Clicks with PC Camera
Before jumping to the project part, lets build a Gesture Controlled Virtual Mouse using PC image recognition technology.
Installing Python & Required Libraries
For the live stream of video to be visible on our computer we need to write a Python script that will enable us to retrieve the frames of the video. The first step is to install Python. Go to python.org and download Python version 3.7.8. It is important to download this version or downgrade to this version or else a few libraries won’t work.

Once downloaded and installed go to command prompt and run the commands below:
|
1 |
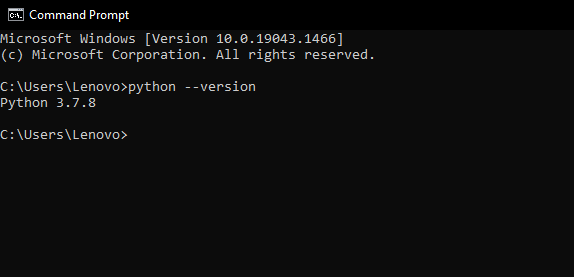
python --version |
The output should be as below, that is version 3.7.8.
Now we have to install a few libraries. For that run the following commands below one after another until all the libraries are installed.
|
1 2 3 4 |
pip install numpy pip install opencv-python pip install autopy pip install mediapipe |
If the python version you installed is correct then installing these won’t be an issue.
Source Code/Program
Now create a folder and inside that folder create a new python file, name the file as track_hand.py .
Now copy and paste the code below, and save it.
|
1 2 3 4 5 6 7 8 9 10 11 12 13 14 15 16 17 18 19 20 21 22 23 24 25 26 27 28 29 30 31 32 33 34 35 36 37 38 39 40 41 42 43 44 45 46 47 48 49 50 51 52 53 54 55 56 57 58 59 60 61 62 63 64 65 66 67 68 69 70 71 72 73 74 75 76 77 78 79 80 81 82 83 84 85 86 87 88 89 90 91 92 93 94 95 96 97 98 99 100 101 102 103 104 105 106 107 108 109 110 111 112 113 114 115 116 117 118 119 120 121 122 123 124 125 126 127 |
import cv2 import mediapipe as mp import time import math import numpy as np class handDetector(): def __init__(self, mode=False, maxHands=1, modelComplexity=1, detectionCon=0.5, trackCon=0.5): self.mode = mode self.maxHands = maxHands self.modelComplex = modelComplexity self.detectionCon = detectionCon self.trackCon = trackCon self.mpHands = mp.solutions.hands self.hands = self.mpHands.Hands(self.mode, self.maxHands, self.modelComplex, self.detectionCon, self.trackCon) self.mpDraw = mp.solutions.drawing_utils self.tipIds = [4, 8, 12, 16, 20] def findHands(self, img, draw=True): imgRGB = cv2.cvtColor(img, cv2.COLOR_BGR2RGB) self.results = self.hands.process(imgRGB) # print(results.multi_hand_landmarks) if self.results.multi_hand_landmarks: for handLms in self.results.multi_hand_landmarks: if draw: self.mpDraw.draw_landmarks(img, handLms, self.mpHands.HAND_CONNECTIONS) return img def findPosition(self, img, handNo=0, draw=True): xList = [] yList = [] bbox = [] self.lmList = [] if self.results.multi_hand_landmarks: myHand = self.results.multi_hand_landmarks[handNo] for id, lm in enumerate(myHand.landmark): # print(id, lm) h, w, c = img.shape cx, cy = int(lm.x * w), int(lm.y * h) xList.append(cx) yList.append(cy) # print(id, cx, cy) self.lmList.append([id, cx, cy]) if draw: cv2.circle(img, (cx, cy), 5, (255, 0, 255), cv2.FILLED) xmin, xmax = min(xList), max(xList) ymin, ymax = min(yList), max(yList) bbox = xmin, ymin, xmax, ymax if draw: cv2.rectangle(img, (xmin - 20, ymin - 20), (xmax + 20, ymax + 20), (0, 255, 0), 2) return self.lmList, bbox def fingersUp(self): fingers = [] # Thumb #print(self.lmList) #print(self.tipIds) if self.lmList[self.tipIds[0]][1] > self.lmList[self.tipIds[0] - 1][1]: fingers.append(1) else: fingers.append(0) # Fingers for id in range(1, 5): if self.lmList[self.tipIds[id]][2] < self.lmList[self.tipIds[id] - 2][2]: fingers.append(1) else: fingers.append(0) # totalFingers = fingers.count(1) return fingers def findDistance(self, p1, p2, img, draw=True,r=15, t=3): x1, y1 = self.lmList[p1][1:] x2, y2 = self.lmList[p2][1:] cx, cy = (x1 + x2) // 2, (y1 + y2) // 2 if draw: cv2.line(img, (x1, y1), (x2, y2), (255, 0, 255), t) cv2.circle(img, (x1, y1), r, (255, 0, 255), cv2.FILLED) cv2.circle(img, (x2, y2), r, (255, 0, 255), cv2.FILLED) cv2.circle(img, (cx, cy), r, (0, 0, 255), cv2.FILLED) length = math.hypot(x2 - x1, y2 - y1) return length, img, [x1, y1, x2, y2, cx, cy] def main(): pTime = 0 cTime = 0 cap = cv2.VideoCapture(0) detector = handDetector() while True: success, img = cap.read() img = detector.findHands(img) lmList, bbox = detector.findPosition(img) if len(lmList) != 0: print(lmList[4]) cTime = time.time() fps = 1 / (cTime - pTime) pTime = cTime fingers = detector.fingersUp() cv2.putText(img, str(int(fps)), (10, 70), cv2.FONT_HERSHEY_PLAIN, 3, (255, 0, 255), 3) cv2.imshow("Image", img) cv2.waitKey(1) if __name__ == "__main__": main() |
Now inside the same folder create another python file as final.py.
Now copy and paste the code below, and save it. But before saving make sure you change a few attributes:
** wCam and hCam attributes should be changed accordingly, these are the width and height of your webcam. **
|
1 2 3 4 5 6 7 8 9 10 11 12 13 14 15 16 17 18 19 20 21 22 23 24 25 26 27 28 29 30 31 32 33 34 35 36 37 38 39 40 41 42 43 44 45 46 47 48 49 50 51 52 53 54 55 56 57 58 59 60 61 62 63 64 65 66 67 68 69 70 71 72 |
import numpy as np import track_hand as htm import time import autopy import cv2 wCam, hCam = 1280, 720 frameR = 100 smoothening = 7 pTime = 0 plocX, plocY = 0, 0 clocX, clocY = 0, 0 cap = cv2.VideoCapture(0) cap.set(3, wCam) cap.set(4, hCam) detector = htm.handDetector(maxHands=1) wScr, hScr = autopy.screen.size() # print(wScr, hScr) while True: # 1. Find hand Landmarks fingers=[0,0,0,0,0] success, img = cap.read() img = detector.findHands(img) lmList, bbox = detector.findPosition(img) # 2. Get the tip of the index and middle fingers if len(lmList) != 0: x1, y1 = lmList[8][1:] x2, y2 = lmList[12][1:] # print(x1, y1, x2, y2) # 3. Check which fingers are up fingers = detector.fingersUp() # print(fingers) cv2.rectangle(img, (frameR, frameR), (wCam - frameR, hCam - frameR), (255, 0, 255), 2) # 4. Only Index Finger : Moving Mode if fingers[1] == 1 and fingers[2] == 0: # 5. Convert Coordinates x3 = np.interp(x1, (frameR, wCam - frameR), (0, wScr)) y3 = np.interp(y1, (frameR, hCam - frameR), (0, hScr)) # 6. Smoothen Values clocX = plocX + (x3 - plocX) / smoothening clocY = plocY + (y3 - plocY) / smoothening # 7. Move Mouse autopy.mouse.move(wScr - clocX, clocY) cv2.circle(img, (x1, y1), 15, (255, 0, 255), cv2.FILLED) plocX, plocY = clocX, clocY # 8. Both Index and middle fingers are up : Clicking Mode if fingers[1] == 1 and fingers[2] == 1: # 9. Find distance between fingers length, img, lineInfo = detector.findDistance(8, 12, img) print(length) # 10. Click mouse if distance short if length < 40: cv2.circle(img, (lineInfo[4], lineInfo[5]), 15, (0, 255, 0), cv2.FILLED) autopy.mouse.click() # 11. Frame Rate cTime = time.time() fps = 1 / (cTime - pTime) pTime = cTime cv2.putText(img, str(int(fps)), (20, 50), cv2.FONT_HERSHEY_PLAIN, 3, (255, 0, 0), 3) # 12. Display cv2.imshow("Image", img) cv2.waitKey(1) |
Testing
Now run the above code, something similar to below must be visible.

The image should be tracking all the whole hand and fingers.
Now as you move the hand inside the pink bounding box the cursor moves. To click, raise the middle figure, and put it down, the place where the cursor is, clicking will take place.
Congratulations half the work is done now. Let’s move to another part that is the device or embedded part.
ESP32 CAM Module
The ESP32 Based Camera Module developed by AI-Thinker. The controller is based on a 32-bit CPU & has a combined Wi-Fi + Bluetooth/BLE Chip. It has a built-in 520 KB SRAM with an external 4M PSRAM. Its GPIO Pins have support like UART, SPI, I2C, PWM, ADC, and DAC.

The module combines with the OV2640 Camera Module which has the highest Camera Resolution up to 1600 × 1200. The camera connects to the ESP32 CAM Board using a 24 pins gold plated connector. The board supports an SD Card of up to 4GB. The SD Card stores capture images.
To learn in detail about the ESP32 Camera Module you can refer to our previous Getting Started Tutorial.
ESP32-CAM FTDI Connection
The board doesn’t have a programmer chip. So In order to program this board, you can use any type of USB-to-TTL Module. There are so many FTDI Module available based on CP2102 or CP2104 Chip or any other chip.
Make a following connection between FTDI Module and ESP32 CAM module.

| ESP32-CAM | FTDI Programmer |
| GND | GND |
| 5V | VCC |
| U0R | TX |
| U0T | RX |
| GPIO0 | GND |
Connect the 5V & GND Pin of ESP32 to 5V & GND of FTDI Module. Similarly, connect the Rx to UOT and Tx to UOR Pin. And the most important thing, you need to short the IO0 and GND Pin together. This is to put the device in programming mode. Once programming is done you can remove it.
Project PCB Gerber File & PCB Ordering Online
If you don’t want to assemble the circuit on a breadboard and you want PCB for the project, then here is the PCB for you. The PCB Board for ESP32 CAM Board is designed using EasyEDA online Circuit Schematics & PCB designing tool. The PCB looks something like below.

The Gerber File for the PCB is given below. You can simply download the Gerber File and order the PCB from ALLPCB at 1$ only.
You can use this Gerber file to order high quality PCB for this project. To do that visit the ALLPCB official website by clicking here: https://www.allpcb.com/.

You can now upload the Gerber File by choosing the Quote Now option. From these options, you can choose the Material Type, Dimensions, Quantity, Thickness, Solder Mask Color and other required parameters.

After filling all details, select your country and shipping method. Finally you can place the order.
You can assemble the components on the PCB Board.

Installing ESP32CAM Library
Here we will not use the general ESP webserver example rather another streaming process. Therefore we need to add another ESPCAM library. The esp32cam library provides an object oriented API to use OV2640 camera on ESP32 microcontroller. It is a wrapper of esp32-camera library.

Go to the following Github Link and download the zip library as in the image
Once downloaded add this zip library to Arduino Libray Folder. To do so follow the following steps:
Open Arduino -> Sketch -> Include Library -> Add .ZIP Library… -> Navigate to downloaded zip file -> add
Source Code/Program for ESP32 CAM Module
The source code/program ESP32 CAM Gesture Controlled Mouse can be found in Library Example. So go to Files -> Examples -> esp32cam -> WifiCam.


Before Uploading the code you have to make a small change to the code. Change the SSID and password variable and in accordance with your WiFi network.
Now compile and upload it to the ESP32 CAM Board. But during uploading, you have to follow few steps every time.
- Make sure the IO0 pin is shorted with the ground when you have pressed the upload button.
- If you see the dots and dashes while uploading press the reset button immediately
- Once the code is uploaded, remove the I01 pin shorting with Ground and press the reset button once again.
- If the output is the Serial monitor is still not there then press the reset button again.
Now you can see a similar output as in the image below.

So setting up ESP32-CAM part is done now. The ESP32-CAM is transmitting the live video, make sure that you copy this IP address displayed.
Python Code + Gesture Controlled Virtual Mouse with ESP32-CAM
Lets move to the final part of the Gesture Controlled Virtual Mouse with ESP32-CAM project. So, we again come back to our final.py code and do some changes by or simply paste the code given.
|
1 2 3 4 5 6 7 8 9 10 11 12 13 14 15 16 17 18 19 20 21 22 23 24 25 26 27 28 29 30 31 32 33 34 35 36 37 38 39 40 41 42 43 44 45 46 47 48 49 50 51 52 53 54 55 56 57 58 59 60 61 62 63 64 65 66 67 68 69 70 71 72 73 74 75 76 77 78 79 80 |
import numpy as np import track_hand as htm import time import autopy import cv2 url="http://192.168.1.61/cam-hi.jpg" wCam, hCam = 800, 600 frameR = 100 smoothening = 7 pTime = 0 plocX, plocY = 0, 0 clocX, clocY = 0, 0 '''cap = cv2.VideoCapture(0) cap.set(3, wCam) cap.set(4, hCam)''' detector = htm.handDetector(maxHands=1) wScr, hScr = autopy.screen.size() while True: # 1. Find hand Landmarks fingers=[0,0,0,0,0] #success, img = cap.read() img_resp=urllib.request.urlopen(url) imgnp=np.array(bytearray(img_resp.read()),dtype=np.uint8) img=cv2.imdecode(imgnp,-1) img = detector.findHands(img) lmList, bbox = detector.findPosition(img) # 2. Get the tip of the index and middle fingers if len(lmList) != 0: x1, y1 = lmList[8][1:] x2, y2 = lmList[12][1:] # print(x1, y1, x2, y2) # 3. Check which fingers are up fingers = detector.fingersUp() cv2.rectangle(img, (frameR, frameR), (wCam - frameR, hCam - frameR), (255, 0, 255), 2) # 4. Only Index Finger : Moving Mode if fingers[1] == 1 and fingers[2] == 0: # 5. Convert Coordinates x3 = np.interp(x1, (frameR, wCam - frameR), (0, wScr)) y3 = np.interp(y1, (frameR, hCam - frameR), (0, hScr)) # 6. Smoothen Values clocX = plocX + (x3 - plocX) / smoothening clocY = plocY + (y3 - plocY) / smoothening # 7. Move Mouse autopy.mouse.move(wScr - clocX, clocY) cv2.circle(img, (x1, y1), 15, (255, 0, 255), cv2.FILLED) plocX, plocY = clocX, clocY # 8. Both Index and middle fingers are up : Clicking Mode if fingers[1] == 1 and fingers[2] == 1: # 9. Find distance between fingers length, img, lineInfo = detector.findDistance(8, 12, img) print(length) # 10. Click mouse if distance short if length < 40: cv2.circle(img, (lineInfo[4], lineInfo[5]), 15, (0, 255, 0), cv2.FILLED) autopy.mouse.click() # 11. Frame Rate cTime = time.time() fps = 1 / (cTime - pTime) pTime = cTime cv2.putText(img, str(int(fps)), (20, 50), cv2.FONT_HERSHEY_PLAIN, 3, (255, 0, 0), 3) # 12. Display cv2.imshow("Image", img) cv2.waitKey(1) |
Here in the above code make sure you update your URL variable, according to the IP displayed on the Arduino IDE Serial monitor. Also, update the wCam and hCam variables according to the resolution being displayed.
Now run the code the Wireless stream of ESP32Cam with tracking of the mouse must be visible and possible.

Thus, our wireless Virtual Gesture Controlled Virtual Mouse with ESP32-CAM & OpenCV is made.

Video Tutorial & Guide


3 Comments
Innovative
It is a very good one, for enriching one’s cv…
was the code for track hands written by you ?