

Overview
In this project, we will build Gas Leak Detection & Alarm System using MQ2 Gas Sensor and Arduino UNO Board. The MQ2 sensor is a versatile gas sensor capable of detecting a wide range of gases as well as smoke.
This initiative is centered on creating a mock-up of a gas leak detection system utilizing an Arduino Uno as the core controller. It employs an MQ2 gas sensor alongside an RGB LED to monitor gas levels persistently. When the detected gas levels exceed a certain preset limit, an alert is triggered via a buzzer, and the RGB LED glows red to indicate danger. If the gas levels are within safe limits, below the set threshold, the system keeps the alarm silent and the LED displays a green light, signaling safety.
Bill of Materials
For this tutorial I am using the SunFounder Arduino Starter Kit which has 90+ components.
Here are the list of components I am using from this Kit.
| S.N. | Components | Quantity | Purchase Links |
|---|---|---|---|
| 1 | Arduino UNO R4/R3 Board | 1 | Amazon | AliExpress |
| 2 | MQ-2 Gas Sensor | 1 | Amazon | AliExpress | SunFounder |
| 3 | Green LED | 1 | Amazon | AliExpress | SunFounder |
| 4 | Red LED | 1 | Amazon | AliExpress | SunFounder |
| 5 | Buzzer | 1 | Amazon | AliExpress | SunFounder |
| 6 | Connecting Wires | 10 | Amazon | AliExpress | SunFounder |
| 7 | Type C USB Cable | 1 | Amazon | AliExpress |
| 8 | Breadboard | 1 | Amazon | AliExpress | SunFounder |
MQ2 Gas/Smoke Sensor Module
The MQ-2 gas sensor is a versatile and cost-effective solution for detecting a variety of gases.

The MQ-2 sensor stands out as a multifunctional gas detector that can identify various gases such as alcohol, carbon monoxide, hydrogen, isobutene, liquefied petroleum gas, methane, propane, and smoke. Its affordability and user-friendly attributes make it a favorite choice for beginners in the field.
Technical Specifications
- Target Gases: LPG, Propane, Methane, Alcohol, Hydrogen, Smoke
- Operating Voltage: Typically 5V (with a preheat time of over 24 hours for initial use)
- Load Resistance: 20 KΩ
- Heater Resistance: 33Ω ± 5%
- Sensing Resistance: 10 KΩ – 60 KΩ
- Heating consumption: <800mw
- Sensitivity: High to gases in the scope of detection
- Concentration Range: 200 – 10000ppm
- Preheat Duration: 20 seconds (minimum)
- Operating Temperature: -10 to 50 degrees Celsius
Design and Functionality
The MQ-2 sensor consists of a small tin dioxide (SnO2) layer on an aluminum oxide tube. The SnO2 is a semiconductor material that has lower conductivity in clean air. When the target gas is present in the environment, the conductivity of the SnO2 increases as the gas reacts with the oxygen on the surface of the sensor. This change in conductivity is used to measure the gas concentration.

The sensor has a built-in potentiometer to adjust the sensitivity of the sensor to the presence of different gases. By adjusting the load resistance of the sensor, you can change the type of gas to which it is most sensitive.
Integration with Electronics
The MQ-2 sensor is typically used with a breakout board that provides the necessary circuitry to connect it to a microcontroller.

The breakout board usually includes a comparator circuit for converting the analog signal to a digital one, a potentiometer for adjusting sensitivity, and sometimes a digital output that triggers an alarm when gas concentration reaches a certain threshold.
Interfacing MQ2 Gas Sensor Module with Arduino
Let us learn how we can interface the MQ2 Gas Sensor with Arduino UNO Board. Interfacing an MQ2 gas sensor with an Arduino is a straightforward process that involves both hardware connections and software programming.
Hardware Connection
The connection between Arduino and MQ2 Sensor is very simple.

- VCC: Connect the VCC pin of the MQ-2 sensor module to the 5V out pin on the Arduino.
- GND: Connect the GND pin to the ground pin on the Arduino.
- A0: Connect the analog output pin (A0) of the MQ-2 sensor to the A0 Pin of the Arduino.
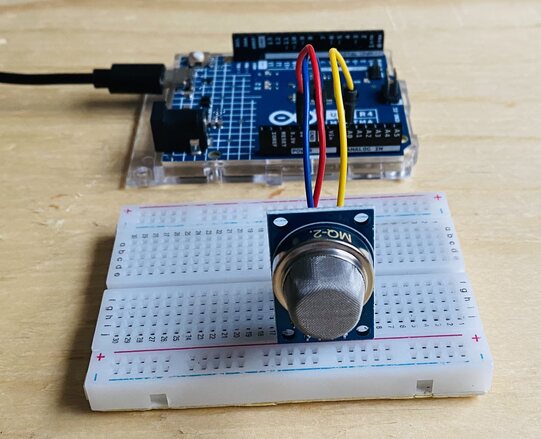
You can assemble the circuit on breadboard and use jumper wires for connection.
Sample Test Code
Since, the sensor output is analog, we can develop a simple Arduino Code to read the MQ2 Gas value.
|
1 2 3 4 5 6 7 8 9 10 11 12 |
// Define the pin numbers for the Gas Sensor const int sensorPin = A0; void setup() { Serial.begin(9600); // Start serial communication at 9600 baud rate } void loop() { Serial.print("Analog output: "); Serial.println(analogRead(sensorPin)); // Read the analog value of the gas sensor and print it to the serial monitor delay(50); // Wait for 50 milliseconds } |
From the tools menu, select Arduino UNO Board and the connected COM port. Then hit the upload button to upload the code.
Test & Results
Once the code is uploaded, the circuit is ready for test. Therefore open the Serial Monitor.
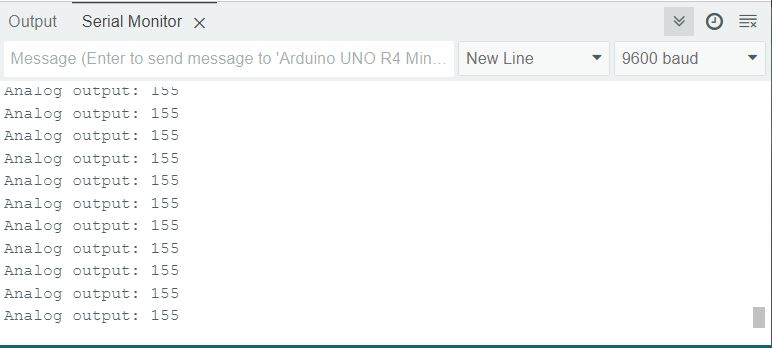
In the absense of any gas, the sensor will display lower analog value.
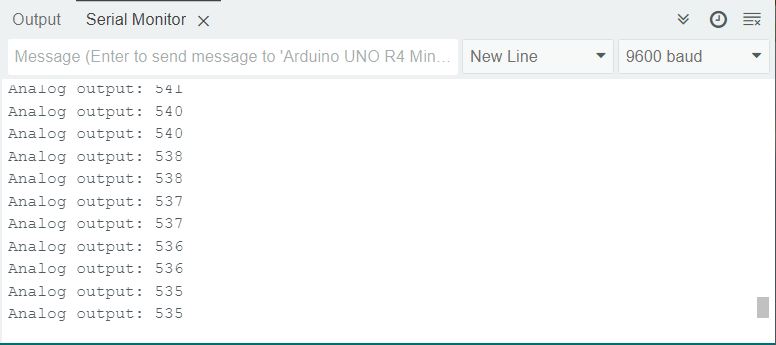
To test the analog reading changes, introduce a gas source near the sensor.
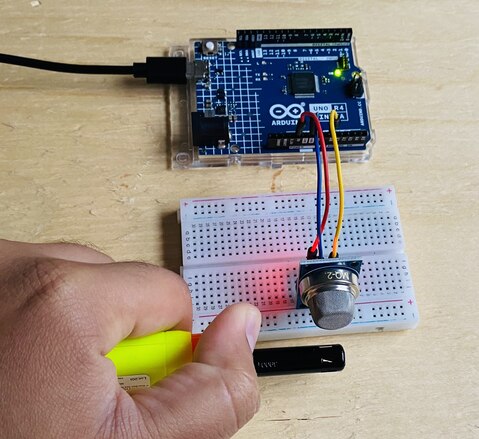
You will notice that the anlog reading will rise slowly as the sensor is exposed to gas.
Gas Leak Detection & Alarm using MQ2 Sensor & Arduino
Lets move to the main part of the project. Here we will be making a Gas Leak Detection & Alarm System using MQ2 Gas Sensor & Arduino UNO Board. We will use buzzer and LED indication when the gas level exceeds.
Hardware Connection
Here is the circuit diagram for this project.

Connect the Red and Green LED to digital pins 5 and 6 respectively via 330-ohm resistor. Similarly connect a 5V Buzzer to the digital Pin 2 of the Arduino Board.
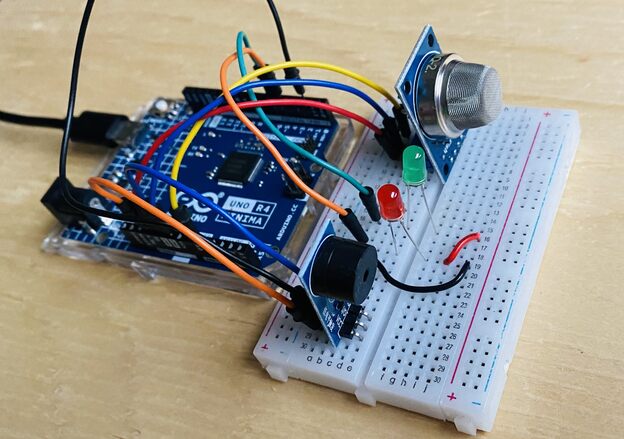
Assemble the circuit on a breadboard as per the circuit diagram.
Source Code/Program
The core principle of the project revolves around continuously monitoring the gas concentration. When the detected gas concentration surpasses a certain threshold, it sets off an alarm and changes the LED’s color to red.
The code has been modified according to circuit. The threshold is set to 300. You may set your own threshold value.
Here is the final code.
|
1 2 3 4 5 6 7 8 9 10 11 12 13 14 15 16 17 18 19 20 21 22 23 24 25 26 27 28 29 30 31 32 33 34 35 36 37 38 39 40 41 42 43 |
// Define the pin numbers for the Gas Sensor const int sensorPin = A0; int sensorValue; // Define the pin number for the buzzer const int buzzerPin = 2; // Define pin numbers for the RGB LED const int RPin = 5; // R channel of RGB LED const int GPin = 6; // G channel of RGB LED void setup() { Serial.begin(9600); // Start serial communication at 9600 baud rate // Initialize the buzzer and RGB LED pins as output pinMode(buzzerPin, OUTPUT); pinMode(RPin, OUTPUT); pinMode(GPin, OUTPUT); } void loop() { // Read the analog value of the gas sensor sensorValue = analogRead(sensorPin); // Print the sensor value to the serial monitor Serial.print("Analog output: "); Serial.println(sensorValue); // If the sensor value exceeds the threshold, trigger the alarm and make the RGB LED red if (sensorValue > 300) { tone(buzzerPin, 500, 300); digitalWrite(GPin, LOW); digitalWrite(RPin, HIGH); } else { // If the sensor value is below the threshold, turn off the alarm and make the RGB LED green noTone(buzzerPin); digitalWrite(RPin, LOW); digitalWrite(GPin, HIGH); } // Wait for 50 milliseconds before the next loop iteration delay(50); } |
Upload the code to the Arduino UNO Board.
Testing & Results
The circuit is ready for testing once the code uploading is done.
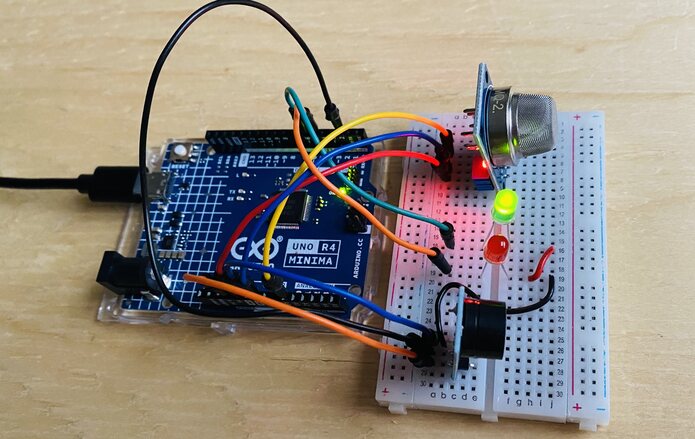
When the gas level is lower, the green LED turns ON and no alarm sound is produced. This means, if the value is below 300, the buzzer is silenced using noTone(), and the LED turns green.
This means if the value exceeds 300, the buzzer is activated using tone(), and the RGB LED turns red. If the concentration drops below the threshold, the alarm is deactivated and the LED switches to green, indicating a safe environment.
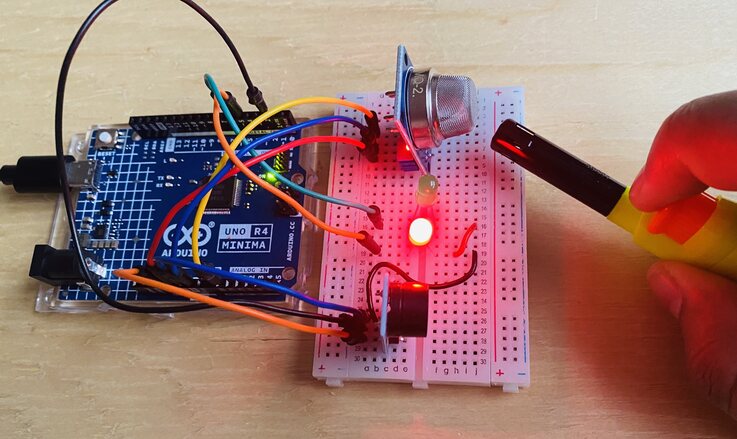
It’s crucial to note that this demo is purely illustrative and shouldn’t replace real gas leak detection systems.
You can make a better version of this project which are as follows:

")


