

Overview
In this article, we will discuss the Smart Temperature/Humidity/Soil Moisture Monitoring Device with LoRaWAN on TTN (The Things Network) Server. It is an innovative solution for monitoring environmental conditions wirelessly. The project uses LoRaWAN technology to transmit temperature, humidity, and soil moisture data wirelessly to a TTN (The Things Network) server for monitoring and analysis.
In agriculture and horticulture, monitoring soil moisture is important to ensure that plants receive the right amount of water. In addition, monitoring temperature and humidity can help to prevent fungal growth and ensure that the environment is conducive to plant growth. The traditional method of monitoring these parameters involves manual measurements, which can be time-consuming and tedious.
With the LoRaWAN Temperature/ Humidity/ Soil Moisture Sensor, this process is simplified and made more efficient. The sensors used in the project are connected to an ATmega328 Microcontroller, which reads data from the sensors and transmits it wirelessly to the TTN server. This allows farmers and gardeners to monitor environmental conditions in real-time and make informed decisions based on the data received.
This article provides a detailed guide on how to configure the LoRaWAN Temperature/Humidity/Soil Moisture Sensor to transmit data wirelessly over a long distance to a 915MHz LoRaWAN Gateway. The Gateway is responsible for uploading the data to TTN (The Things Network) server, from which it can be sent to the Thingspeak Server for real-time monitoring. Additionally, the article explains how the device can be operated using AAA batteries for over a year by enabling sleep mode and low power mode.
Bill of Materials
We need following components for this project. You can purchase all these components from Makerfabs Website.
| S.N. | Components | Quantity | Purchase Links |
|---|---|---|---|
| 1 | LoRaWAN Soil Moisture Sensor | 1 | Makerfabs |
| 2 | LPS8N LoRaWAN Gateway | 1 | Makerfabs |
| 3 | USB-to-UART Converter | 1 | Makerfabs |
| 4 | AAA Battery | 3 | - |
LoRaWAN Temperature/ Humidity/ Soil Moisture Sensor
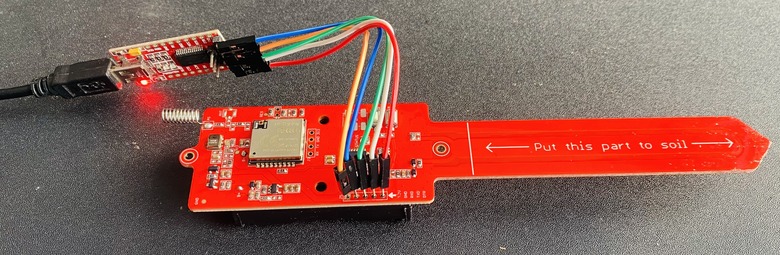
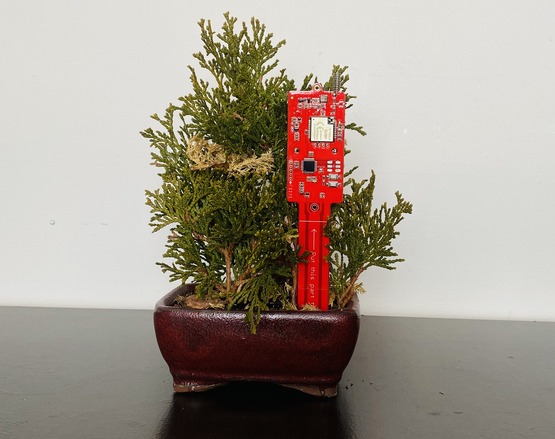
The LoRaWAN Temperature/Humidity/Soil Moisture Sensor is a versatile device that can monitor soil moisture levels using a capacitive method with a waterproof coating, preventing corrosion issues often experienced with cheaper resistor-mode soil moisture sensors. Additionally, it comes equipped with an AHT10 air temperature/humidity sensor, making it perfect for use in greenhouses. It uses ATmega328 microcontroller with Arduino Pro Mini bootloader.
This device operates using 3 AAA batteries, with a sleep current of 26uA and a working current of 4mA. With a 1-hour message interval, Class A operation has an average working time of over a year.
The LoRaWAN Temperature/Humidity/Soil Moisture Sensor is designed for prototyping and creating projects. The device comes with firmware frames that include pre-set lower power modules and PWM settings, allowing users to easily modify a few codes (Appkey, AppEUI, and DevEUI) and create a LoRaWAN application in a matter of minutes. Users can also freely modify the settings such as the LoRaWAN message interval and add/remove functions as needed. However, it is important to note that a LoRaWAN router is required to use this device.
Features
- LoRaWAN Nodes, RA08H
- Soil Moisture Measurement based on capacitive Testing
- Low power: 7.1uA when sleeping & 4mA in message sending turn around
- Onboard AHT10 sensor to monitor air temperature and air humidity
- Onboard Battery Voltage Measurement
- Compatible with Arduino
- Supply power voltage: 4.7~3.5V
Setting Up LoRaWAN Gateway with TTN Server
The LoRaWAN Temperature/Humidity/Soil Moisture Sensor is a product with a RA08H LoRaWAN Chip. This product, therefore, requires LoRaWAN Gateway.
Therefore, we need to buy any popular LoRaWAN Gateway like LPS8, LPS8N, LIG16, LG01-N, LG308, or any other compatible gateway with a frequency of 915MHz.

For this project, I used LPS8N Indoor Gateway which is an open-source LoRaWAN gateway from Dragino. It allows you to connect a LoRa wireless network to an IP network via WiFi, Ethernet, or 4G Cellular Network. The LPS8N uses the Semtech Packet Forwarder and is fully compatible with the LoRaWAN protocol. The Dragino products are known for a very good price-performance ratio and this is also the case with the LPS8N Indoor Gateway.
To monitor the data on the Internet, we need to configure the LPS8N LoRaWAN Gateway with The Things Network Server.
The Things Network (TTN) is a global open community that is building a decentralized Internet of Things (IoT) network. The TTN server is the backbone of this network and is responsible for managing the network’s gateways, nodes, and data.
The TTN server is built on top of the LoRaWAN protocol, which is a Low Power Wide Area Network (LPWAN) protocol designed for long-range, low-power communication between IoT devices and gateways. The server is designed to be open and accessible to anyone, which means that developers can build applications on top of the TTN network and use it as a platform for IoT projects.
First we need to connect the LPS8N LoRaWAN Gateway with the TTN Server. The process of configuring the Gateway has been explained in detail with stepwise instructions here:
Once the Gateway establishes a connection with the TTN Server, you are ready to go and start testing the LoRa nodes.

Setting up the LoRaWAN Node
The LoRaWAN Temperature/Humidity/Soil Moisture Sensor is Node that needs to be configured with the LoRaWAN Gateway & The Things Network Server. This is done so that the data can be monitored on the TTN Dashboard.
Registering End Devices
To setup the application follow the following steps.
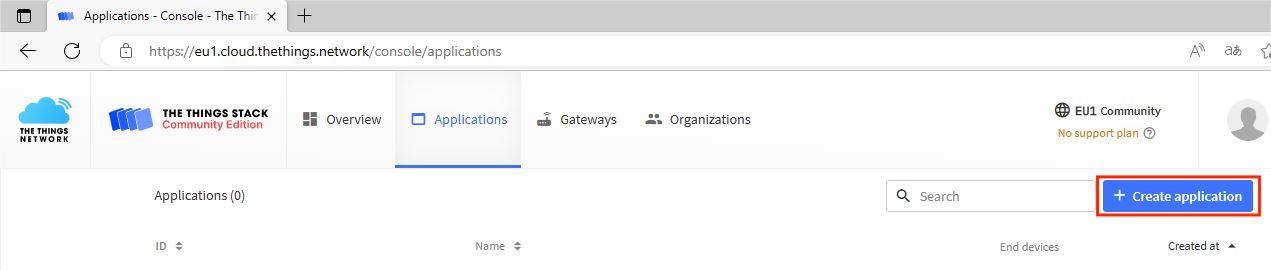
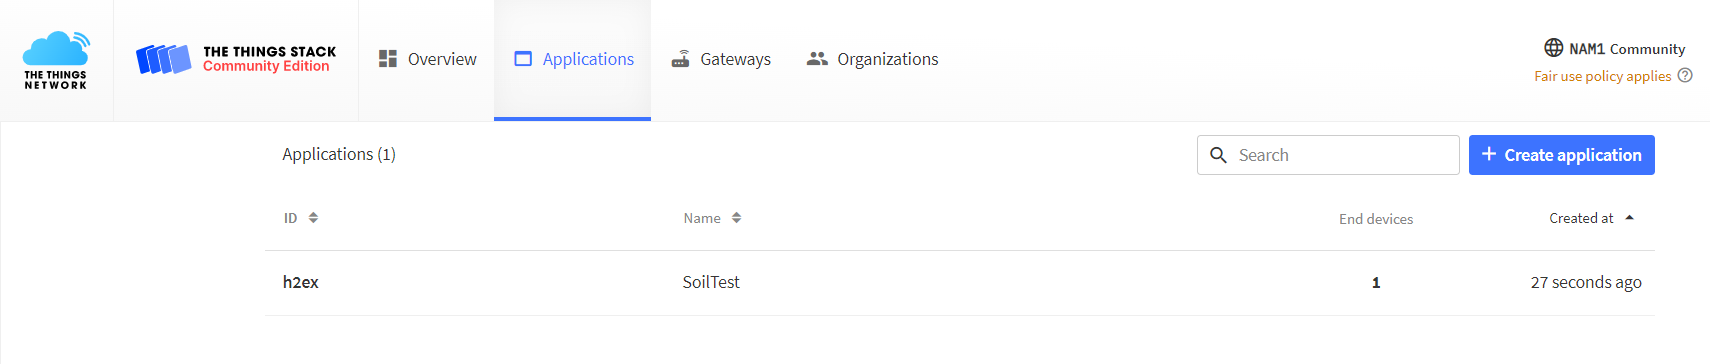
Go to the Applications part of the TTN Dashboard and click on ‘Create Application‘.
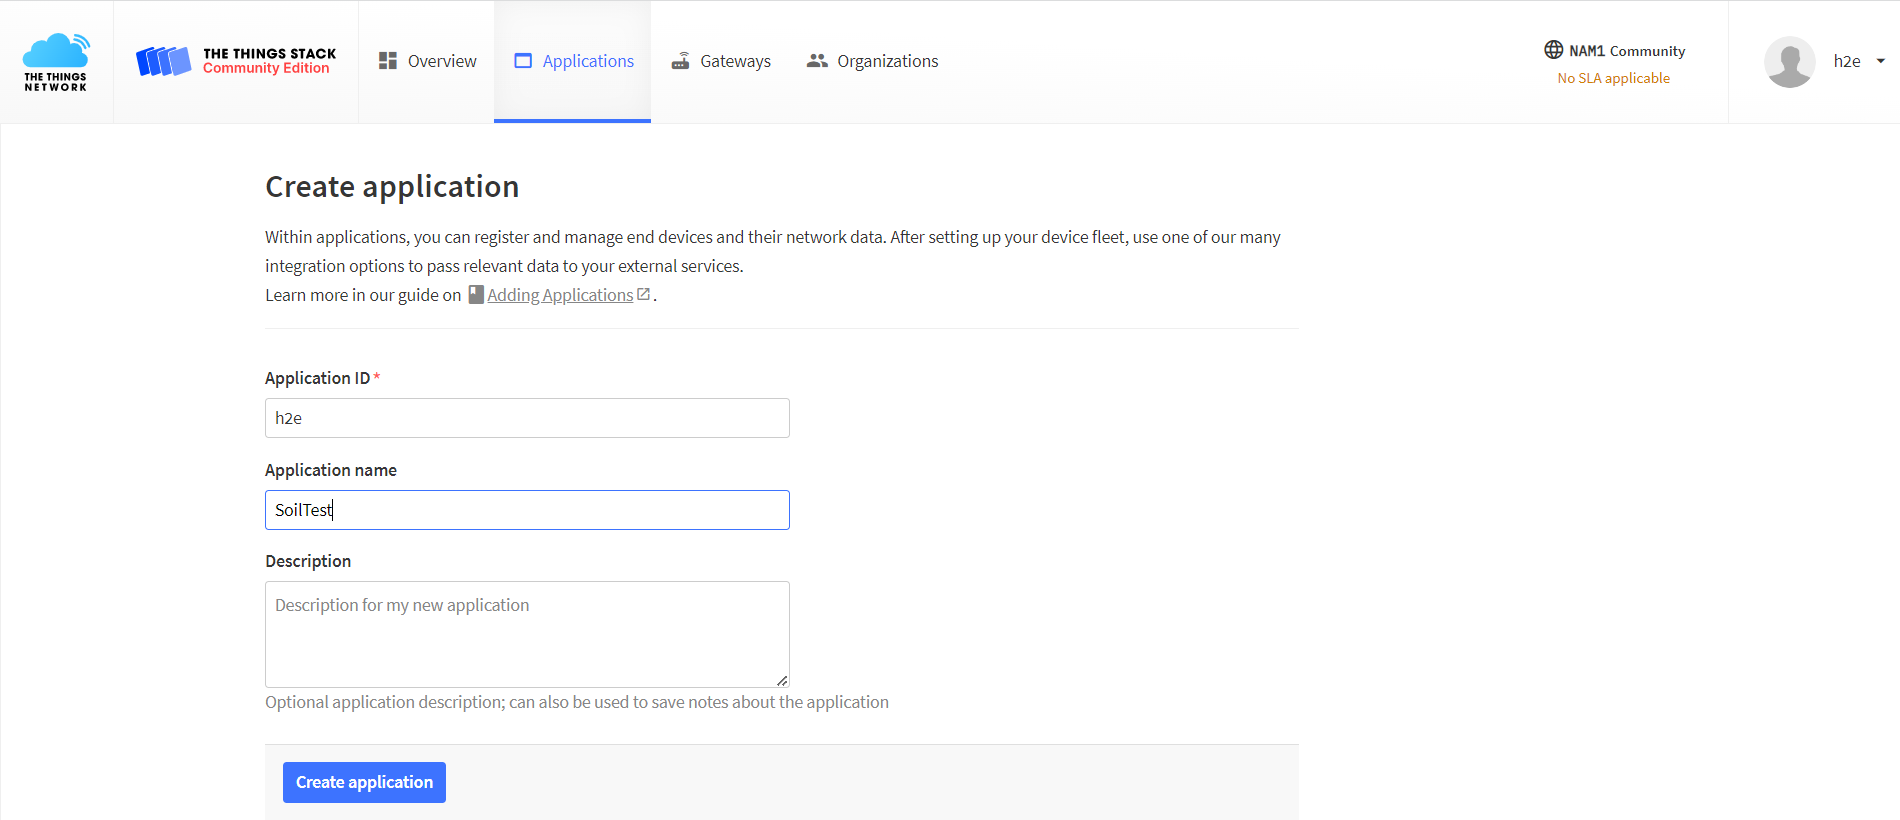
Set the Application ID and Application name that you want, then click the Create application.
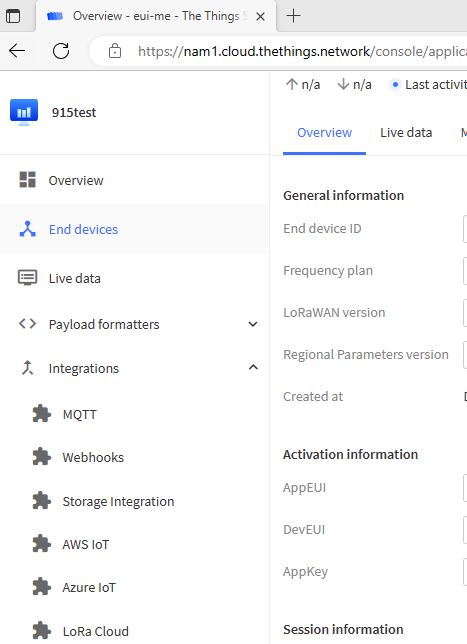
Click the Register end device to add an end device to the application.
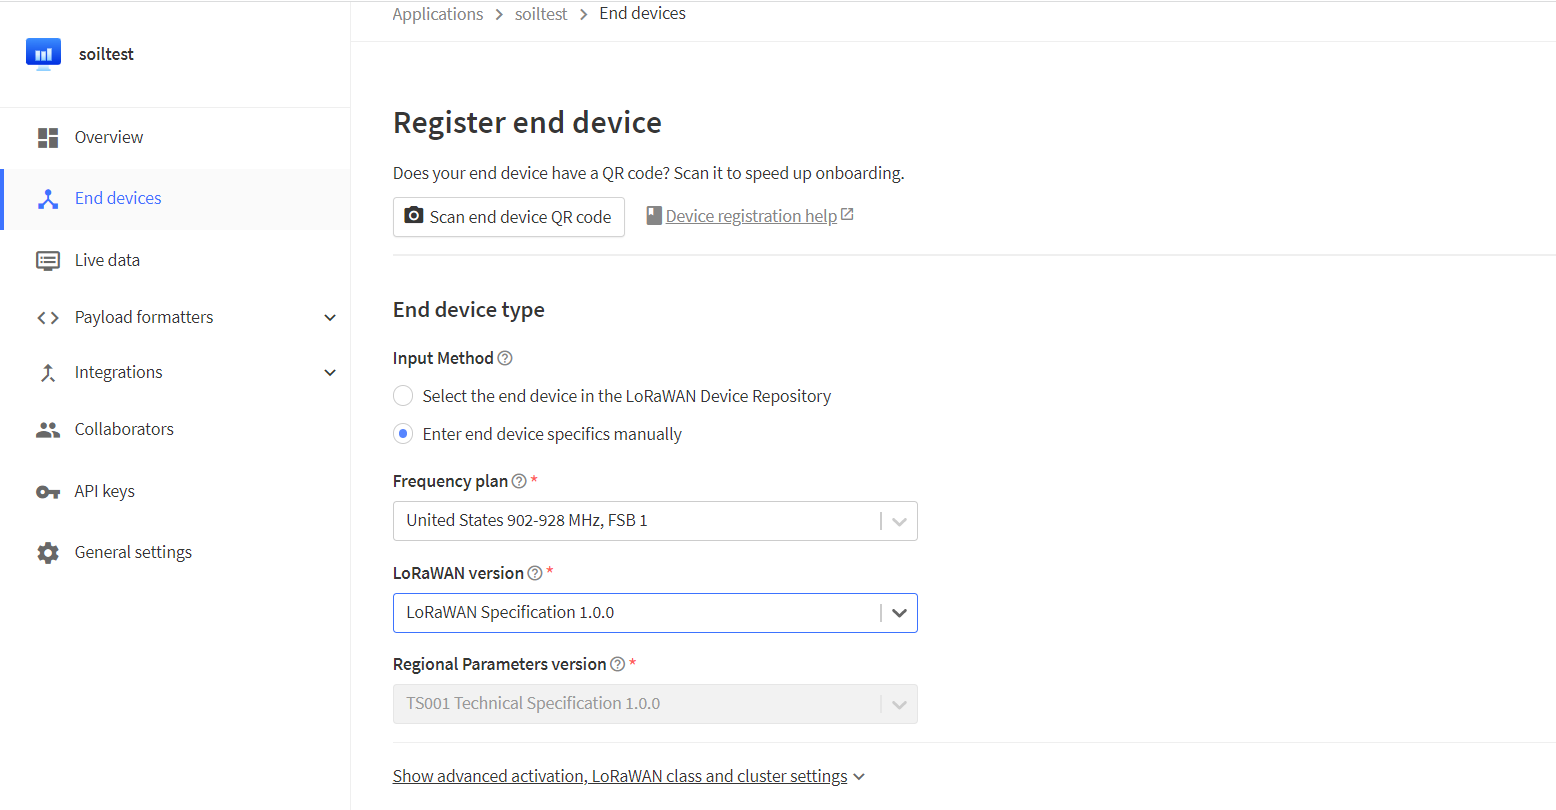
Configure the information according to the picture above.
Click the Show advanced activation, LoRaWAN class, and cluster settings to finish the setting.
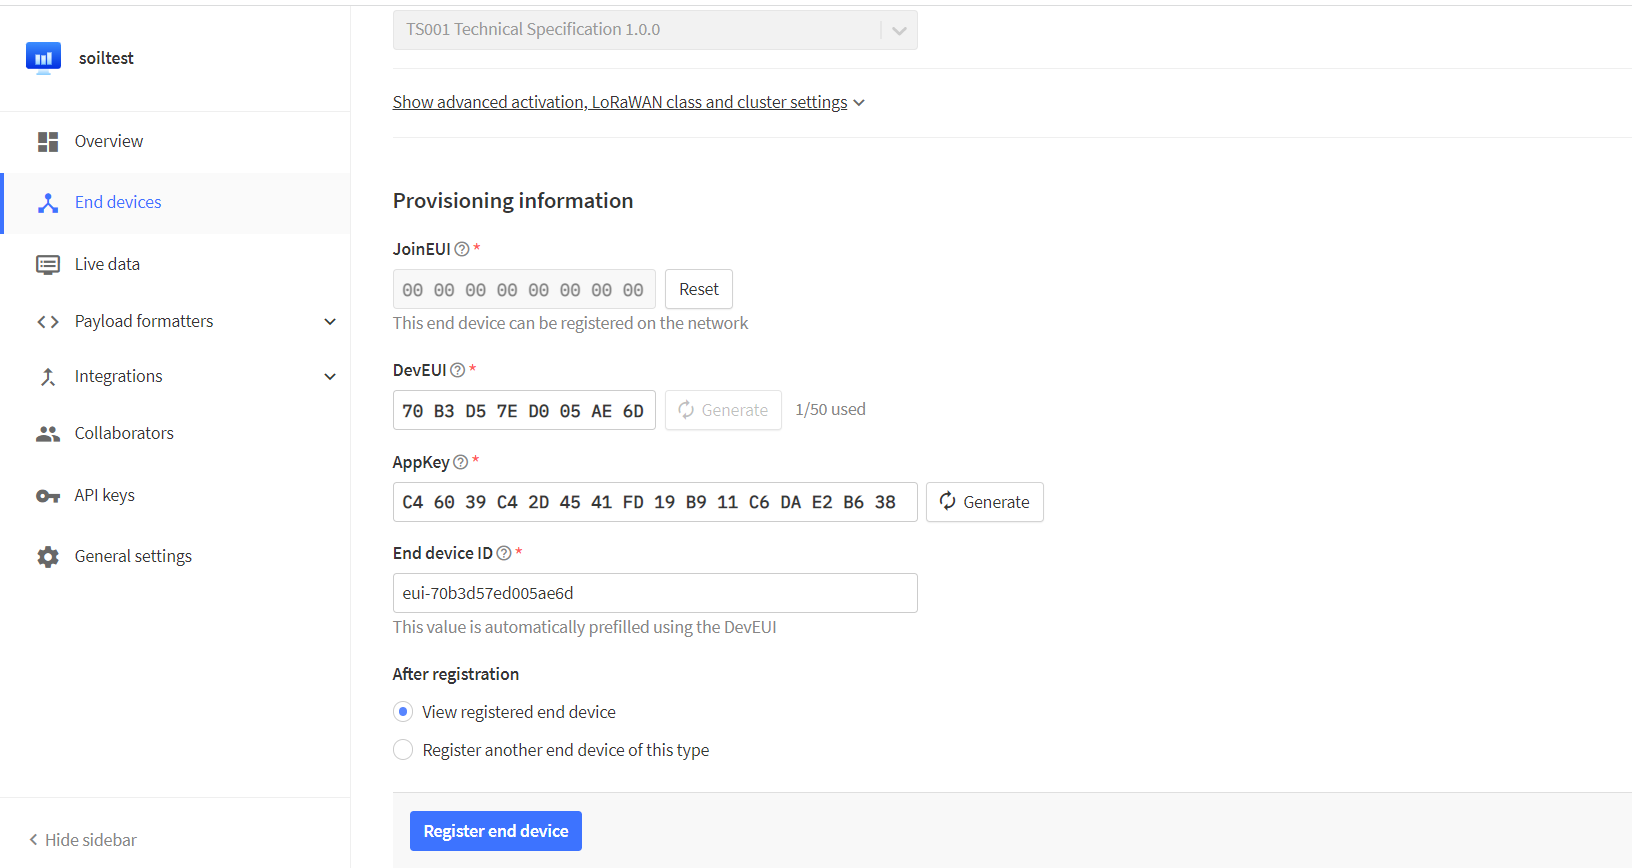
Choose the (OTAA) mode and joinEUI. You can set up a joinEUI with any 16 digits. The DevEUI and AppKey can be set by clicking the generate. Then click the confirm.
If end device been created successfully, users can see a new end device.
Payload formatters
When the end device transmits data to TTN, which receives it with the byte stream format. in the Payload formatters. Users can configure analytic procedures.

Click the Payload formatters, and choose the Custom Javascript formatters. then users can copy the code to Formatters code.
|
1 2 3 4 5 6 7 8 9 10 11 12 13 14 15 16 17 18 19 20 21 22 |
function decodeUplink(input) { var temp = input.bytes[0] var humi = input.bytes[1] var adc = input.bytes[2] var bat = input.bytes[3] return { data:{ //adc, //temp, //humi, //bat, //num, field1:adc, field2:temp, field3:humi, field4:bat }, }; } |
End Device Firmware Setting & Source Code/Program
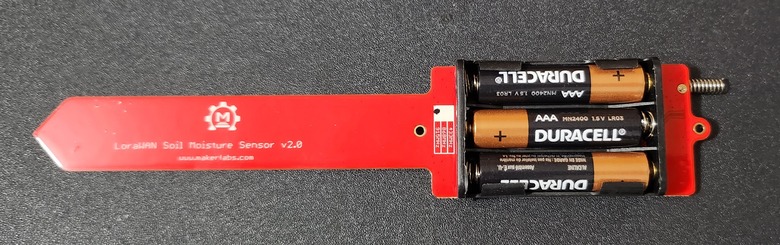
Before moving to the coding part, insert 3 AAA Battery at the back of the Battery Holder.
The firmware for the LoRaWAN Temperature/ Humidity/ Soil Moisture Sensor is already developed by the Manufacturer. You can find the complete firmware here.
Download the file (Firmware Fram/moisture_lorawan) and open it.
This framework handles not only the LoRaWAN protocol but also various other functions such as setting the sleep mode, generating PWM signals, and sensing air temperature/humidity. Users can easily modify or apply these settings by making a few changes to the firmware code.
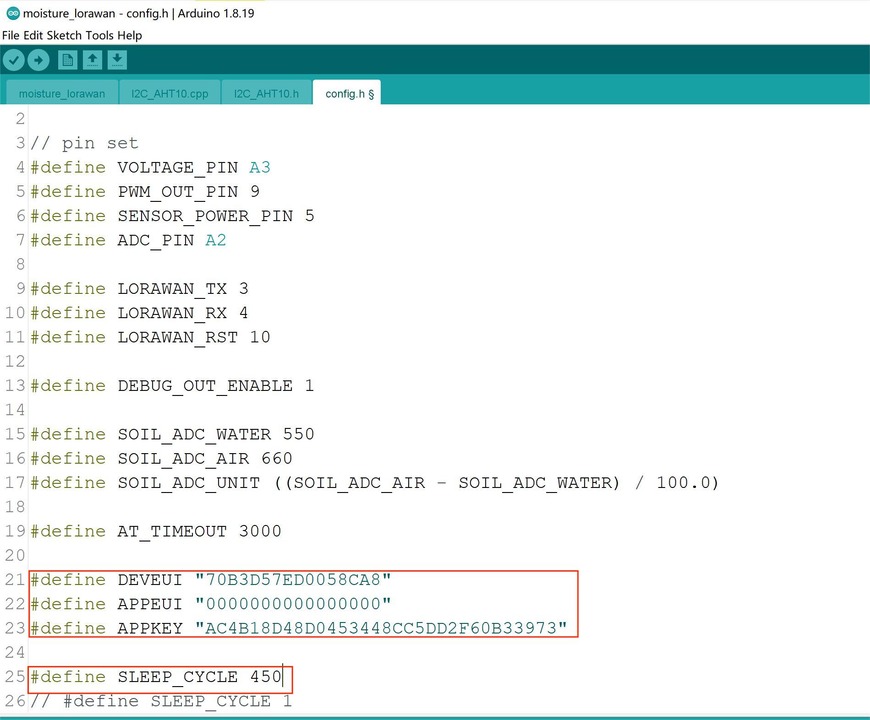
Users need to copy their DEVEUI, APPEUI, and APPKEY settings into the config.h file.
The SLEEP_CYCLE function is a timed procedure that enables the device to wake up periodically and transmit data. The default setting is currently set to 450, which equates to a reporting interval of approximately 60 minutes. The Atmega328P controller wakes up every 60 minutes to initiate a LoRaWAN data transmission, which takes approximately 8 seconds, before entering sleep mode again. Users can adjust this setting to balance the data interval and module working lifespan.
Once this is done, the sensor can be programmed using a USB-to-UART converter and the Arduino IDE. Connect the wire as follows:
Vcc — Vcc
GND — GND
TX — RX
RX — TX
From the Board Manager Select Arduino Pro Mini with 3.3V/8MHz setting. Then select the COM Port.
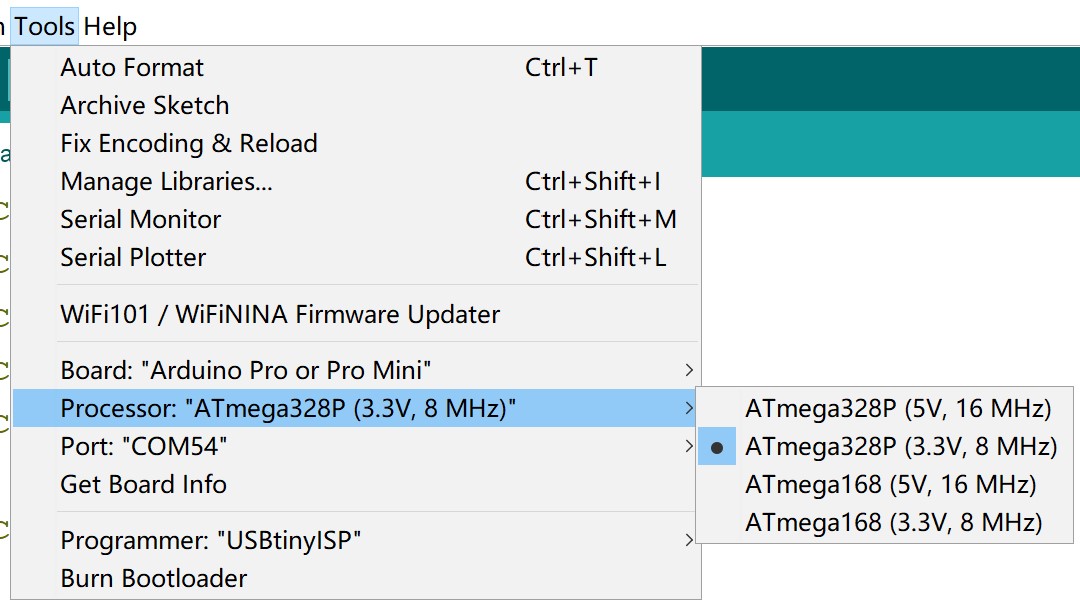
Now hit the upload button so that the code will burn in ATmega328 microcontroller.
Soil Moisture Monitoring with LoRaWAN on TTN Server
After uploading the code, you can start the testing process. Dip the LoRaWAN Temperature/ Humidity/ Soil Moisture Sensor in a Soil or keep it on a Pot for testing.
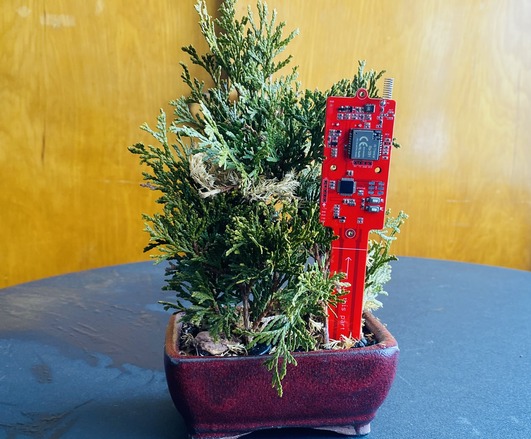
If the LoRaWAN Temperature/Humidity/Soil Moisture Sensor is functioning correctly, TTN will receive a data byte stream that has been parsed.
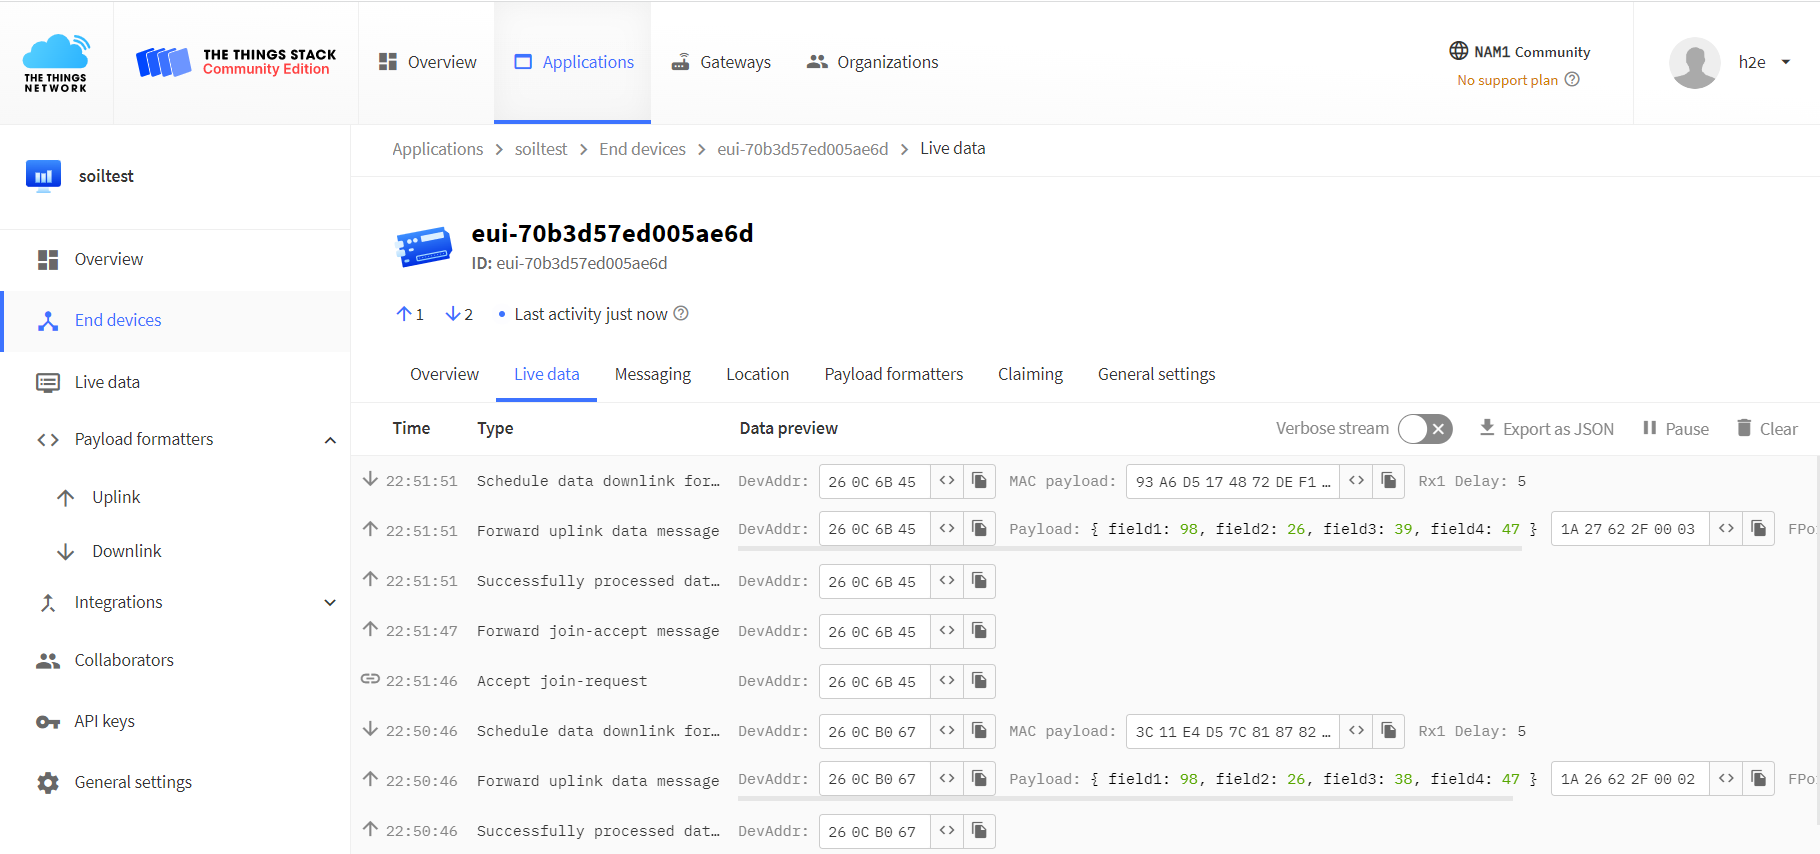
The TTN Dashboard receives the Soil Moisture, Temperature, Humidity, and Battery Voltage Data.
Data Visualization of ThingSpeak Server
To make the data more user-friendly and visually accessible to end-users, we send the data from TTN to Thingspeak for diagram display. This allows end-users to monitor the data in a more direct manner.
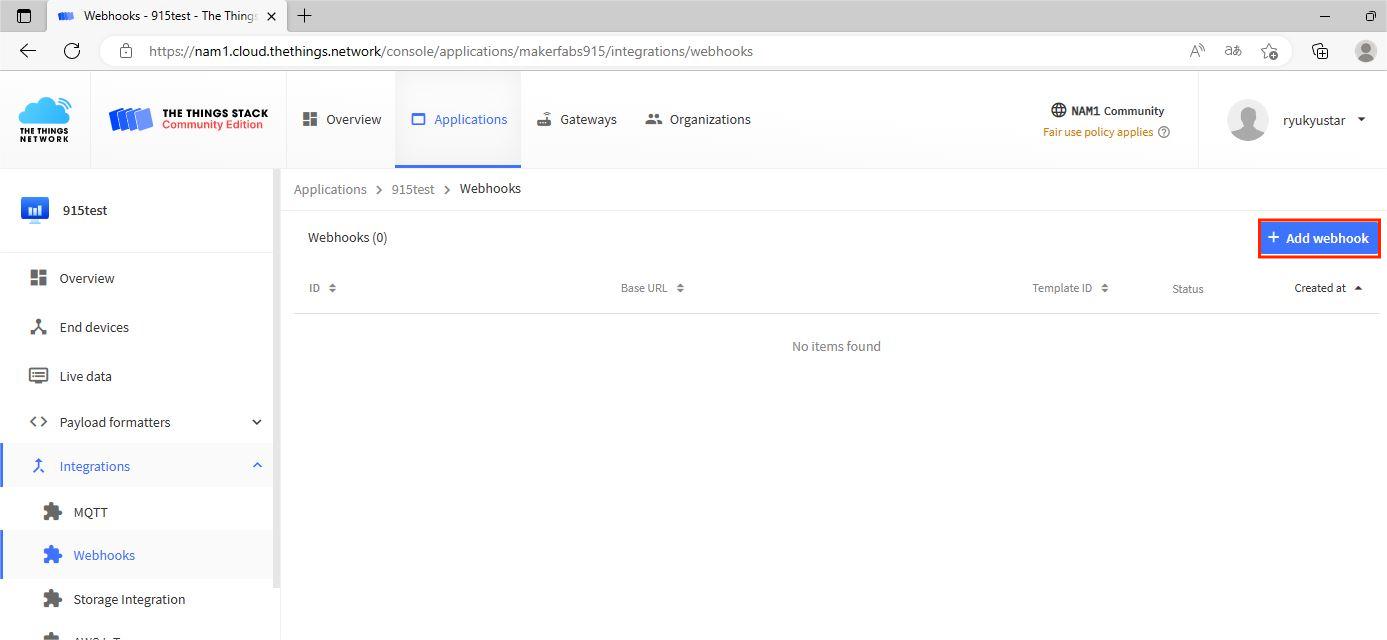
Click the integrations>>Webhooks
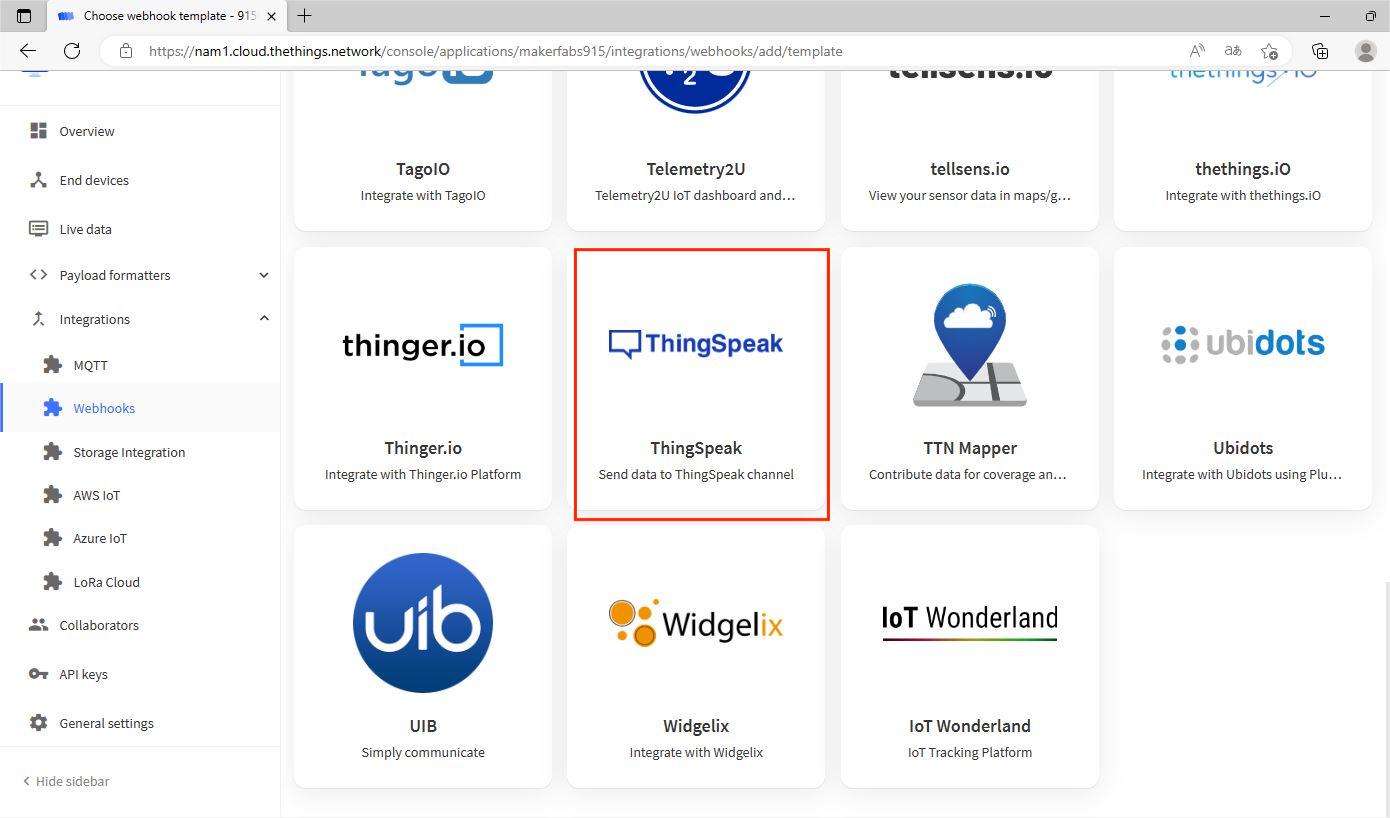
Search the icon of Thingspeak, and click it.
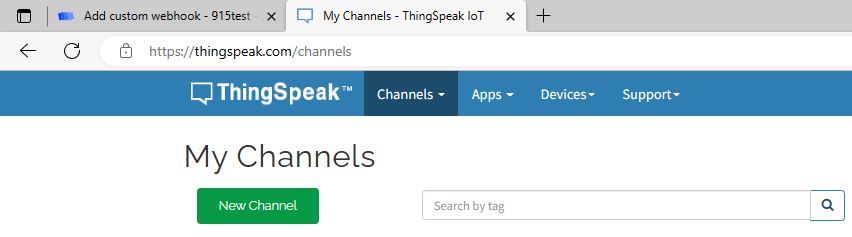
Log in the Thingspeak, and create a new channel.
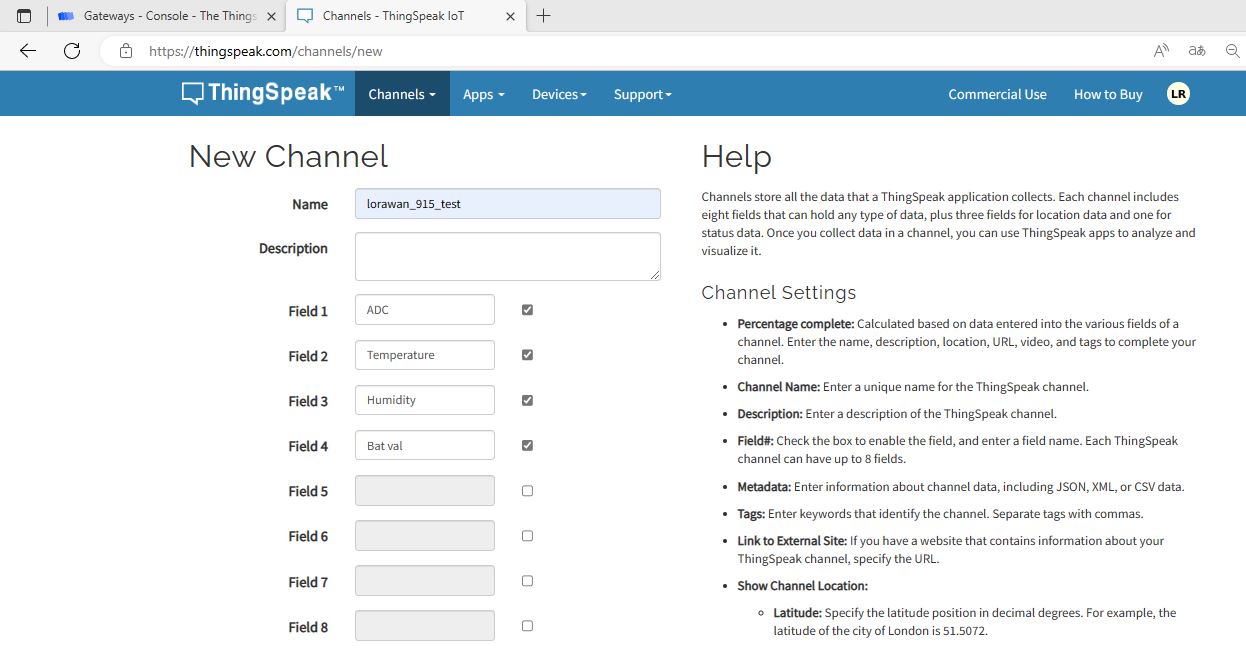
Configure the channel as in the picture.
Then save the Channel. Choose the Write API Keys.
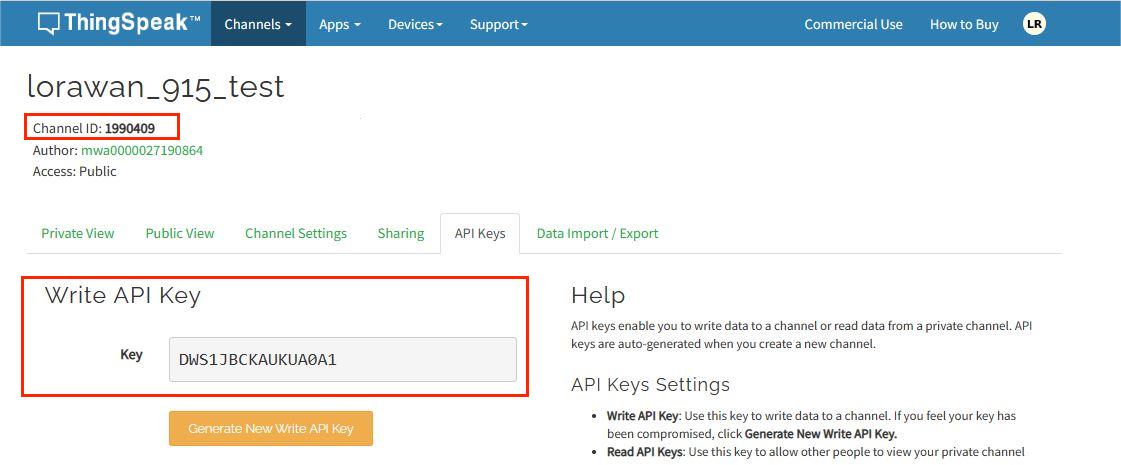
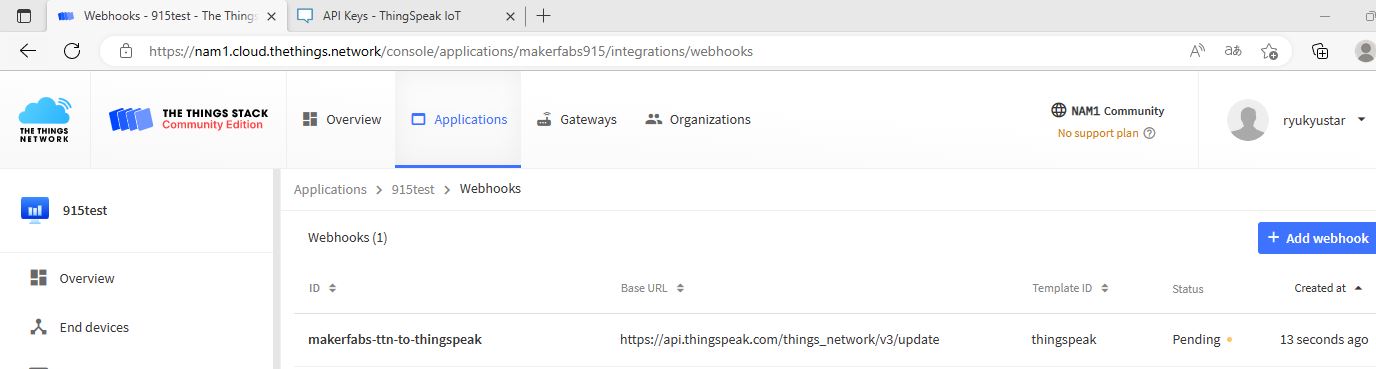
Copy the Channel ID and write API Key to the Webhook, and create ThingSpeak webhook.
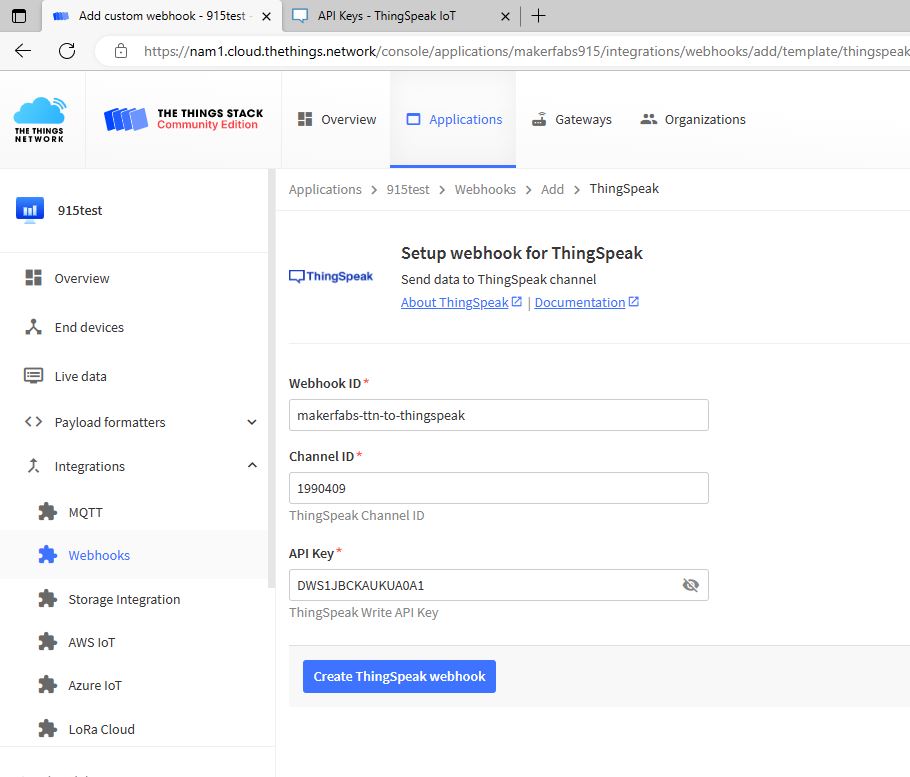
The ThingSpeak webhook has bulit.
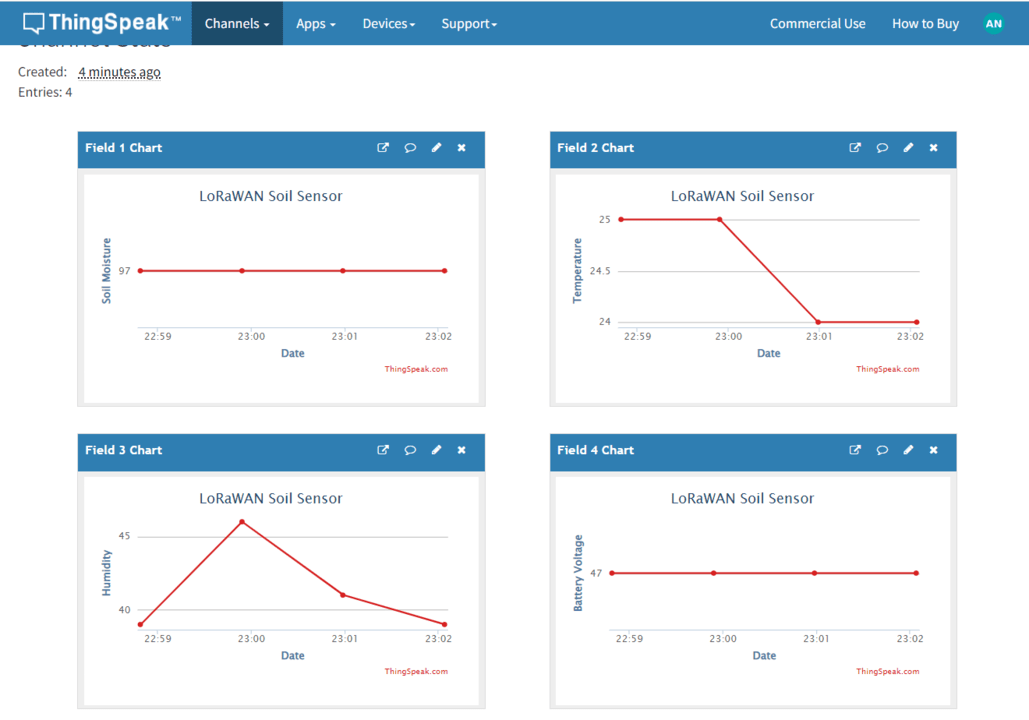
If the LoRaWAN Temperature/Humidity/Soil Moisture Sensor is functioning properly, the Thingspeak server will receive a byte stream of data and display it in a visual graphical format.
Video Tutorial & Guide

In conclusion, the LoRaWAN Temperature/Humidity/Soil Moisture Sensor provides valuable data for monitoring environmental conditions. By leveraging the TTN network, data can be transmitted securely and reliably, while the Thingspeak platform provides an easy-to-use interface for displaying the data in a visual graphical format.
This combination of technologies allows for efficient and effective monitoring of environmental conditions, which can be useful in a variety of contexts such as agriculture, weather monitoring, and indoor climate control.


1 Comment
2 years ago I visited your Website and I have to say, I was thoroughly impressed by the quality and variety of resources available. Your dedication to providing high-quality educational content is genuinely commendable. 🙂