

Overview
In this article, we will learn Interfacing of DS18B20 Temperature Sensor with STM32 Microcontroller. The Arduino Dallas Library & OneWire Library is not supported by DS18B20. This the reason why we have to write code without using the library. The DS18B20 Code for STM32F103C is a little long and complex as there is no involvement of the library and all the addressing modes are defined in the code.
The DS18B20 is one wire waterproof sensor used for measuring the temperature of a liquid in between -55 to 125°C. Power for reading, writing, and performing temperature conversions can be derived from the data line itself with no need for an external power source. Because each DS18B20 contains a unique silicon serial number, multiple DS18B20s can exist on the same 1-Wire bus.
DS18B20 Waterproof Digital Temperature Sensor
This is a pre-wired and waterproofed version of the DS18B20 sensor. Handy for when you need to measure something far away, or in wet conditions. The Sensor can measure the temperature between -55 to 125°C (-67°F to +257°F). The cable is jacketed in PVC.
Because it is digital, there is no signal degradation even over long distances. These 1-wire digital temperature sensors are fairly precise, i.e ±0.5°C over much of the range. It can give up to 12 bits of precision from the onboard digital-to-analog converter. They work great with any microcontroller using a single digital pin.

The only downside is they use the Dallas 1-Wire protocol, which is somewhat complex and requires a bunch of code to parse out the communication. We toss in a 4.7k resistor, which is required as a pullup from the DATA to the VCC line when using the sensor.
To learn more about this sensor you can go through the DS18B20 Sensor Datasheet.
Interfacing DS18B20 Temperature Sensor with STM32
Now let us Interface DS18B20 Sensor with STM32F103C Bluepill Board. The connection digram is given below.

The Sensor is powered by 3.3V pin of STM32 & GND is connected to GND. Similarly, the digital Pin is connected to PA8 of Bluepill. The digital pin is pulled via 4.7K Resistor.

DS18B20 STM32 Code
Upload the following code to STM32F103C Board for reading the temperature sensed by DS18B20. You can use any method to upload the code. I used the Serial method and uploaded the code using USB-TTL Converter Module.
|
1 2 3 4 5 6 7 8 9 10 11 12 13 14 15 16 17 18 19 20 21 22 23 24 25 26 27 28 29 30 31 32 33 34 35 36 37 38 39 40 41 42 43 44 45 46 47 48 49 50 51 52 53 54 55 56 57 58 59 60 61 62 63 64 65 66 67 68 69 70 71 72 73 74 75 76 77 78 79 80 81 82 83 84 85 86 87 88 89 90 |
int DSPIN = PA8; void setup() { // put your setup code here, to run once: Serial.begin(115200); } void loop() { // put your main code here, to run repeatedly: double temp = TempRead(); temp = temp * 0.0625; // conversion accuracy is 0.0625 / LSB Serial.print("Temperature: "); Serial.print(temp); Serial.println(" °C"); Serial.println(""); delay(500); } boolean DS18B20_Init() { pinMode(DSPIN, OUTPUT); digitalWrite(DSPIN, HIGH); delayMicroseconds(5); digitalWrite(DSPIN, LOW); delayMicroseconds(750);//480-960 digitalWrite(DSPIN, HIGH); pinMode(DSPIN, INPUT); int t = 0; while (digitalRead(DSPIN)) { t++; if (t > 60) return false; delayMicroseconds(1); } t = 480 - t; pinMode(DSPIN, OUTPUT); delayMicroseconds(t); digitalWrite(DSPIN, HIGH); return true; } void DS18B20_Write(byte data) { pinMode(DSPIN, OUTPUT); for (int i = 0; i < 8; i++) { digitalWrite(DSPIN, LOW); delayMicroseconds(10); if (data & 1) digitalWrite(DSPIN, HIGH); else digitalWrite(DSPIN, LOW); data >>= 1; delayMicroseconds(50); digitalWrite(DSPIN, HIGH); } } byte DS18B20_Read() { pinMode(DSPIN, OUTPUT); digitalWrite(DSPIN, HIGH); delayMicroseconds(2); byte data = 0; for (int i = 0; i < 8; i++) { digitalWrite(DSPIN, LOW); delayMicroseconds(1); digitalWrite(DSPIN, HIGH); pinMode(DSPIN, INPUT); delayMicroseconds(5); data >>= 1; if (digitalRead(DSPIN)) data |= 0x80; delayMicroseconds(55); pinMode(DSPIN, OUTPUT); digitalWrite(DSPIN, HIGH); } return data; } int TempRead() { if (!DS18B20_Init()) return 0; DS18B20_Write (0xCC); // Send skip ROM command DS18B20_Write (0x44); // Send reading start conversion command if (!DS18B20_Init()) return 0; DS18B20_Write (0xCC); // Send skip ROM command DS18B20_Write (0xBE); // Read the register, a total of nine bytes, the first two bytes are the conversion value int temp = DS18B20_Read (); // Low byte temp |= DS18B20_Read () << 8; // High byte return temp; } |
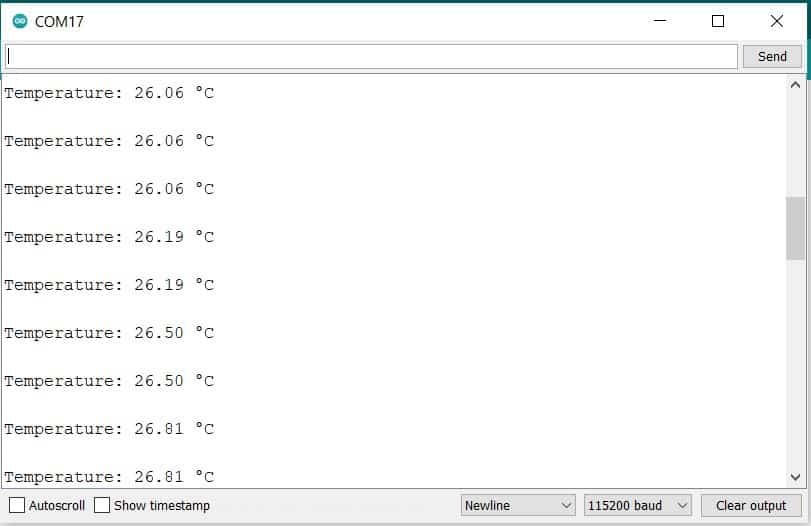
Once the code is uploaded, open the Serial Monitor. The Serial Monitor will start displaying the Room Temperature immediately.


1 Comment
Hey, I have to really thank you for your manuals. It is a great job, and it helps me out from troubles with STM32. I have a question, could you consider to use digital temperature and humidity sensor AM2320 with the STM32 on Arduino IDE? I am looking nearly everywhere, but I can’t make it work. So maybe it will be a challenge for you :).
Thanks for your work.