

Overview:
This project is about Age & Gender Classification with OpenCV and Deep Learning (specifically Convolutional Neural Networks or CNNs) on Raspberry Pi 4 Computer.
With the rise of social platforms, automatically determining age and gender from images has become increasingly important. However, the accuracy of current methods on real-world photos isn’t as good as the progress we’ve seen in face recognition. In this study, we demonstrate that using deep-convolutional neural networks (CNN) can significantly enhance the accuracy of age and gender classification. The model is based on Gil Levi & Tal Hassner Model published in 2015. It introduce a straightforward CNN design that’s effective even when there’s not a lot of data to train on.
In this guide, we’ll learn how to use OpenCV and Deep Learning to tell a person’s age and gender using a Raspberry Pi 4. OpenCV is a tool that helps computers understand pictures and videos. Deep Learning is a way for computers to learn from data, like how we learn from experience. When we combine these two, we can make a computer guess a person’s age and gender by looking at their picture. By the end of this guide, you’ll have a full idea of Age & Gender Classification Project with OpenCV & Deep Learning on Raspberry Pi.
Components Required
We need the following components for this project. You can purchase all items from given links:
| S.N. | Components | Quantity | Purchase Link |
|---|---|---|---|
| 1 | Raspberry Pi 4 | 1 | Amazon | SunFounder |
| 2 | Raspberry Pi Camera | 1 | Amazon | SunFounder |
| 2 | SD Card 16/32 GB | 1 | Amazon | SunFounder |
| 3 | 5V, 3A DC Adapter for RPi | 1 | Amazon | SunFounder |
| 4 | LCD Display (Optional) | 1 | Amazon | SunFounder |
| 5 | Mouse & Keyboard (Optional) | 1 | Amazon | SunFounder |
Raspberry Pi Camera Connection
The Raspberry Pi Camera is a peripheral device developed by the Raspberry Pi Foundation to be used with their series of Raspberry Pi single-board computers. The camera module provides a way to add video/photo capabilities to Raspberry Pi projects.
For this project, we can use a 5 mega-pixel Raspberry Pi Camera.

Simply connect the Camera Module to the Raspberry Pi 4 Board using the Camera Connector.

To use the Camera you need to enable the Camera Module first. Open the Raspberry Pi Configuration Tool by typing sudo raspi-config in the terminal. Navigate to Interfacing Options > Camera and enable it.
Age & Gender Classification Method
The model proposed by Levi and Hassner in 2015 is a convolutional neural network (CNN). CNNs are a category of neural networks that have proven very effective in areas such as image recognition and classification. Their model was trained on the Adience dataset, which is unfiltered and not aligned, making it suitable for real-world, unconstrained images.

The classification process is broken down into two primary steps:
- Step 1: Face Detection – The first step involves scanning the input video stream to detect faces. This is crucial as the subsequent classification is based on the facial features.
- Step 2: Age and Gender Prediction – Once a face is detected, the next step is to extract the face’s Region of Interest (ROI). This ROI is then fed into the age and gender detector algorithm. The algorithm analyzes the facial features and predicts both the age and gender of the individual.
The gender prediction will categorize the individual as either ‘Male‘ or ‘Female‘. For age prediction, the model classifies the individual into one of the predefined age brackets: (0 – 2), (4 – 6), (8 – 12), (15 – 20), (25 – 32), (38 – 43), (48 – 53), or (60 – 100).
Raspberry Pi Setup, Libraries & Dependencies Installation
OpenCV is required for Age and Gender Classification, and other image processing tasks present in the code. Hence you need to install the OpenCV first. Follow the following guide to install OpenCV in your system:
The next step is to install picamera. Therefore install it using pip.
|
1 |
pip3 install picamera |
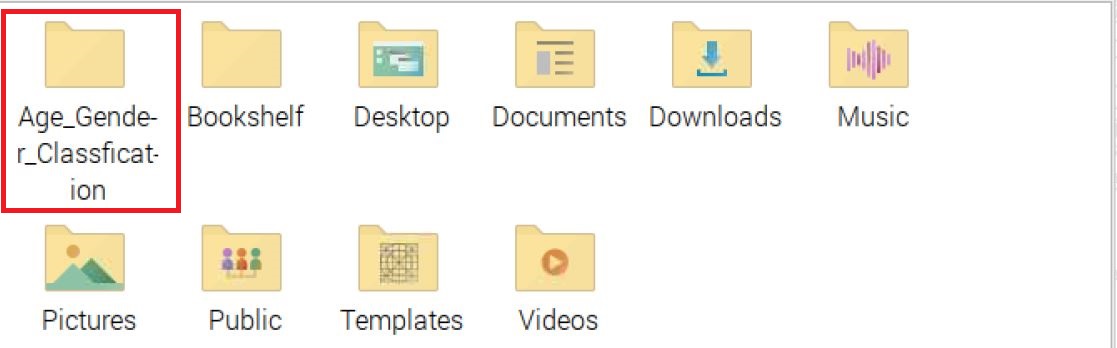
Create a folder in the Home directory of your Raspberry Pi with any name such as “Age_Gender_Classfication“.
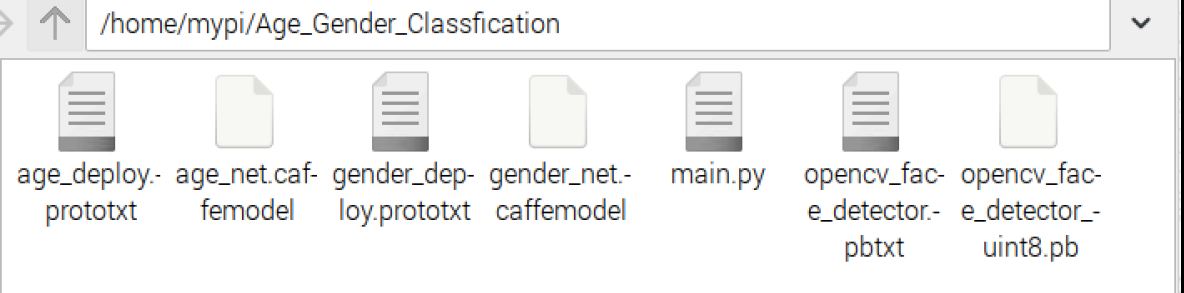
The code references multiple files used for age and gender classification. Download these files from the following links:
- opencv_face_detector.pbtxt
- opencv_face_detector_uint8.pb
- age_deploy.prototxt
- age_net.caffemodel
- gender_deploy.prototxt
- gender_net.caffemodel
Add these files to the folder you created above.
The setup part is complete now. We can move to the Age & Gender Classification Project with OpenCV & Deep Learning on Raspberry Pi.
Raspberry Pi Python Code for Age & Gender Classification
Now let’s develop a Python Code that helps in the classification of age and geneder using the OpenCV library and Raspberry Pi Camera.
Python Code
Open Thonny IDE and paste the following code to the Thonny Editor. Save this file with the any name such as “classification.py” to the folder that we created earlier. Ensure that these all the downloaded files are present in the directory mentioned in the code (/home/mypi/Age_Gender_Classfication/).
Here is the complete code.
|
1 2 3 4 5 6 7 8 9 10 11 12 13 14 15 16 17 18 19 20 21 22 23 24 25 26 27 28 29 30 31 32 33 34 35 36 37 38 39 40 41 42 43 44 45 46 47 48 49 50 51 52 53 54 55 56 57 58 59 60 61 62 63 64 65 66 67 68 69 70 71 72 73 74 75 76 77 78 79 80 |
import cv2 def highlightFace(net, frame, conf_threshold=0.7): frameOpencvDnn = frame.copy() frameHeight = frameOpencvDnn.shape[0] frameWidth = frameOpencvDnn.shape[1] blob = cv2.dnn.blobFromImage(frameOpencvDnn, 1.0, (300, 300), [104, 117, 123], True, False) net.setInput(blob) detections = net.forward() faceBoxes = [] for i in range(detections.shape[2]): confidence = detections[0, 0, i, 2] if confidence > conf_threshold: x1 = int(detections[0, 0, i, 3] * frameWidth) y1 = int(detections[0, 0, i, 4] * frameHeight) x2 = int(detections[0, 0, i, 5] * frameWidth) y2 = int(detections[0, 0, i, 6] * frameHeight) faceBoxes.append([x1, y1, x2, y2]) cv2.rectangle(frameOpencvDnn, (x1, y1), (x2, y2), (0, 255, 0), int(round(frameHeight/150)), 8) return frameOpencvDnn, faceBoxes faceProto = "/home/mypi/Age_Gender_Classfication/opencv_face_detector.pbtxt" faceModel = "/home/mypi/Age_Gender_Classfication/opencv_face_detector_uint8.pb" ageProto = "/home/mypi/Age_Gender_Classfication/age_deploy.prototxt" ageModel = "/home/mypi/Age_Gender_Classfication/age_net.caffemodel" genderProto = "/home/mypi/Age_Gender_Classfication/gender_deploy.prototxt" genderModel = "/home/mypi/Age_Gender_Classfication/gender_net.caffemodel" MODEL_MEAN_VALUES = (78.4263377603, 87.7689143744, 114.895847746) ageList = ['(0-2)', '(4-6)', '(8-12)', '(15-20)', '(25-32)', '(38-43)', '(48-53)', '(60-100)'] genderList = ['Male', 'Female'] faceNet = cv2.dnn.readNet(faceModel, faceProto) ageNet = cv2.dnn.readNet(ageModel, ageProto) genderNet = cv2.dnn.readNet(genderModel, genderProto) video = cv2.VideoCapture(0) padding = 20 hasFrame, frame = video.read() if not hasFrame: print("Couldn't read a frame from the video.") exit() desired_window_width = 480 ratio = desired_window_width / frame.shape[1] height = int(frame.shape[0] * ratio) while True: hasFrame, frame = video.read() if not hasFrame: break frame = cv2.resize(frame, (desired_window_width, height)) resultImg, faceBoxes = highlightFace(faceNet, frame) for faceBox in faceBoxes: face = frame[ max(0, faceBox[1] - padding):min(faceBox[3] + padding, frame.shape[0] - 1), max(0, faceBox[0] - padding):min(faceBox[2] + padding, frame.shape[1] - 1) ] blob = cv2.dnn.blobFromImage(face, 1.0, (227, 227), MODEL_MEAN_VALUES, swapRB=False) genderNet.setInput(blob) genderPreds = genderNet.forward() gender = genderList[genderPreds[0].argmax()] ageNet.setInput(blob) agePreds = ageNet.forward() age = ageList[agePreds[0].argmax()] text = "{}:{}".format(gender, age) cv2.putText(resultImg, text, (faceBox[0], faceBox[1] - 10), cv2.FONT_HERSHEY_SIMPLEX, 0.8, (0, 255, 255), 2, cv2.LINE_AA) cv2.imshow("Detecting age and gender", resultImg) key = cv2.waitKey(1) & 0xFF if key == ord("q"): break cv2.destroyAllWindows() video.release() |
Code Explanation
Let’s break down the code and explain each section:
|
1 |
import cv2 |
This line imports the OpenCV library, which is a popular library for computer vision tasks.
|
1 2 3 |
def highlightFace(net, frame, conf_threshold=0.7): ... return frameOpencvDnn, faceBoxes |
This function, highlightFace, is designed to detect and highlight faces in a given image (frame). It uses a deep learning model (net) and a confidence threshold (conf_threshold). The function returns the image with highlighted faces and the bounding boxes of the detected faces.
|
1 2 3 4 |
faceProto = ".../opencv_face_detector.pbtxt" faceModel = ".../opencv_face_detector_uint8.pb" ... genderNet = cv2.dnn.readNet(genderModel, genderProto) |
Here, paths to various pre-trained models and their configurations are defined. These models are for face detection, age classification, and gender classification. The models are then loaded into memory using their respective paths.
|
1 2 3 4 5 |
video = cv2.VideoCapture(0) padding = 20 hasFrame, frame = video.read() ... height = int(frame.shape[0] * ratio) |
The webcam is accessed to capture video frames. The first frame is read to determine the video resolution, and the desired height of the frame is calculated based on a fixed width.
|
1 2 3 |
while True: ... cv2.imshow("Detecting age and gender", resultImg) |
This is the main loop where each frame from the webcam is processed. For each frame:
- The frame is resized.
- Faces are detected using the
highlightFacefunction. - For each detected face, the face region is extracted, and gender and age are predicted using the respective models.
- Predicted gender and age are displayed on the frame.
- The processed frame is displayed in a window.
|
1 2 3 |
key = cv2.waitKey(1) & 0xFF if key == ord("q"): break |
This section checks for a key press. If the “q” key is pressed, the loop is exited.
|
1 2 |
cv2.destroyAllWindows() video.release() |
After exiting the loop, all OpenCV windows are closed, and the video capture is released.
Testing & Results
Run the above code. A window will appear immediately which shows the image from Camera.
To detect the age and gender, you may introduce yourself or some other person in front of Camera or use an image. The age and gender will be shown in the screen.
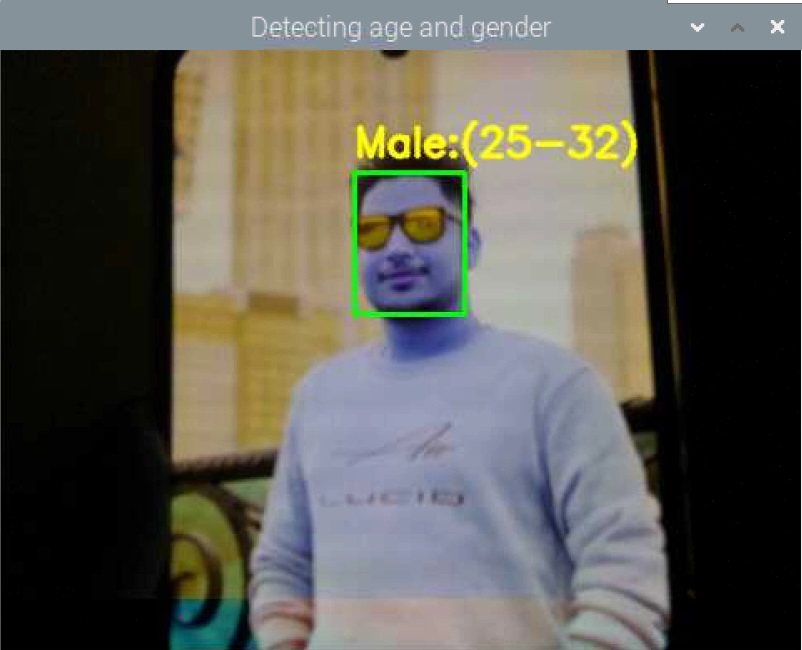
The model works well for both male and female and can accurately detect the age group.
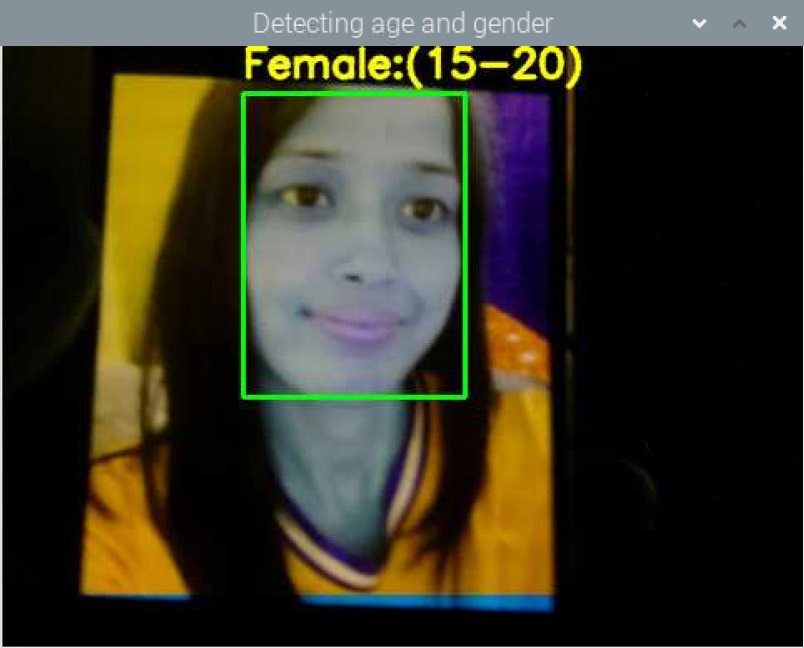
Some age category is missed or undefined in the code, in that case the nearest age group is shown.

You may try this model with smaller age groups or older age groups.
Conclusion
In conclusion, our project successfully harnessed the capabilities of OpenCV and Deep Learning to classify age and gender from images using a Raspberry Pi 4. Drawing inspiration from the model by Gil Levi & Tal Hassner, we’ve demonstrated that deep-convolutional neural networks can significantly improve classification accuracy, even with limited training data.
The combination of OpenCV’s image processing and the advanced learning techniques of Deep Learning has enabled us to create a reliable system. As a result, anyone using our guide can now efficiently determine age and gender from photos, showcasing the practical applications of integrating advanced technologies in real-world scenarios.


