

Overview
In this post, we will learn how to make our own Barcode + QR Code Reader using Arduino & Embedded QR/Barcode Scanner Module. The DIY QR & Barcode scanner can scan the Barcode or QR Code and display the read information on the OLED Display. You can also make a simple ESP32 CAM QR Scanner using the ESP32 Camera Module but it requires computer screen for visualization.
QR codes are frequently used to track information about products in a supply chain, often used in marketing and advertising campaigns. More recently, they have played a key role in helping to trace coronavirus exposure and slow the spread of the virus. Similarly, Barcodes are applied to products as a means of quick identification. They are used in retail stores as part of the purchase process, in warehouses to track inventory, and on invoices to assist in accounting.
For making Arduino Barcode + QR Code Reader, we will use Maikrt Embedded QR Code Scanning Module. The module supports both USB and UART Serial communication. It is a small 1D/2D codes reader that can be embedded in any device for scanning code to identify other items. It uses the intelligent image recognition algorithm to identify the Barcode and QR Code data.
In this tutorial, we will learn what is QR & Barcode and how the technology works. Apart from this, we will be going through the details of the Maikrt Embedded QR Code Scanning Module. And finally, we will interface the Barcode + QR Code Scanner with Arduino Board and display the read data on OLED Display.
Bill of Materials
To design your own QR Barcode Scanner, we need following components. You can purchase all the components online from Amazon.
| S.N. | Components Name | Quantity | Purchase Links |
|---|---|---|---|
| 1 | Arduino Nano Board | 1 | Amazon | AliExpress |
| 2 | Maikrt Embedded QR Code Scanning Module | 1 | Amazon | AliExpress |
| 3 | 0.96" I2C OLED Display | 1 | Amazon | AliExpress |
| 4 | Connecting Wires | 10 | Amazon | AliExpress |
| 5 | Breadboard | 1 | Amazon | AliExpress |
What is Barcode & how it works?
A barcode represents the line of numbers printed underneath it with a pattern of black and white bars. Barcodes are designed for computers to read quickly by scanning red LED or laser light across them.
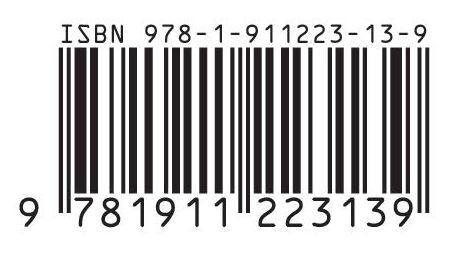
Each digit in a barcode is represented by seven equal-sized vertical blocks. These are colored in either black or white to represent the decimal numbers 0–9. Every number ultimately consists of four fat or thin black and white stripes and its pattern is designed so that, even if you turn it upside down, it can’t be confused with any other number.

How does a barcode scanner work?
A barcode scanner scans digitally convert printed barcodes. It then decodes the data and sends the data to a computer. It consists of a lens, a source of light, and a light sensor that can translate optical impulses into electrical signals. A barcode scanner contains a decoder that analyses the image data provided by the sensor and sends it to the output port. After scanning an image, it links to a host computer to pass along the captured information.

The decoder recognizes the barcode symbols, translates the bar and space content, and transmits the data to a computer in such a format that we can read.
What is QR Code & how it works?
A QR code is a scannable barcode encoded with data. Encoded means converted into a particular form. In the case of QR codes, numeric and alphanumeric characters, bytes, and kanji convert into a unique two-dimensional arrangement of squares. When an optical scanner passes over those squares, it translates their arrangement back into that data’s original form.

The most important parts of a QR code are the Data module, Position marker & Quiet zone.

The data module is the standard unit of the QR code. It’s typically a black square set against a white background. There are three position markers on every QR code. Consisting of an inner and outer eye, they allow scanners and cameras to quickly and accurately locate the data modules and the scanning direction. The quiet zone is the blank area on all sides of the data module matrix that contains all the data modules and position markers. It allows scanners and readers to optically place where the QR code begins and ends.
How QR Code Scanner work?
The patterns within QR codes represent binary codes that can be interpreted to reveal the code’s data.
A QR reader can identify a standard QR code based on the three large squares outside the QR code. Once it has identified these three shapes, it knows that everything contained inside the square is a QR code.
The QR reader then analyzes the QR code by breaking the whole thing down to a grid. It looks at the individual grid squares and assigns each one a value based on whether it is black or white. It then groups grid squares to create larger patterns.
Maikrt Embedded QR Code Barcode Scanning Module
The Maikrt Embedded QR Code Barcode Scanning Module is a small 1D/2D codes reader. It can be embedded in any device for scanning code to identify other items. It uses the intelligent image recognition algorithm for reading QR or Barcode data. It can easily capture bar codes 1D, 2D on labels, paper, and mobile phone or computer displays. The module has the best sensitivity and high accuracy.

The module has both USB and TTL interfaces for direct interfacing with a computer or a microcontroller. It is equipped with 9 pin terminal line and USB cable, which is convenient for you to convert between the UART TTL serial port and USB interface.
Using the USB interface, the module scans the code directly and sends the result to your host computer automatically. After receiving the data, the host computer can proceed to the next step. The default baud rate of this module is set to 9600.

The module has 9-pin 4-wire terminal line for interfacing with a microcontroller. The red wire is the VCC (+5V) pin, black is the GND. The green and white wires are the Tx and Rx Pins.
The following is the setup code for conversion between TTL & USB interface. You can scan the QR code of the corresponding interface according to your needs.

Technical Parameters
1. Voltage:5V
2. Power:<0.9w
3. Communication interface: UART TTL\UART RS232\USB
4. Baud Rate: 9600
5. Scanning Mode: Omni-directional Auto Sense Scan Mode
6. Parameter setting method: sweep QR code setting parameter or host command setting
7. Work tips: Buzzer can be connected, LED indicator
8. Scan angle: ±60°, ±40°, ±360° (left-right, front-back, rotation)
9. Scan Distance: 5 to 10cm
10. Working temperature: -25°C~55°C
Interfacing Barcode/QR Code Scanner with Arduino
Now let us interface Barcode/QR Code Reader Scanner Module with Arduino. Since the Module onl requires 4 connection, so its interfacing is fairly simple. The connection diagram is as follows

Connect the red wire (VCC) & black wire (GND) of the QR Bar Code Scanner Module to Arduino 5V & GND pin respectively. Similarly, connect the green wire (Tx) and white wire (Rx) to D3 & D4 of Arduino.

Source Code/Program
The Arduino QR or Barcode Reader code is very simple. We will use Software Serial library to read the received data. You can copy the code and upload it to your Arduino Board.
|
1 2 3 4 5 6 7 8 9 10 11 12 13 14 15 16 17 18 19 20 21 22 |
#include <SoftwareSerial.h> SoftwareSerial mySerial(3, 4); // RX, TX void setup() { Serial.begin(9600); mySerial.begin(9600); // set the data rate for the SoftwareSerial port } void loop() { if (mySerial.available()) // Check if there is Incoming Data in the Serial Buffer. { while (mySerial.available()) // Keep reading Byte by Byte from the Buffer till the Buffer is empty { char input = mySerial.read(); // Read 1 Byte of data and store it in a character variable Serial.print(input); // Print the Byte delay(5); // A small delay } Serial.println(); } } |
After the code is uploaded, you can bring any QR Code or Barcode in front of the Module. The module will identify and ready the data snd display the read data on Serial Monitor.

Portable Barcode/QR Code Scanner with Arduino & OLED Display
The testing of Barcode/QR Code Scanning Module is done using the above code. Now you can integrate 0.96″ I2C OLED Display with the QR Code Scanner Module and Arduino. This can be made as a portable device.
The complete circuit diagram along with OLED Display connections is very simple.

The OLED Display is an I2C Module. So it has 4 wires as VCC, GND, SCL & SDA. Connect the VCC & GND pin to Arduino 5V & GND Pin. Similarly, connect the SCL & SDA Pin to Arduino A5 & A4 Pin respectively.

Source Code/Program
The following is the program for portable Arduino Barcode QR Code Scanner. The code requires two libraries for OLED Display, i.e. Adafruit GFX Library and SSD1306 OLED Library. First download these libraries from Github link and add it to the Arduino Library folder.
You can now copy the code and upload it to the Arduino Board.
|
1 2 3 4 5 6 7 8 9 10 11 12 13 14 15 16 17 18 19 20 21 22 23 24 25 26 27 28 29 30 31 32 33 34 35 36 37 38 39 40 41 |
#include <Wire.h> #include <Adafruit_GFX.h> #include <Adafruit_SSD1306.h> #include <SoftwareSerial.h> SoftwareSerial mySerial(3, 4); // RX, TX #define SCREEN_WIDTH 128 // OLED display width, in pixels #define SCREEN_HEIGHT 64 // OLED display height, in pixels #define OLED_RESET -1 // Reset pin # (or -1 if sharing Arduino reset pin) Adafruit_SSD1306 display(SCREEN_WIDTH, SCREEN_HEIGHT, &Wire, OLED_RESET); void setup() { Serial.begin(9600); mySerial.begin(9600); // set the data rate for the SoftwareSerial port display.begin(SSD1306_SWITCHCAPVCC, 0x3C); //initialize with the I2C addr 0x3C (128x64) display.clearDisplay(); } void loop() { if (mySerial.available()) // Check if there is Incoming Data in the Serial Buffer. { display.setCursor(0, 0); //oled display while (mySerial.available()) // Keep reading Byte by Byte from the Buffer till the Buffer is empty { char input = mySerial.read(); // Read 1 Byte of data and store it in a character variable Serial.print(input); // Print the Byte display.setTextSize(2); display.setTextColor(WHITE); display.print(input); display.display(); delay(5); } Serial.println(); display.clearDisplay(); } } |
After uploading the code, the device will be ready for testing. You can start scanning the QR Codes or Barcode.

You can bring any Barcode near to the Scanner Module and it will scan and display it on the OLED Display.

Not only the barcode, it can also scan the QR Code. You can use QR Code Generator site to generate your own QR Code.

After scanning the QR Code, the OLED Display will display you the correct data.
So, this is how you can make your own portable Arduino Based QR Code Barcode Scanner or Reader for multipurpose applications.
Video Tutorial & Guide


")


3 Comments
Is it possible to stop the autoscan based on movement and rather trigger a scan progmatically?
Does eneone know how to get the manual for the barcode reader?
I’ve uploaded the full documentation in case anyone needs it: https://archive.org/details/mc-3000-embedded-barcode-qr-code-scanner-user-settings-manual-serial-port-v-3.23