

This post is all about the IoT Based ECG Monitoring with AD8232 ECG Sensor & ESP32 using an online IoT platform called Ubidots. The ECG signal from a patient heart can be observed online from any part of the world.
Overview
In one of my previous tutorial, I explained how to interface AD8232 ECG Sensor with Arduino and monitor the ECG waveform on Serial Plotter. You can read my previous guide here: ECG Monitoring with AD8232 ECG Sensor & Arduino with ECG Graph.
But today we will learn how to monitor the same ECG graph online on any IoT cloud platform. For that, we will interface AD8232 ECG Sensor with ESP32. And then we will generate an ECG signal by connecting ECG leads to chest or hand. Using Ubidots parameters like API Key or Token we will send the ECG graph to cloud using MQTT Broker. This project can also be done using NodeMCU ESP8266 Board but connections and program need to be modified.

Heart diseases are becoming a big issue since the last few decades and many people die because of certain health problems. Therefore, heart disease cannot be taken lightly. By analyzing or monitoring the ECG signal at the initial stage this disease can be prevented. So we present this project, i.e IoT Based ECG Monitoring with AD8232 ECG Sensor & ESP32.
Components Required
The Components Required for this projects are listed below. All these components can be purchased online from Amazon.
| S.N. | Components Name | Quantity | Purchase Links |
|---|---|---|---|
| 1 | ESP32 Board | 1 | Amazon | AliExpress |
| 2 | AD8232 ECG Sensor | 1 | Amazon | AliExpress |
| 3 | Micro-USB Cable | 1 | Amazon | AliExpress |
| 5 | Connecting Wires | 10 | Amazon | AliExpress |
| 5 | Breadboard | 1 | Amazon | AliExpress |
What is an ECG?

An ECG is a paper or digital recording of the electrical signals in the heart. It is also called an electrocardiogram or an EKG. The ECG is used to determine heart rate, heart rhythm and other information regarding the heart’s condition. ECGs are used to help diagnose heart arrhythmias, heart attacks, pacemaker function and heart failure.

ECG can be analyzed by studying components of the waveform. These waveform components indicate cardiac electrical activity. The first upward of the ECG tracing is the P wave. It indicates atrial contraction.
The QRS complex begins with Q, a small downward deflection, followed by a larger upwards deflection, a peak (R); and then a downwards S wave. This QRS complex indicates ventricular depolarization and contraction.
Finally, the T wave, which is normally a smaller upwards waveform, representing ventricular re-polarization.
Medical uses of ECG
An electrocardiogram can be a useful way to find out whether your high blood pressure has caused any damage to your heart or blood vessels. Because of this, you may be asked to have an ECG when you are first diagnosed with high blood pressure.
Some of the things an ECG reading can detect are:
|
1 2 3 4 |
1. cholesterol clogging up your heart’s blood supply 2. a heart attack in the past 3. enlargement of one side of the heart 4. abnormal heart rhythms |
AD8232 ECG Sensor
This sensor is a cost-effective board used to measure the electrical activity of the heart. This electrical activity can be charted as an ECG or Electrocardiogram and output as an analog reading. ECGs can be extremely noisy, the AD8232 Single Lead Heart Rate Monitor acts as an op amp to help obtain a clear signal from the PR and QT Intervals easily.

The AD8232 is an integrated signal conditioning block for ECG and other biopotential measurement applications. It is designed to extract, amplify, and filter small biopotential signals in the presence of noisy conditions, such as those created by motion or remote electrode placement.
The AD8232 module breaks out nine connections from the IC that you can solder pins, wires, or other connectors to. SDN, LO+, LO-, OUTPUT, 3.3V, GND provide essential pins for operating this monitor with an Arduino or other development board. Also provided on this board are RA (Right Arm), LA (Left Arm), and RL (Right Leg) pins to attach and use your own custom sensors. Additionally, there is an LED indicator light that will pulsate to the rhythm of a heartbeat.
Note: This product is NOT a medical device and is not intended to be used as such or as an accessory to such nor diagnose or treat any conditions.
Circuit Diagram: Interfacing AD8232 ECG Sensor with ESP32

To interface AD8232 ECG Sensor with ESP32 IOT Chip, follow the circuit diagram above. Supply the AD8232 with 3.3V from ESP32 and connect GND to GND. The output pin of AD8232 is an analog signal and is connected to VP pin of ESP32. Similarly LO+ and L0- of AD8232 is connected to D2 & D3 of ESP32.
Remember, there are so many vendors who makes ESP32. All those ESP32 has different pin mapping. I have used ESP32 wroom 32 Board. If you are using any other board then, please take care of the ESP32 Pins while connecting to AD8232.

AD8232 ECG Sensor Placement on Body
It is recommended to snap the sensor pads on the leads before application to the body. The closer to the heart the pads are, the better the measurement. The cables are color coded to help identify proper placement.

Red: RA (Right Arm)
Yellow: LA (Left Arm)
Green: RL (Right Leg)
I have connected by ESP32 with AD8232 to my hand or simply you can place in your chest as shown in the figure below.

Setting Up Ubidots Account
To publish the data to IoT Cloud, we need some IoT platform. So Ubidots is one such platform. Ubidots offers a platform for developers that enables them to easily capture sensor data and turn it into useful information. Use the Ubidots platform to send data to the cloud from any Internet-enabled device.

Step 1: Creating Ubidots Account
Go to ubidots.com and create and account. You will get a trial period of 30 days.
Step 2: Creating Device & Adding Variables
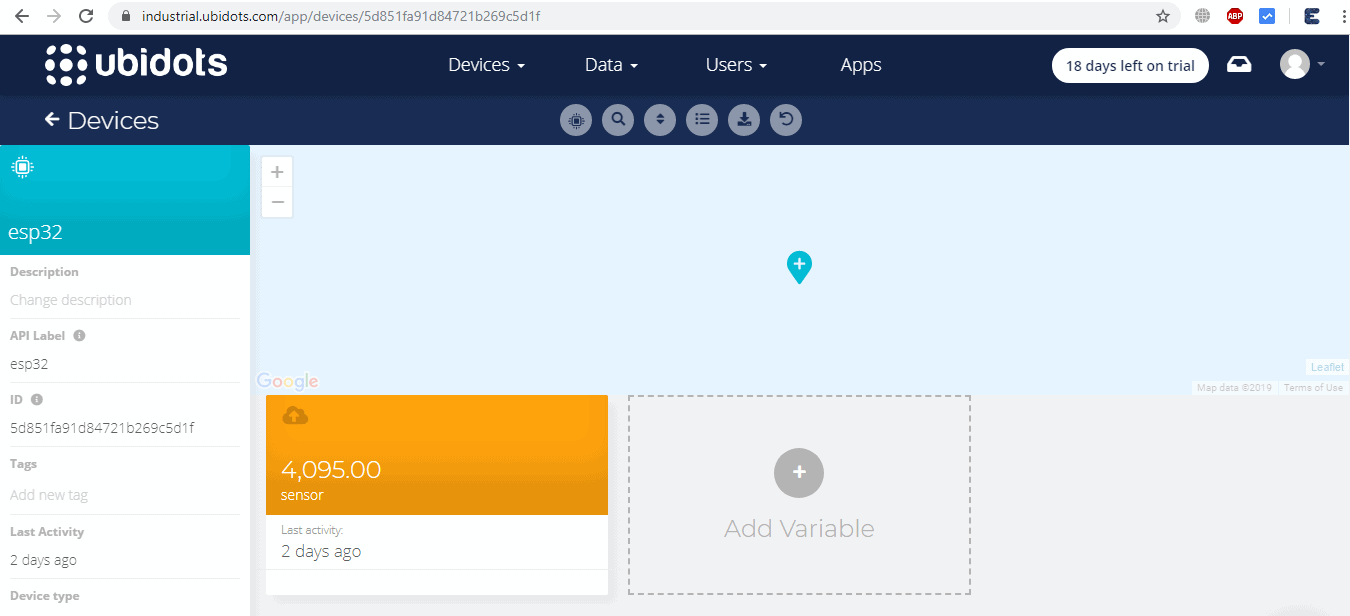
Now setup an Ubidots Device. To create it, go to the Devices section (Devices > Devices). Create a new Device with name esp32.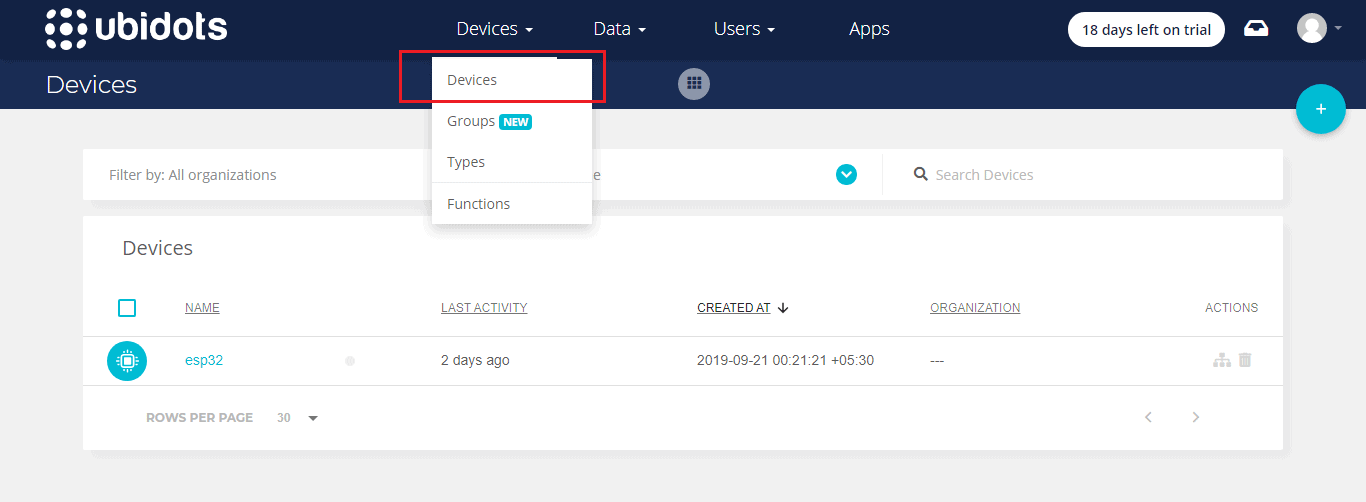
Once the device is created, create a new variable by renaming the variabale to sensor.
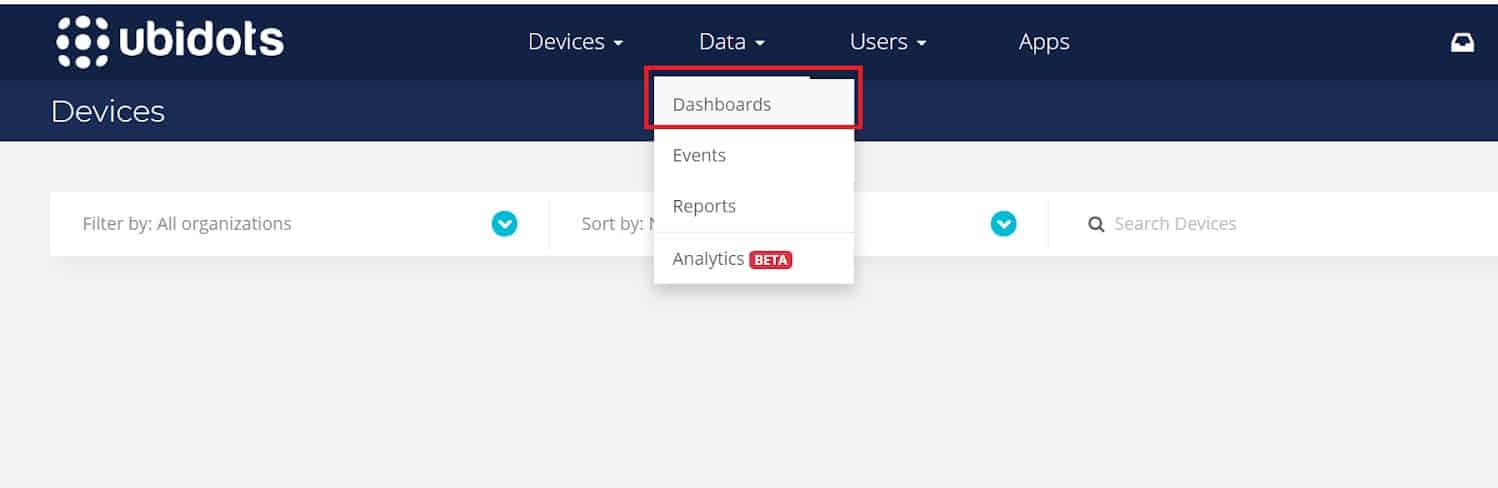
Step 3: Creating Dashboards
Let’s setup an Ubidots’ Dashboard. To create it, go to the Dashboard section (Data > Dashboard)
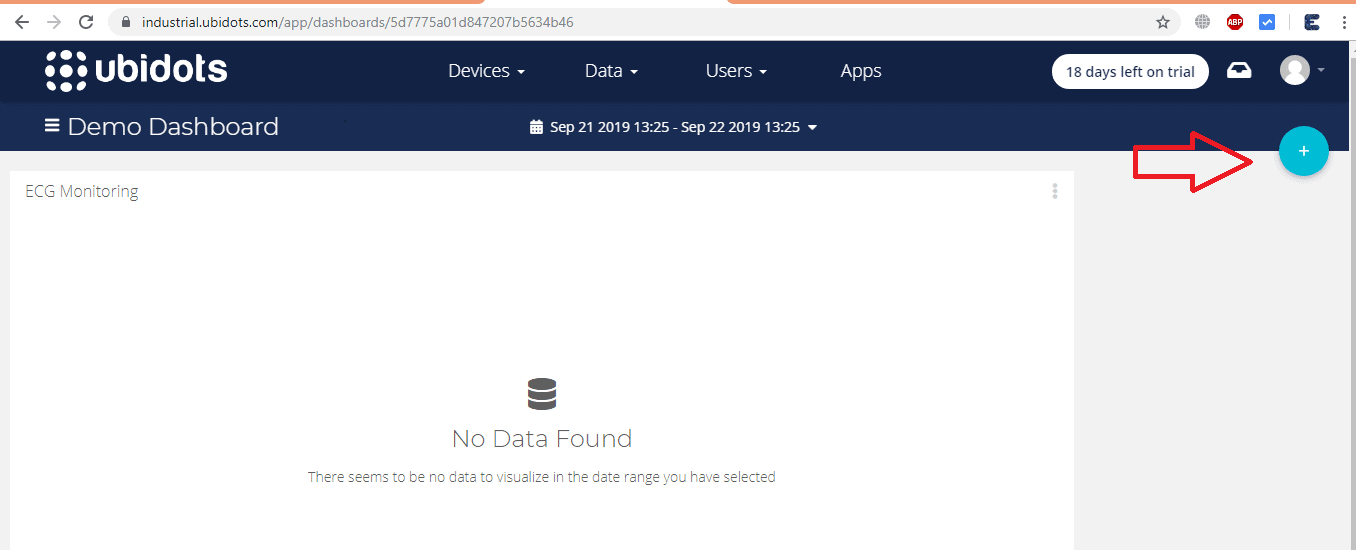
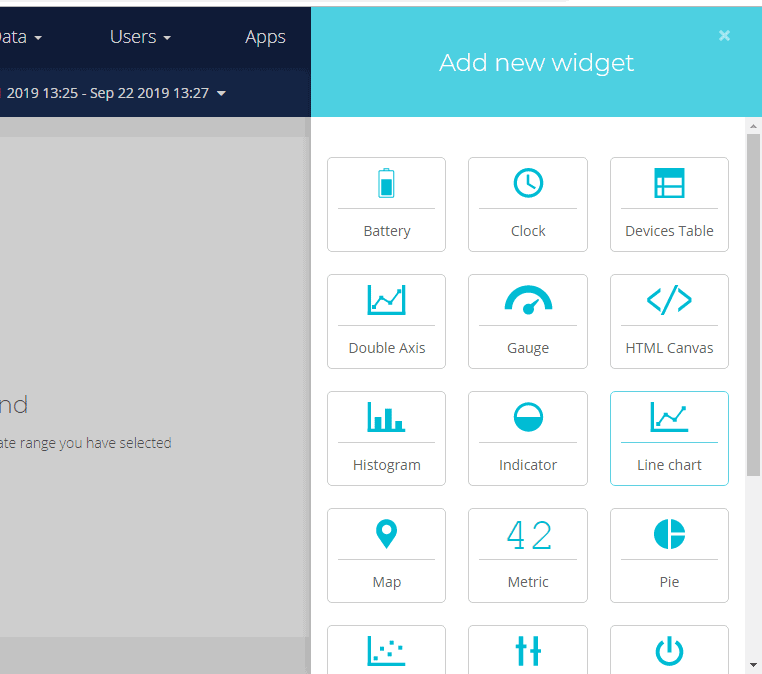
Step 4: Adding New Widgets
Click on the + sign in the right side and “Add new Widget”, and select your widget.
Now, Select the type of widget desired to be displayed. In my case, I choose the “Line Chart”:
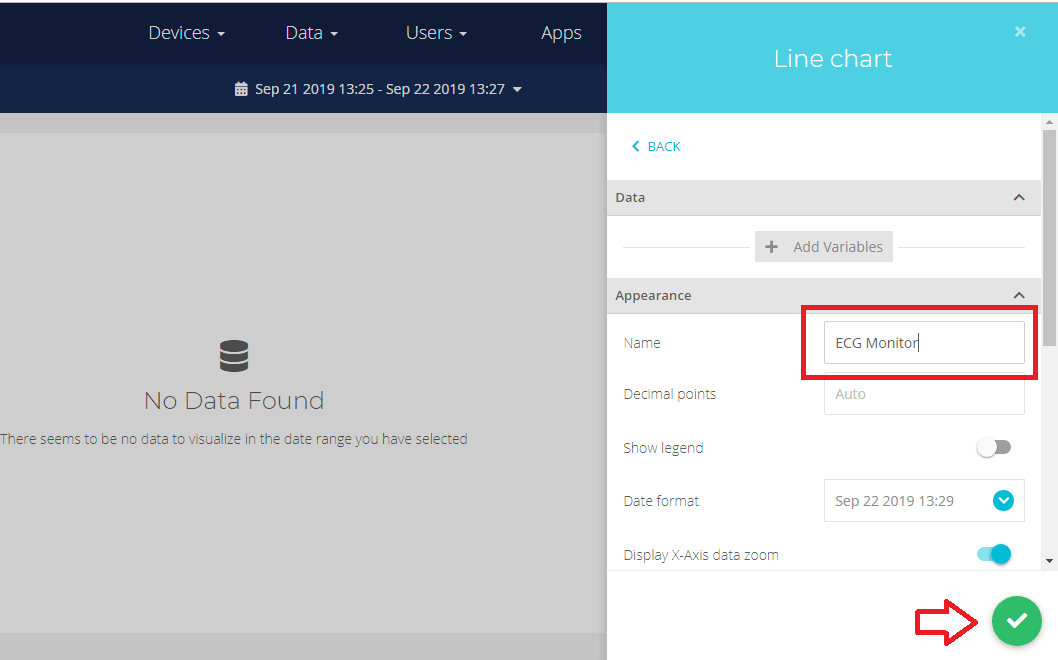
Then, select the variable desired to display the data. Ubidots allows you assign a customize widget name, color, period of data to be displayed and much more. To finish the widget creation, press the green icon.
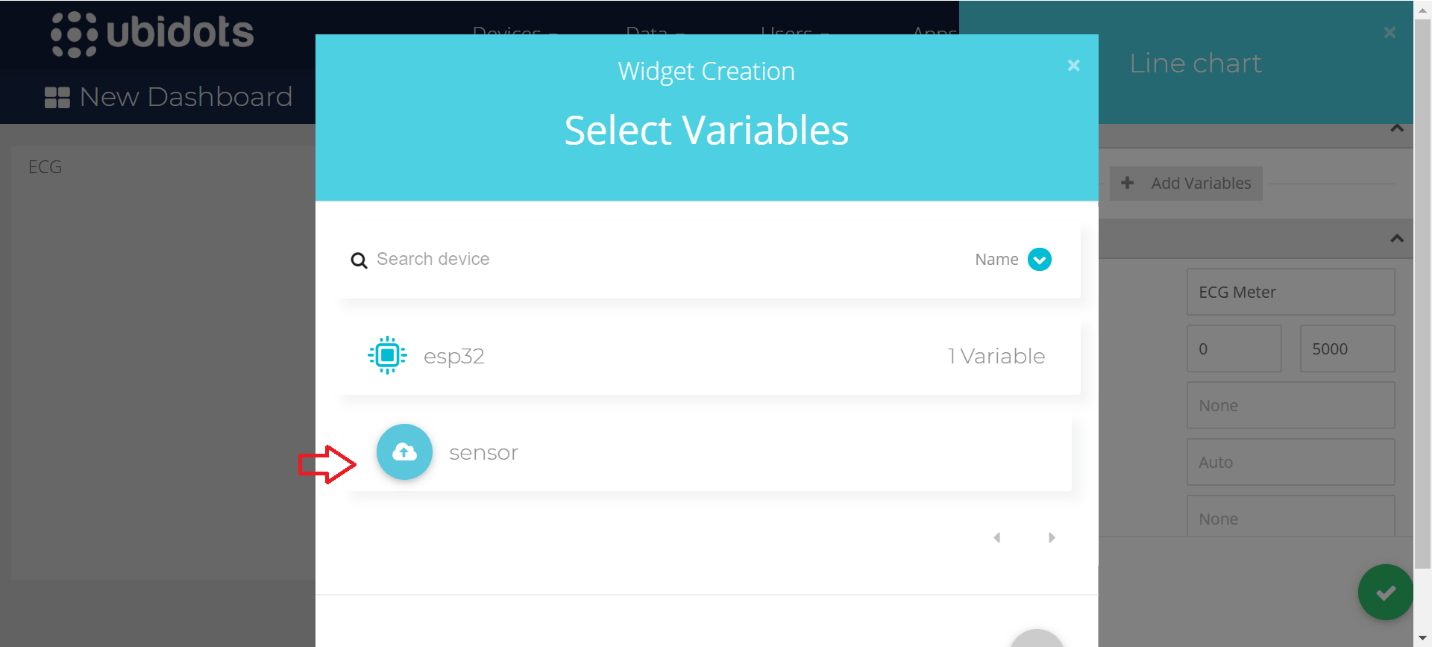
Selct your previously created Device and Variables as shown in the figure below.
Source Code/Program
The source code for IoT Based ECG Monitoring with AD8232 ECG Sensor & ESP32 is given below. Copy this code and change the following Parameters.
|
1 2 3 4 |
1. WIFISSID:</strong> Your WiFi SSID 2. PASSWORD:</strong> Your WiFi password 3. TOKEN:</strong> Your Ubidots TOKEN (Check the video below to find about it) 4. MQTT_CLIENT_NAME:</strong> Your own 8-12 alphanumeric character ASCII string. |
|
1 2 3 4 5 6 7 8 9 10 11 12 13 14 15 16 17 18 19 20 21 22 23 24 25 26 27 28 29 30 31 32 33 34 35 36 37 38 39 40 41 42 43 44 45 46 47 48 49 50 51 52 53 54 55 56 57 58 59 60 61 62 63 64 65 66 67 68 69 70 71 72 73 74 75 76 77 78 79 80 81 82 83 84 85 86 87 88 89 90 91 92 93 94 95 96 97 98 99 100 |
#include <WiFi.h> #include <PubSubClient.h> #define WIFISSID "Alexahome" // Put your WifiSSID here #define PASSWORD "hngzhowxiantan" // Put your wifi password here #define TOKEN "BBFF-RJ8ABBbh6G2ECGU0rkjRSOdXqhUnvj" // Put your Ubidots' TOKEN #define MQTT_CLIENT_NAME "alexnewton" // MQTT client Name, please enter your own 8-12 alphanumeric character ASCII string; //it should be a random and unique ascii string and different from all other devices /**************************************** * Define Constants ****************************************/ #define VARIABLE_LABEL "sensor" // Assing the variable label #define DEVICE_LABEL "esp32" // Assig the device label #define SENSOR A0 // Set the A0 as SENSOR char mqttBroker[] = "industrial.api.ubidots.com"; char payload[100]; char topic[150]; // Space to store values to send char str_sensor[10]; /**************************************** * Auxiliar Functions ****************************************/ WiFiClient ubidots; PubSubClient client(ubidots); void callback(char* topic, byte* payload, unsigned int length) { char p[length + 1]; memcpy(p, payload, length); p[length] = NULL; Serial.write(payload, length); Serial.println(topic); } void reconnect() { // Loop until we're reconnected while (!client.connected()) { Serial.println("Attempting MQTT connection..."); // Attemp to connect if (client.connect(MQTT_CLIENT_NAME, TOKEN, "")) { Serial.println("Connected"); } else { Serial.print("Failed, rc="); Serial.print(client.state()); Serial.println(" try again in 2 seconds"); // Wait 2 seconds before retrying delay(2000); } } } /**************************************** * Main Functions ****************************************/ void setup() { Serial.begin(115200); WiFi.begin(WIFISSID, PASSWORD); // Assign the pin as INPUT pinMode(SENSOR, INPUT); Serial.println(); Serial.print("Waiting for WiFi..."); while (WiFi.status() != WL_CONNECTED) { Serial.print("."); delay(500); } Serial.println(""); Serial.println("WiFi Connected"); Serial.println("IP address: "); Serial.println(WiFi.localIP()); client.setServer(mqttBroker, 1883); client.setCallback(callback); } void loop() { if (!client.connected()) { reconnect(); } sprintf(topic, "%s%s", "/v1.6/devices/", DEVICE_LABEL); sprintf(payload, "%s", ""); // Cleans the payload sprintf(payload, "{\"%s\":", VARIABLE_LABEL); // Adds the variable label float sensor = analogRead(SENSOR); /* 4 is mininum width, 2 is precision; float value is copied onto str_sensor*/ dtostrf(sensor, 4, 2, str_sensor); sprintf(payload, "%s {\"value\": %s}}", payload, str_sensor); // Adds the value Serial.println("Publishing data to Ubidots Cloud"); client.publish(topic, payload); client.loop(); delay(500); } |
Now select the following parameters from the tools and upload the code to ESP32. In some cases the code does not get uploaded. So press boot button while uploading the code to ESP32.

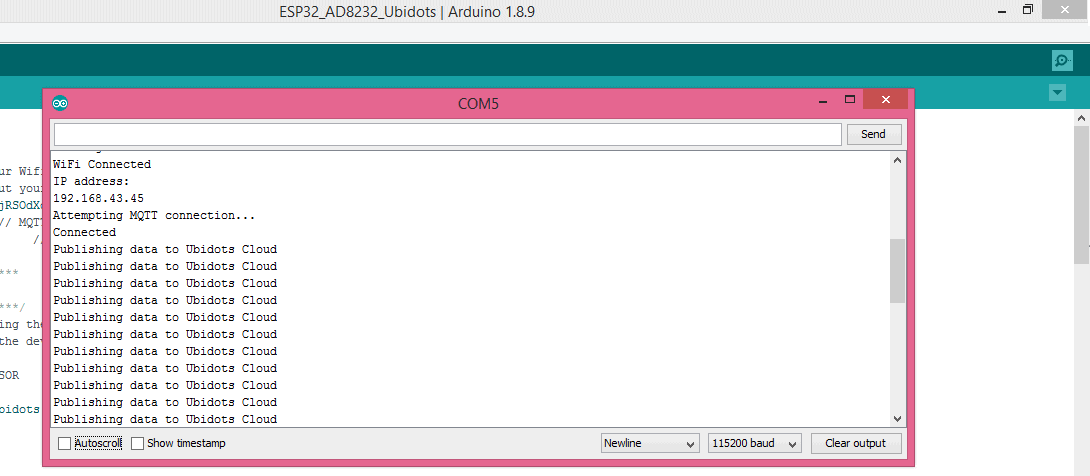
Checking Data & ECG Graph on Ubidots
Once the code is uploaded to ESP32 Board, click on serial monitor. If the ESP32 connects to wifi, it will start sending data to Ubidots Cloud.
You can now go to Ubidots Dashboard and click on esp32, there you will be able to see the ECG Graph.

Video Tutorial & Explanation

If you want to do this project with NodeMCU ESP8266 Board, you can follow this post.
IoT ECG Monitoring with AD8232 ECG Sensor & ESP8266


29 Comments
Excuse me, is there any way to get the BPM in real time in addition to adding a temperature sensor and that everything can be seen in the ubidots. I would appreciate if you could answer me soon
BPM can be calculated from ECG Signal. You can add temperature sensor like DS18B20 to monitor Patient Health Status.
mencionated that i can using esp8266 but we need to change the program and connections. please tell me how can i do that? thank you.
you have selected ESP32 Dev module as board settings, cant we use ESP32 DEVKIT V1?
You can use.
how to solve PubSubClient.h: No such file or directory error 🙁
Update the library. If library doesn’t work use the old library.
Please tell the mapping between ecg ad8232 & esp32 vroom 32 board.
I have a same project. but i use ads 1293, can you help me? about source code and wiring electrical?
Thanks.
Actually I have never used ADS1293 Sensor so no idea about it. Sorry for that.
How can I use ESP8266 Nodemcu in place of esp32?
New video and post coming on that on next week.
I want to add variables more than 4. So what can I do
Can I interface (AD8232) sensor with pic microcontroller???
Yes, of course. However (and unfortunately), your question reveals that quite some effort is needed before you could do this by yourself…
Can the AD83232 board be connected to an oscilloscope
Yes you can easily
how can i determine value of RR interval and HR by graph?
Can be use thingspeak platform instead of ubidots ? Any problem or delay in signal?
Why using Mqttp over http
how to solve PubSubClient.h: No such file or directory error what to do with that
How can updat library
Can we use esp3266module
It pops up with serial.serialutil.SerialTimeOut Exception
Write timeout
Fail to execute script Esptool
What should i do?
Hello, Is it possible to design ECG by ESP8266 and send data to the raspberry pi? if yes how is it possible?
I have added LO+ and L0- of AD8232 is connected to D14 & D12 of ESP32. Is that okay?
how to conect from my iphone wifi
A fatal error occurred: Failed to connect to ESP32: Timed out waiting for packet header
getting this fatal error can u please help me regarding this
Please how can an sd card module be included to this system to store data offline. And what pins of the esp32 supports 5V
How to take the raw data into ubidots and transfer it to a database, say firebase?