

Overview
In this getting started tutorial, we will learn how to send DHT11 Sensor data from NodeMCU ESP8266 to Microsoft Azure IoT Central. The Internet of Things (IoT) is a network of physical devices that connect to and exchange data with other devices and services over the Internet or other network. Anything that can be embedded with the necessary sensors and software can be connected over the internet.
Azure IoT Central is an IoT application platform (aPaaS) that simplifies the creation of IoT solutions. Azure IoT Central provides a ready-to-use UX and API surface built to connect, manage, and operate fleets of devices at scale.
Earlier we learned about AWS IoT Core using ESP8266. Microsoft Azure is similar to Amazon AWS IoT Core. This tutorial is for beginners who want to learn about the Azure IoT Central for IoT Applications. This guide will help you learn to establish communication between NodeMCU ESP8266 with Azure IoT Central. This guide covers setting up Azure IoT Account along with creating IoT Central Applications, Adding a Device, Creating a Template, Publishing Device to Template along with Data Visualization.
Hardware Setup
The hardware setup required for this project is an NodeMCU ESP8266 Wifi Module. And for the sensor part, we will use DHT11 Humidity and Temperature Sensor.
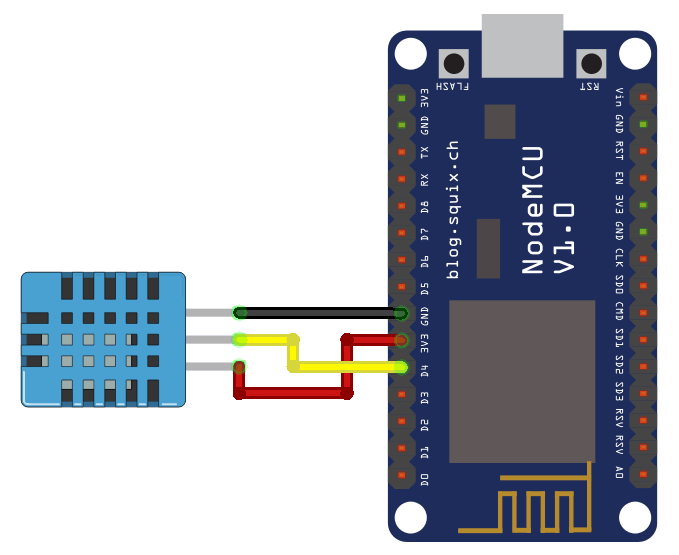
Connect the DHT11 Sensor to NodeMCU ESP8266 Board as per circuit diagram here. Connect the VCC, GND & output pin of DHT11 to NodeMCU ESP8266 3.3V, GND & D4 Pin respectively.

You can use a breadboard for connection or simply use a male-to-female connector wire.
Getting Started with Azure IoT Central using ESP8266
The very first step is to ensure that your PC has been configured to communicate with NodeMCU ESP8266 Board. Then we have to go through Series of steps as follows:
Step 1: Creating Microsoft Azure Account
In order to create a Microsoft Azure Account, you need to have Microsoft Account either Outlook or a Hotmail.
Now visit azure.microsoft.com. Here fill the details and sign up using the microsoft Account. While creating an Account you will be asked to enter debit/credit card details. There are no charges included for one month.
Finally you will be taken to Azure Portal. Hence your account is created now.
Step 2: Setting Up IoT Central Applications
In the Search Bar, look for “IoT Central Applications“. Then click on IoT Central Application. You will be taken to following page.

In the subscription part, select your subscription. Under Resource group, create a new group and give it any name. In the instance details part, give any name to resource and application URL.
In the template part select custom template and region according to your nearest geographical location. Also select the pricing plan. Then finally click on Review + Create.
A review page will appear now.
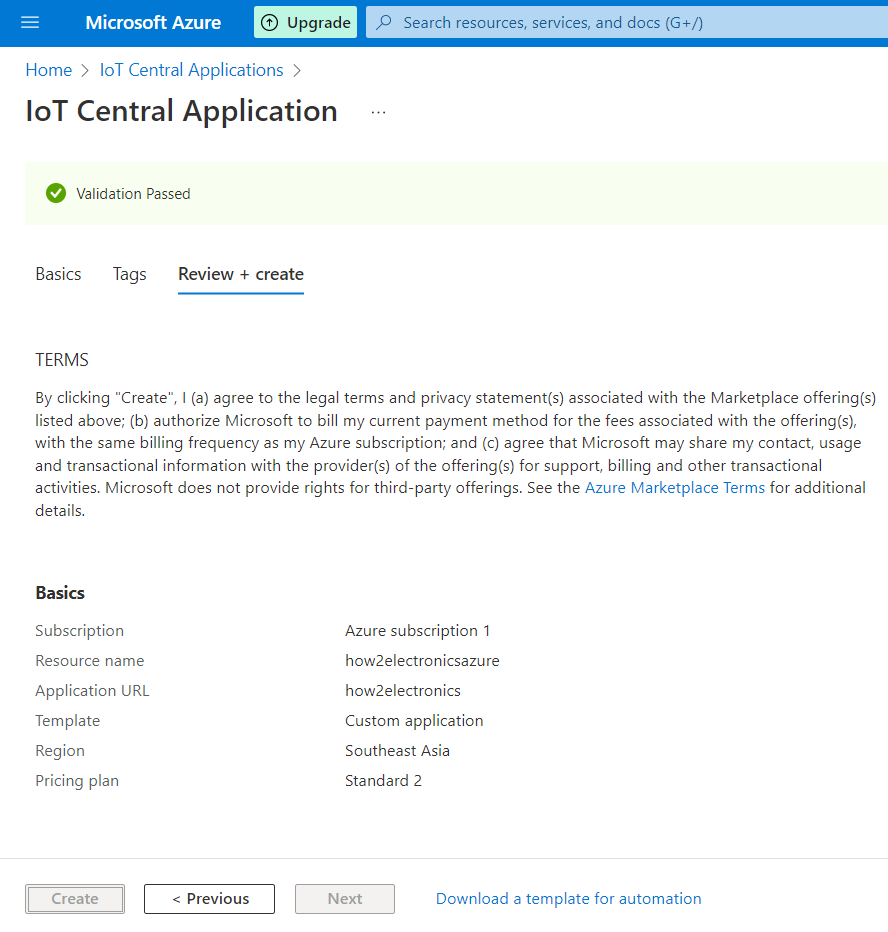
When you get the Validation Passed message, Click on Create. The deployment process will take some time.
When deployment gets completed, you will get the following message on Screen.

Now click on Go to resource.
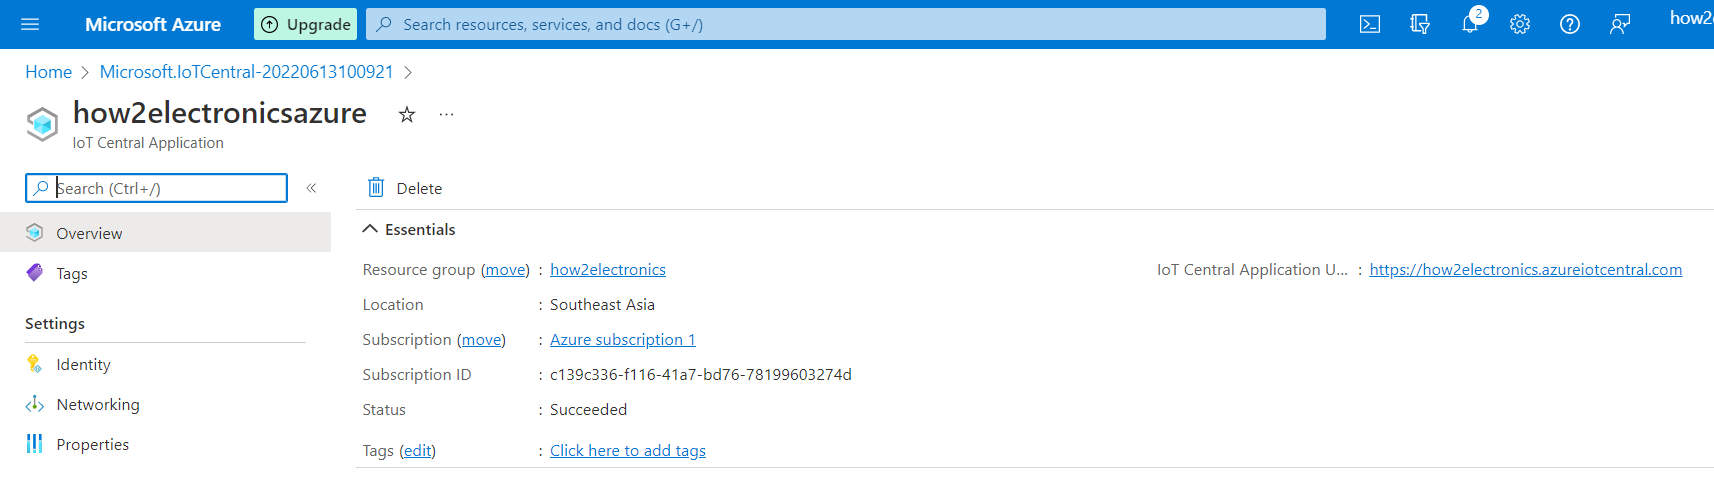
Now you successfully created IoT Central Applications.
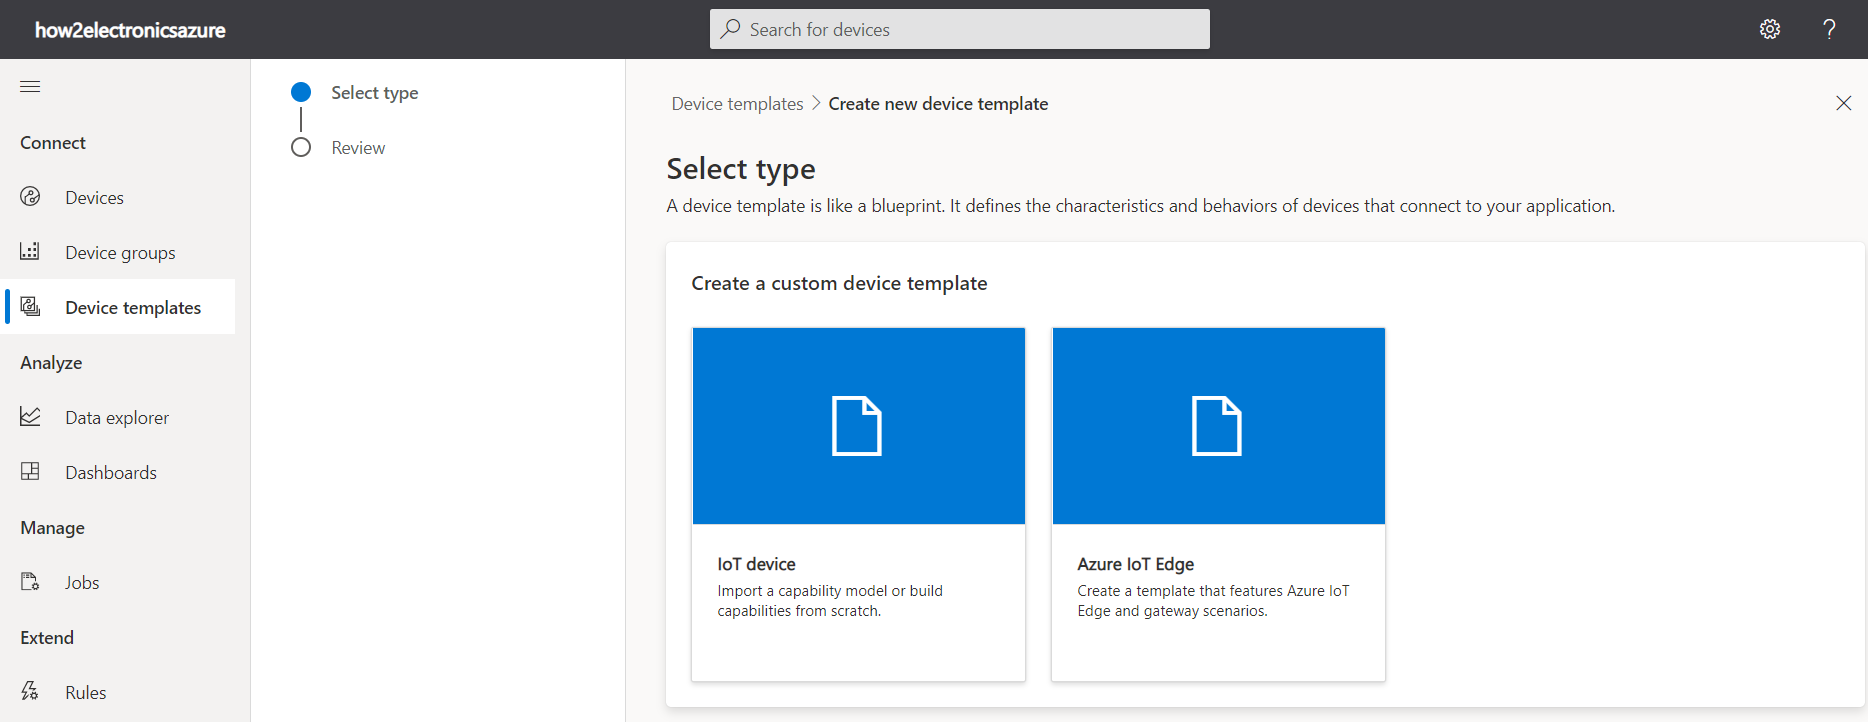
Step 3: Creating Device Templates
We need to create a template or a blueprint for our device, the template will be structured according to the type of data we are expecting from our device. Therefore, what we need to set up first is the device template.
From the above page, you will get an IoT central Application URL. Click on the URL and you will be taken to the following page now.
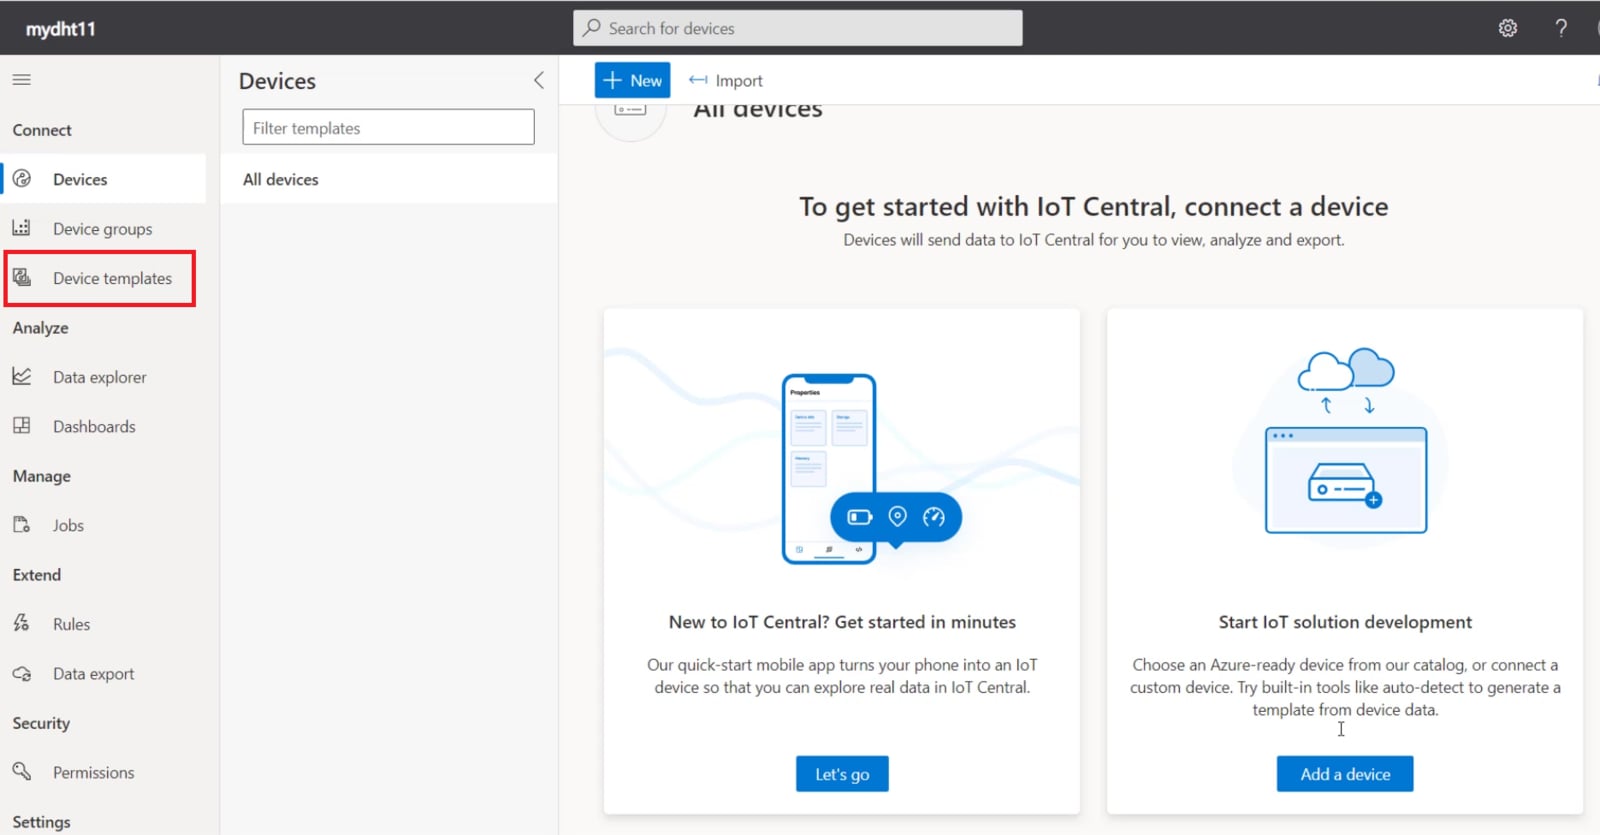
On the left side of the dashboard click on Device Template. Then click on Create a device template.
You will find so many ready-made templates created by many vendors. But we need to create our own template. To do that select IoT Device. Then click on Next:Customize.
Now give any name to Device Template.
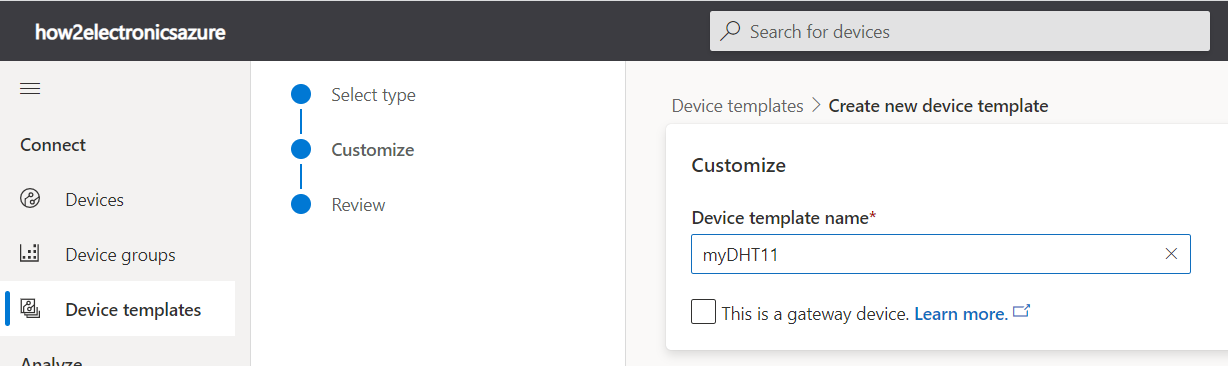
Then Click on Next and then Create. Hence the device template will be successfully created.
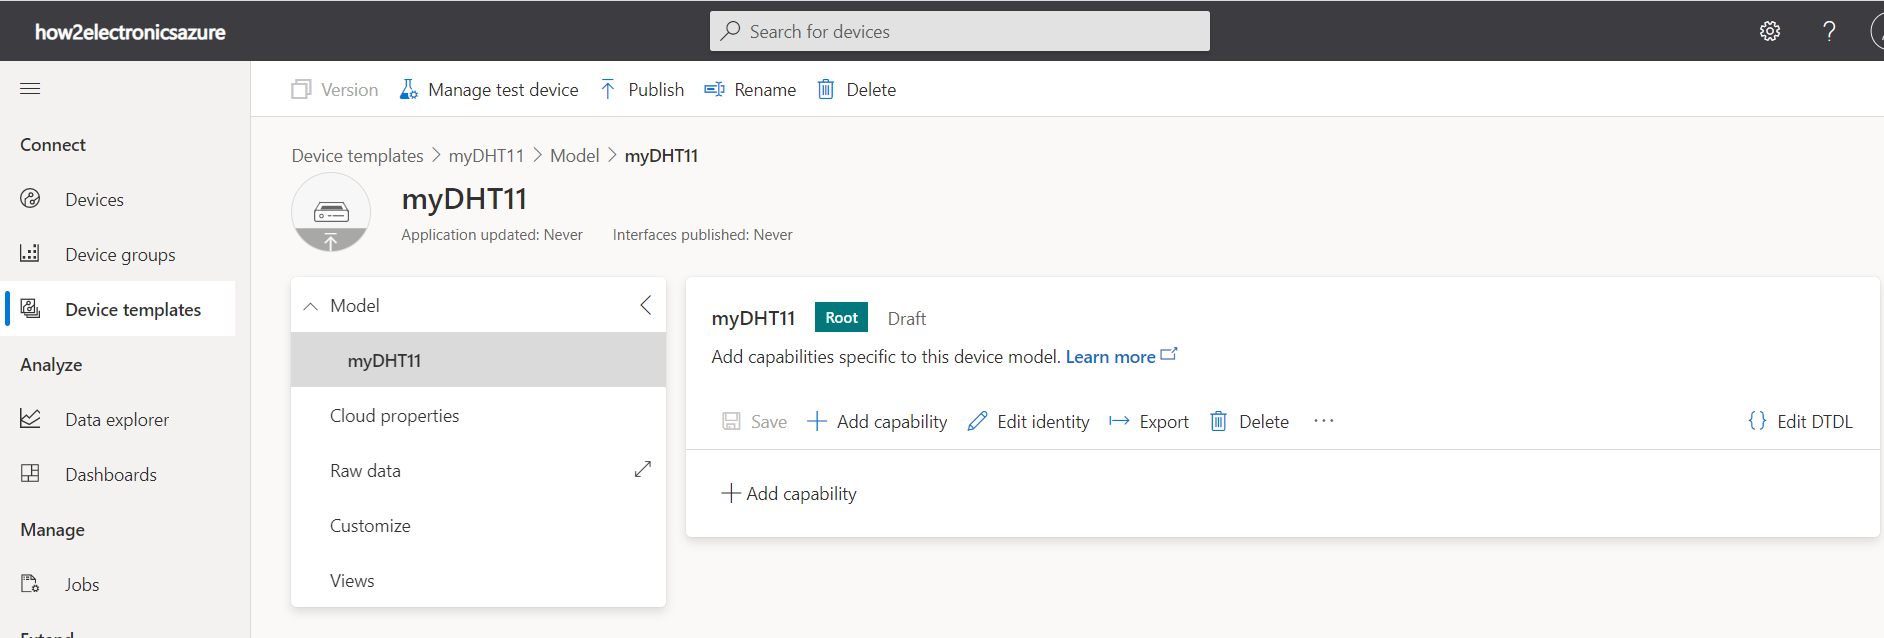
Now we need to add Capability to the device template that we created.
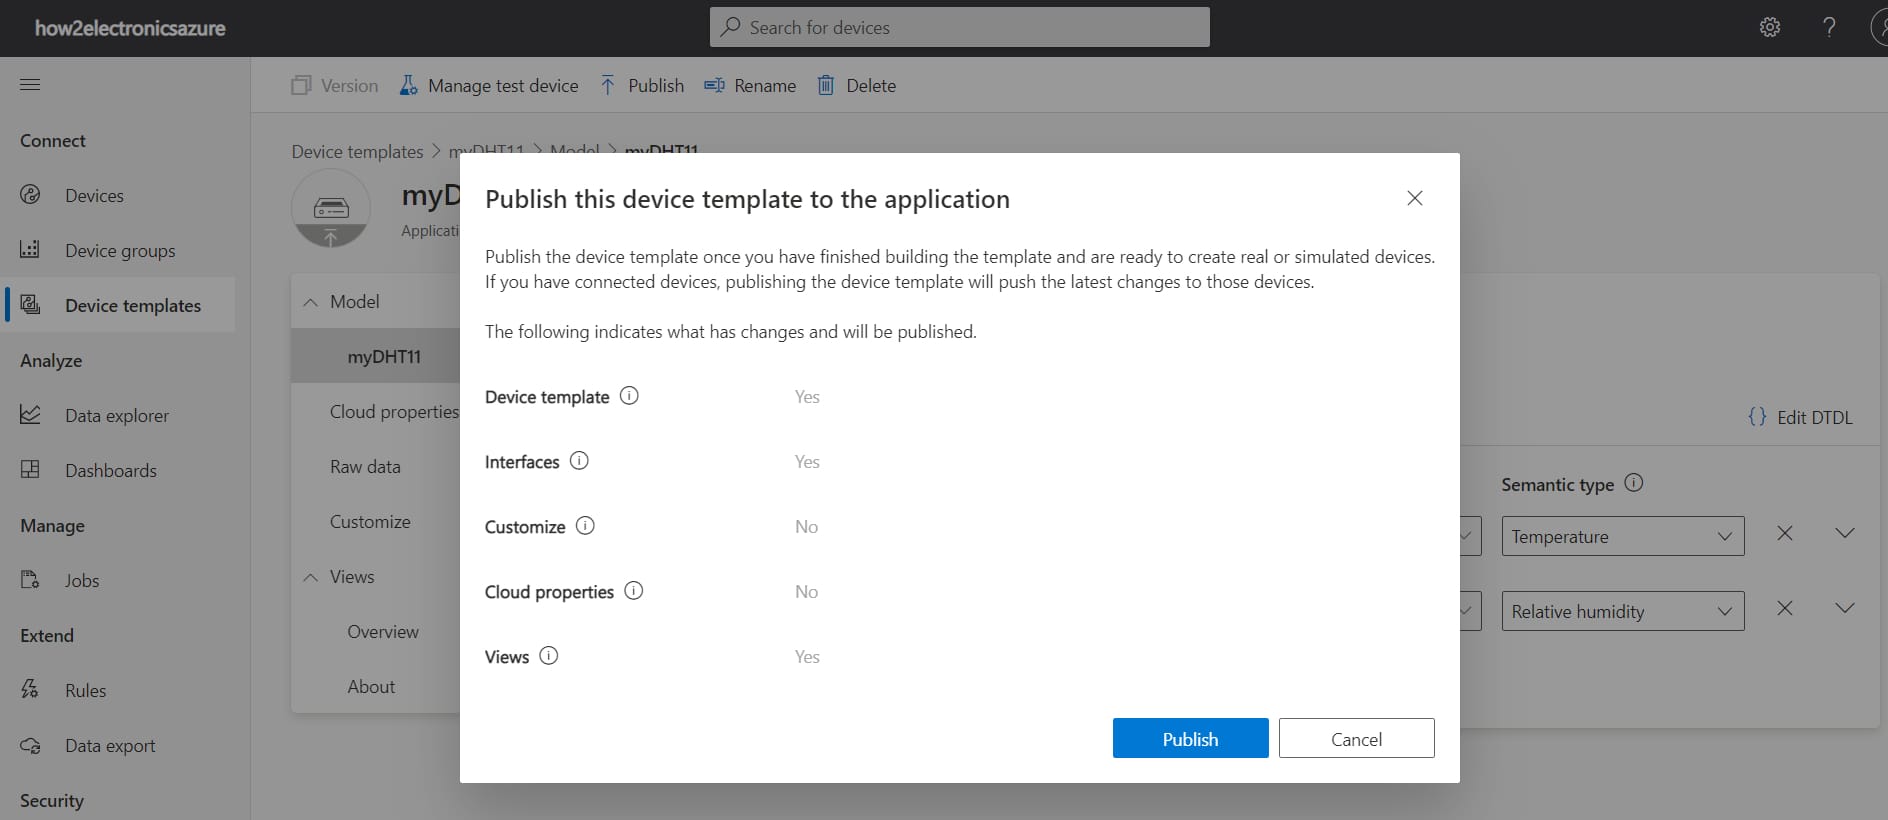
Since we will publish temperature and humidity data, so we will add two capabilities with the following parameters.
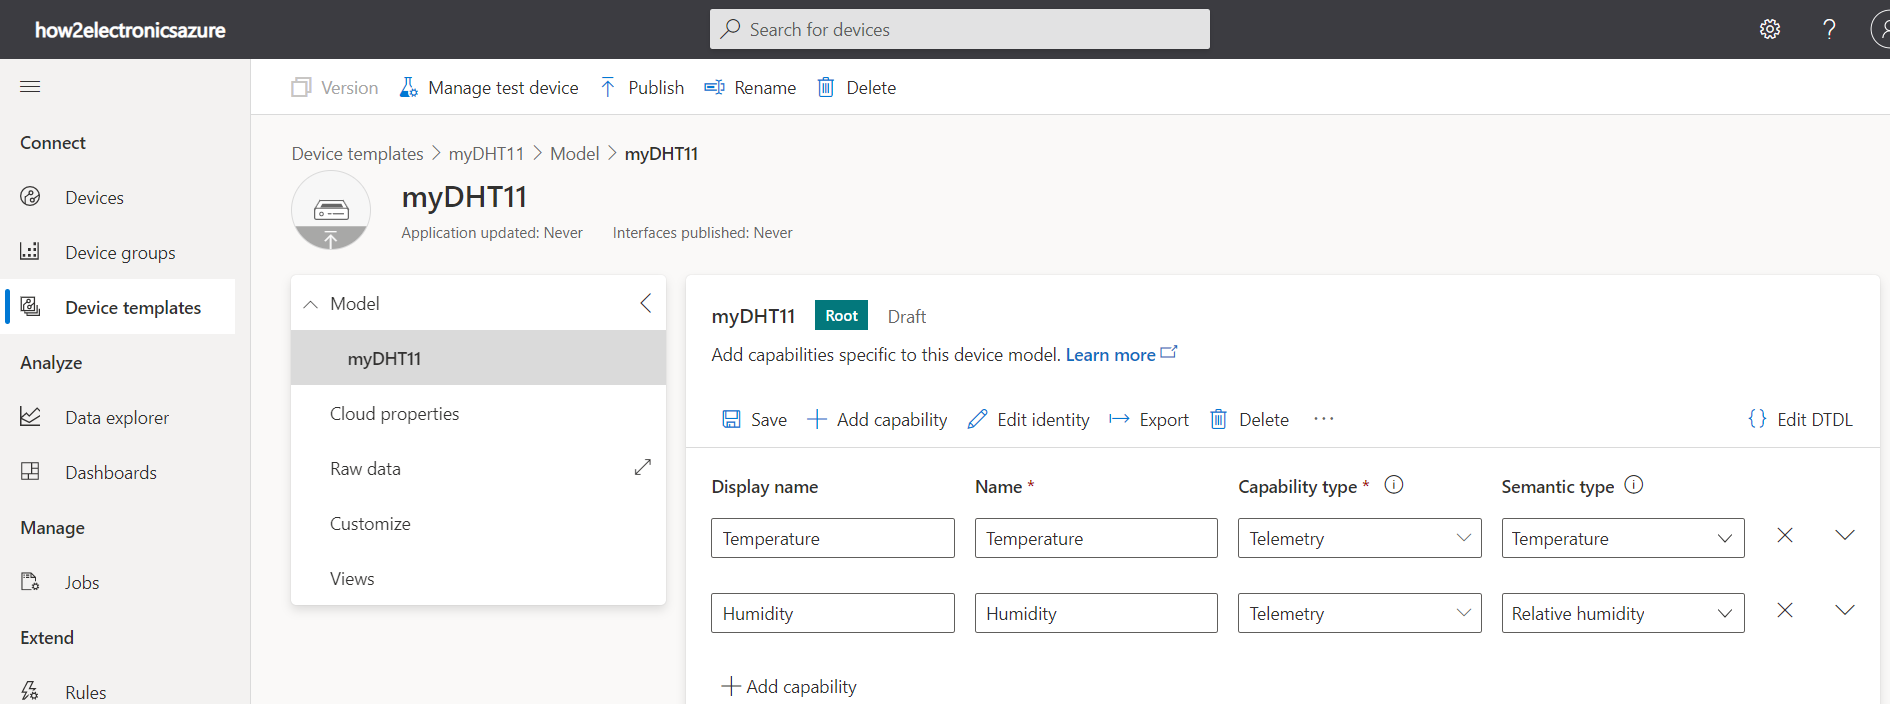
Now click on Save. Then click on Views.
Select General Default Views. Then click on Generate Default Dashboard View(s).
In the views part, you will be presented with how your data will be presented. I will advise you to change the Temperature and Humidity to “Last Known Value”. After this click on “Save” and you can go on to publish your template.
Step 4: Setting up the Device
After creating a blueprint for our device through the Device template, our next task is to configure the device.
Click on Devices and then click on Add a Device.
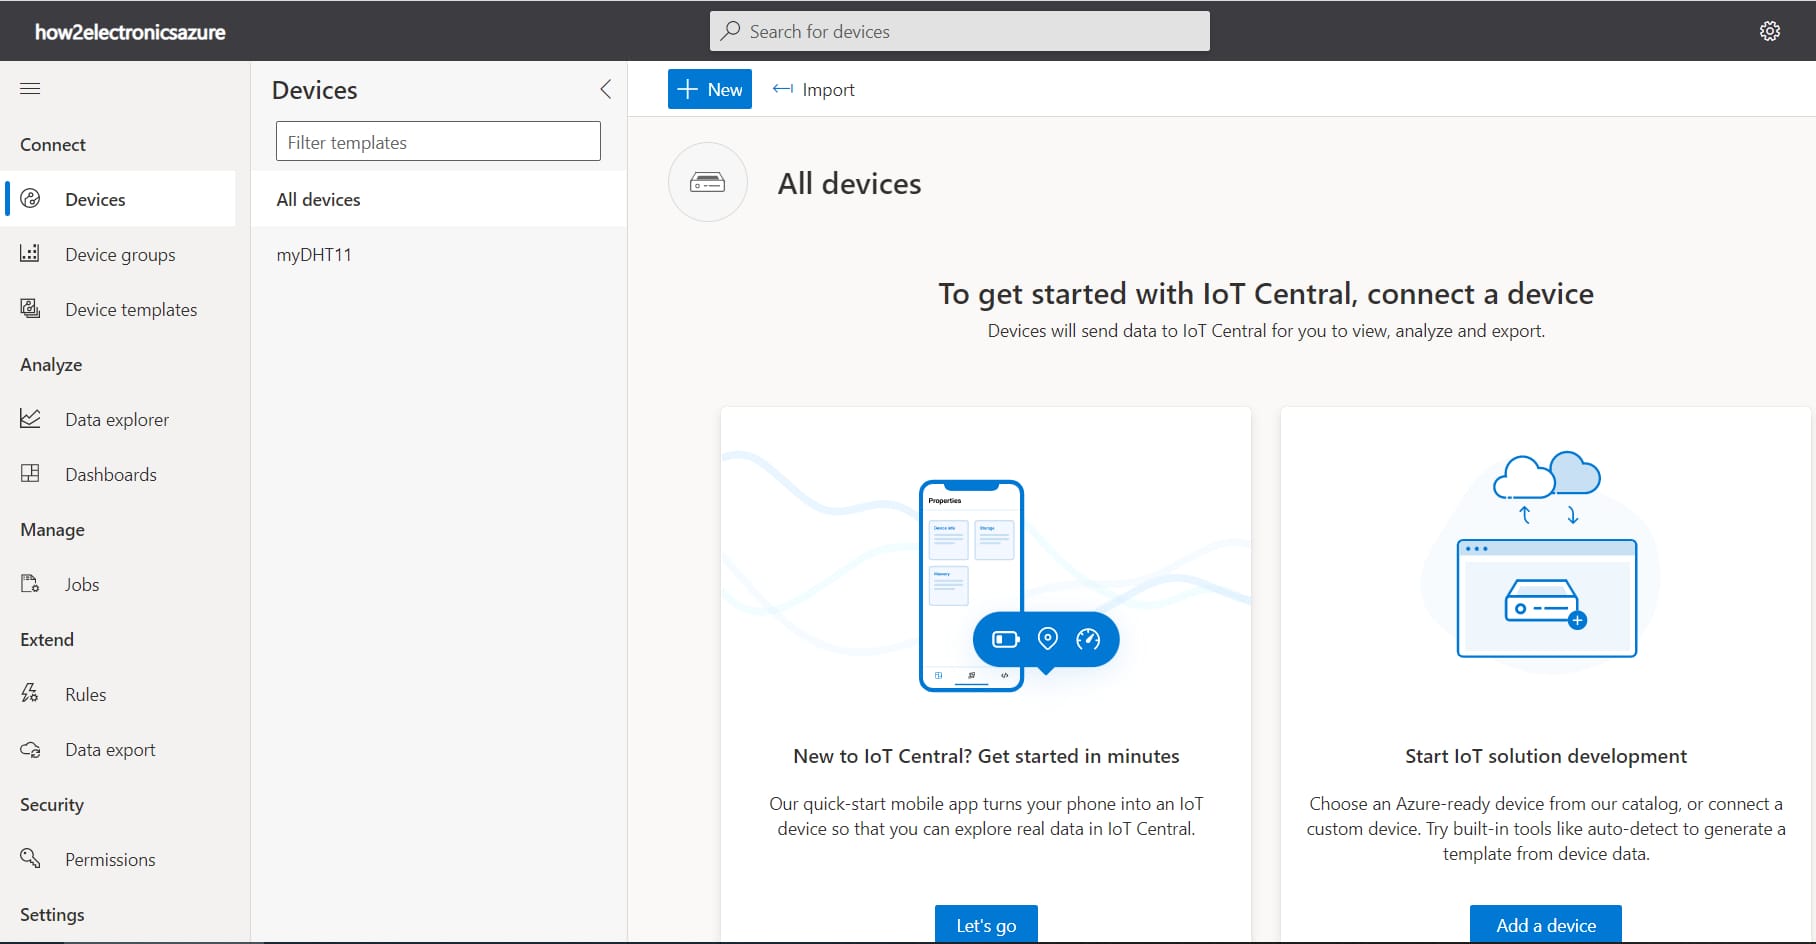
Give Device Name and Device ID as anything you want. In the Device Template part, select the device template we created above. Then Click on Create.
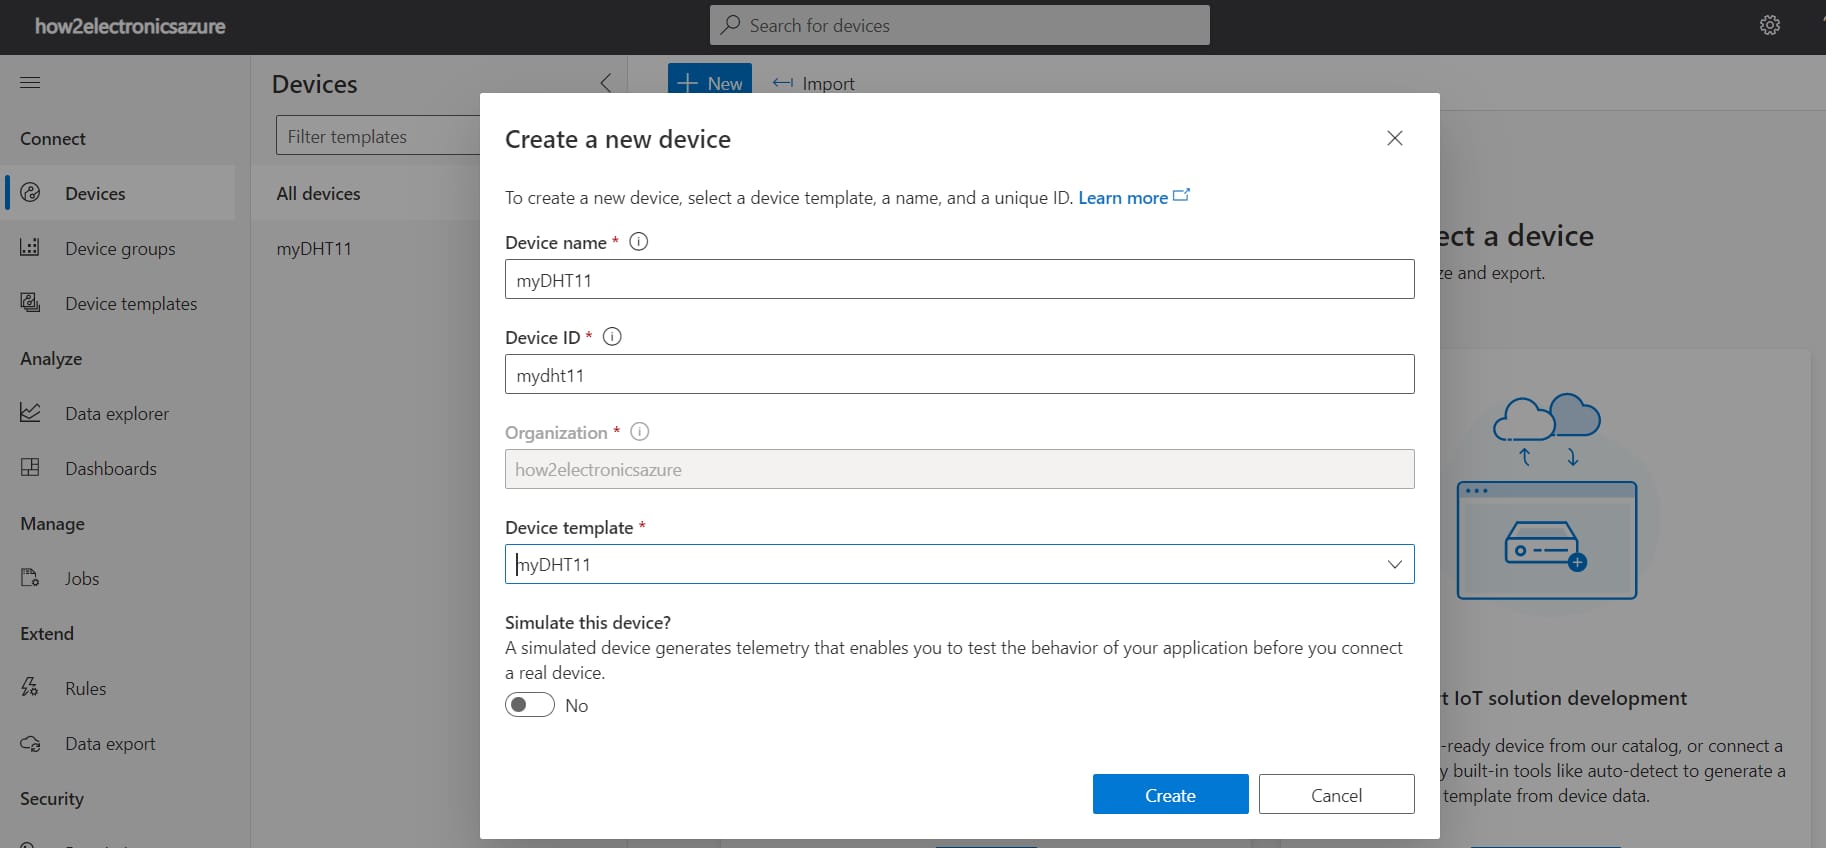
Finally a device will be created.

Click on the device name and you will see so many tabs like about, overview, raw data, and Mapped Alies. The data visualization takes at the overview tab.
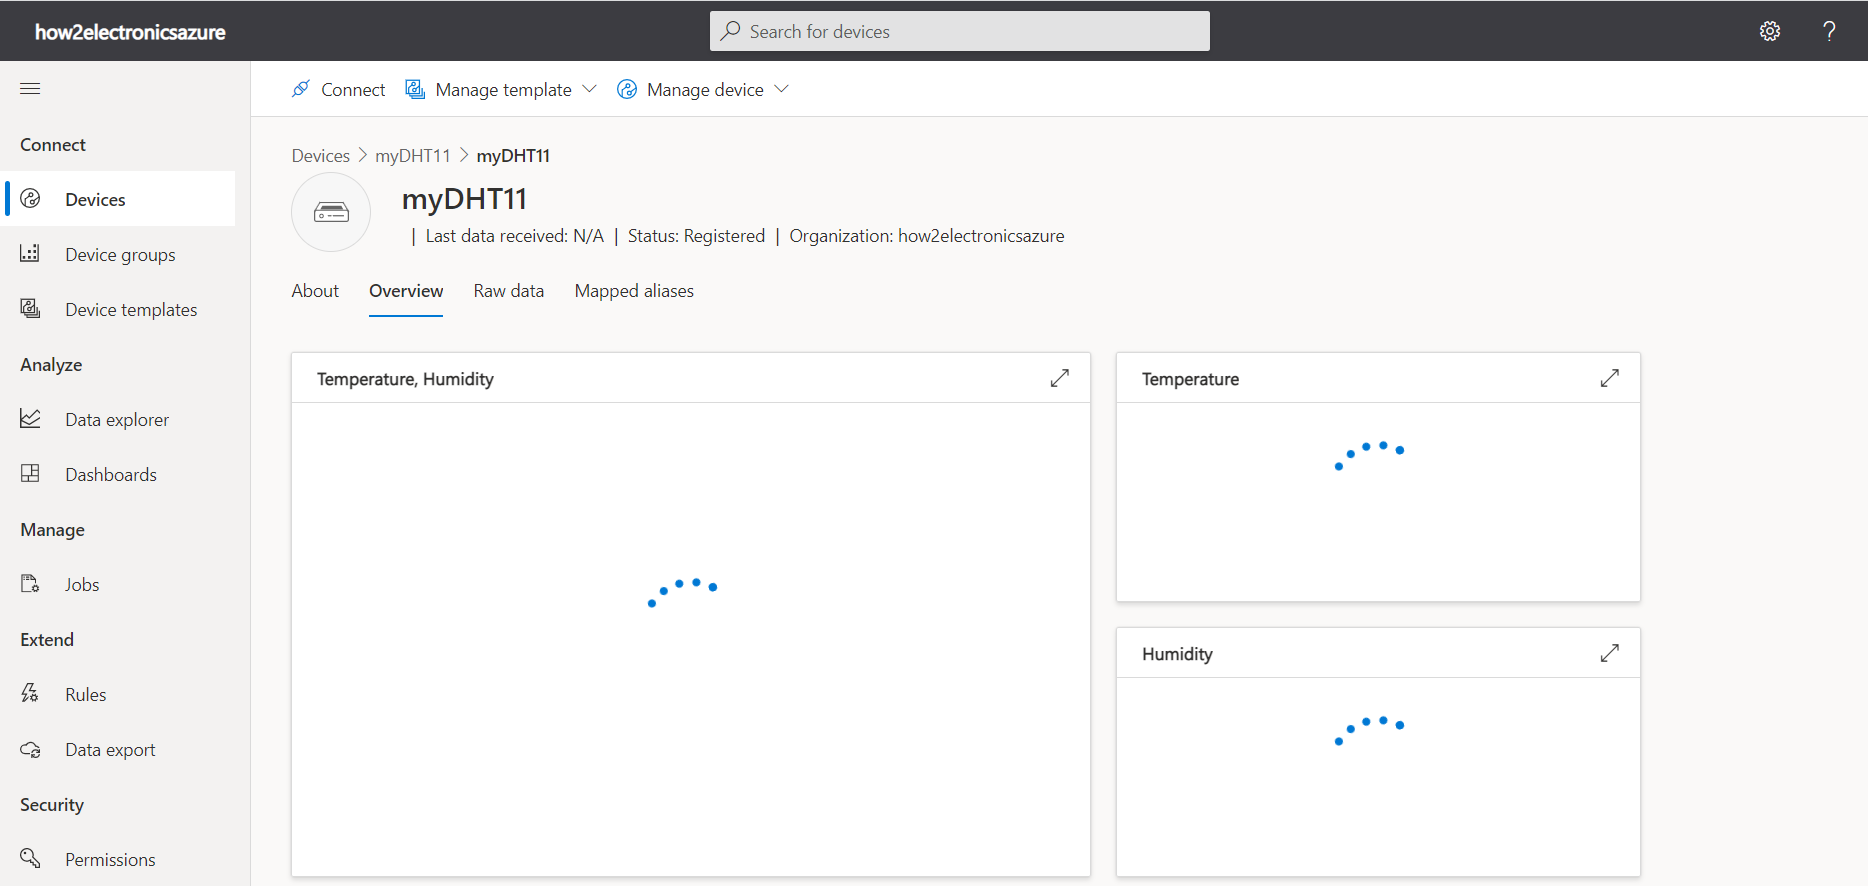
At the top left side, you will see an option to Connect. So click on Connect.
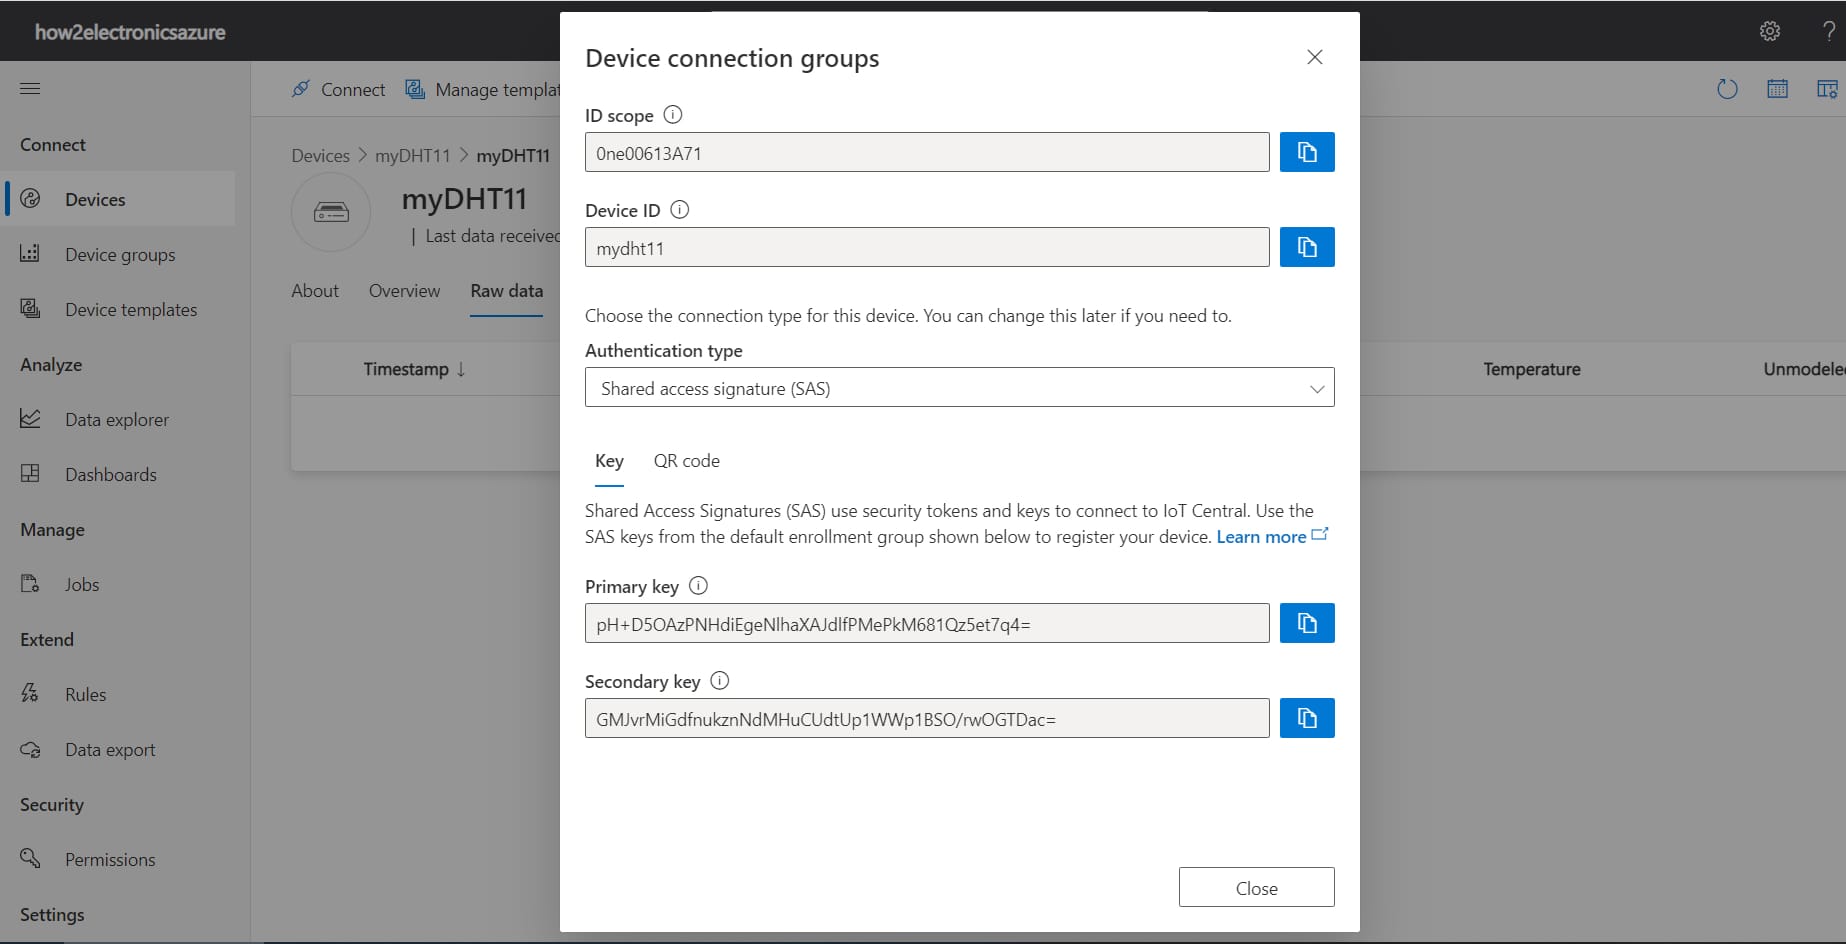
Here you will be presented will information you need to connect your NodeMCU ESP8266 to the Azure IoT Central like the DeviceID, Name, Primary Key, and Public Key.
Source Code/Program
The orginal code for this project is written by Samuel Adesola. The Code is written in Arduino IDE. Hence you need have pre-installed ESP8266 Boards on your Arduino IDE.
Download the complete project folder from the Github Link.
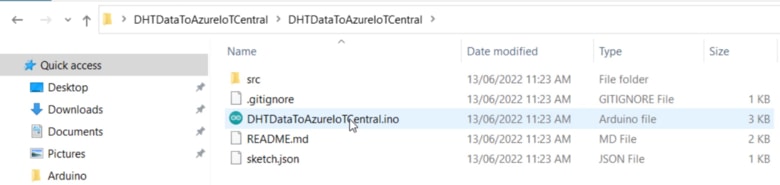
Once downloading is completed, extract the folder and there you will find all the source files and library folders. Open the Arduino Sketch from the same folder.
The Arduino Sketch needs some modification. First change the WiFi SSID and Password to connect to the WiFi Network.
|
1 2 |
#define WIFI_SSID "***************" #define WIFI_PASSWORD "***************" |
Then you need to change the ID Scope, Device ID, and the Primary Device Key. Copy these parameters from above that you got while setting the device.
|
1 2 3 |
const char* SCOPE_ID = "*********************"; const char* DEVICE_ID = "*********************"; const char* DEVICE_KEY = "*********************"; |
Here is the final code. You can copy this code and then upload it to the NodeMCU ESP8266 Board. Hence communication between Azure IoT Central & ESP8266 can be established using the WiFi Network.
|
1 2 3 4 5 6 7 8 9 10 11 12 13 14 15 16 17 18 19 20 21 22 23 24 25 26 27 28 29 30 31 32 33 34 35 36 37 38 39 40 41 42 43 44 45 46 47 48 49 50 51 52 53 54 55 56 57 58 59 60 61 62 63 64 65 66 67 68 69 70 71 72 73 74 75 76 77 78 79 80 81 82 83 84 85 86 87 88 89 90 91 92 93 94 95 96 97 98 99 100 101 102 103 104 105 |
// Copyright (c) Microsoft. All rights reserved. // Licensed under the MIT license. See LICENSE file in the project root for full // license information. #include <ESP8266WiFi.h> #include "src/iotc/common/string_buffer.h" #include "src/iotc/iotc.h" #include "DHT.h" #define DHTPIN 2 #define DHTTYPE DHT11 // DHT 11 #define WIFI_SSID "****************" #define WIFI_PASSWORD "****************" const char* SCOPE_ID = "****************"; const char* DEVICE_ID = "****************"; const char* DEVICE_KEY = "****************"; DHT dht(DHTPIN, DHTTYPE); void on_event(IOTContext ctx, IOTCallbackInfo* callbackInfo); #include "src/connection.h" void on_event(IOTContext ctx, IOTCallbackInfo* callbackInfo) { // ConnectionStatus if (strcmp(callbackInfo->eventName, "ConnectionStatus") == 0) { LOG_VERBOSE("Is connected ? %s (%d)", callbackInfo->statusCode == IOTC_CONNECTION_OK ? "YES" : "NO", callbackInfo->statusCode); isConnected = callbackInfo->statusCode == IOTC_CONNECTION_OK; return; } // payload buffer doesn't have a null ending. // add null ending in another buffer before print AzureIOT::StringBuffer buffer; if (callbackInfo->payloadLength > 0) { buffer.initialize(callbackInfo->payload, callbackInfo->payloadLength); } LOG_VERBOSE("- [%s] event was received. Payload => %s\n", callbackInfo->eventName, buffer.getLength() ? *buffer : "EMPTY"); if (strcmp(callbackInfo->eventName, "Command") == 0) { LOG_VERBOSE("- Command name was => %s\r\n", callbackInfo->tag); } } void setup() { Serial.begin(9600); connect_wifi(WIFI_SSID, WIFI_PASSWORD); connect_client(SCOPE_ID, DEVICE_ID, DEVICE_KEY); if (context != NULL) { lastTick = 0; // set timer in the past to enable first telemetry a.s.a.p } dht.begin(); } void loop() { float h = dht.readHumidity(); float t = dht.readTemperature(); if (isConnected) { unsigned long ms = millis(); if (ms - lastTick > 10000) { // send telemetry every 10 seconds char msg[64] = {0}; int pos = 0, errorCode = 0; lastTick = ms; if (loopId++ % 2 == 0) { // send telemetry pos = snprintf(msg, sizeof(msg) - 1, "{\"Temperature\": %f}", t); errorCode = iotc_send_telemetry(context, msg, pos); pos = snprintf(msg, sizeof(msg) - 1, "{\"Humidity\":%f}", h); errorCode = iotc_send_telemetry(context, msg, pos); } else { // send property } msg[pos] = 0; if (errorCode != 0) { LOG_ERROR("Sending message has failed with error code %d", errorCode); } } iotc_do_work(context); // do background work for iotc } else { iotc_free_context(context); context = NULL; connect_client(SCOPE_ID, DEVICE_ID, DEVICE_KEY); } } |
Note: If you are getting a compilation error message while uploading the Code, please downgrade the ESP8266 version to 2.7.4 from the Board Manager.
Data Visulization & Testing
After code is uploaded, the ESP8266 can establish connection with Azure IoT Central using the WiFi Network. Now open the Serial Monitor and you will be seeing the series of steps to connect to WiFi and Azure Server.
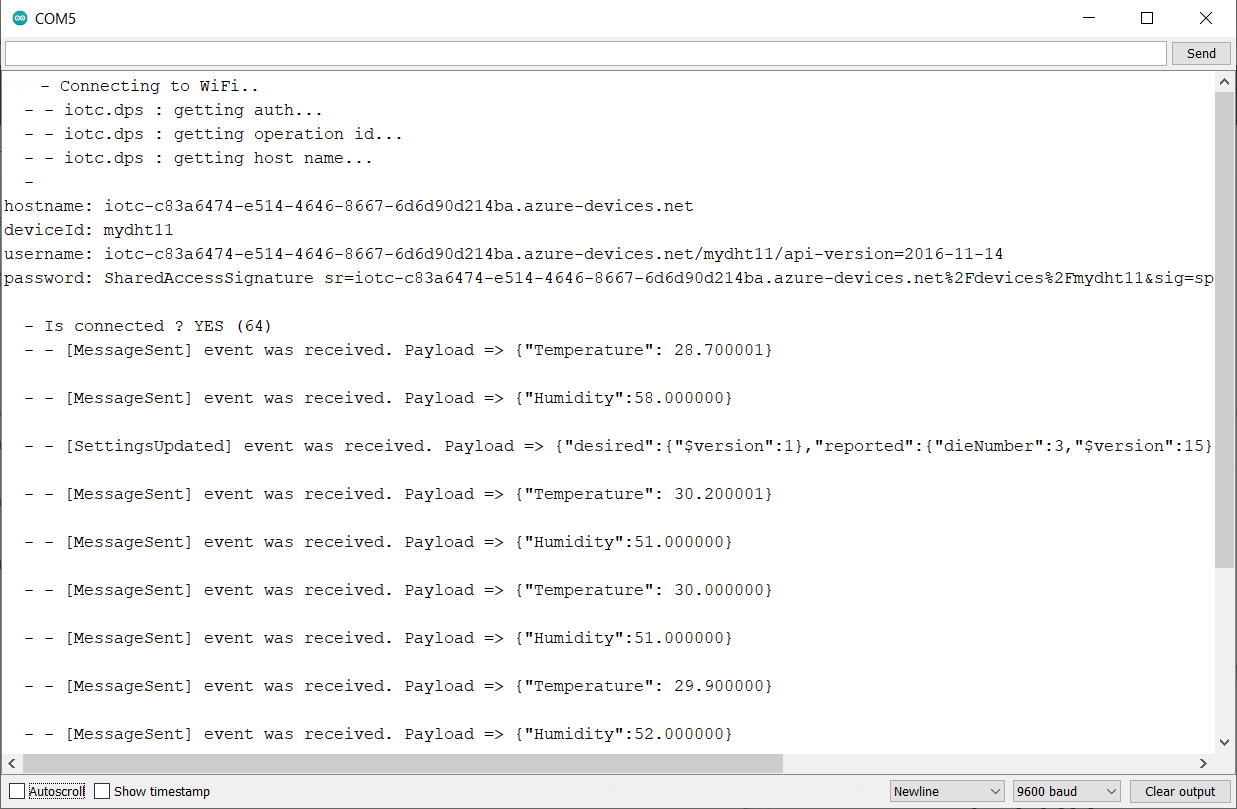
Once connected to the Azure Server, the ESP8266 will start uploading the DHT11 Humidity & Temperature data to Azure IoT Central.
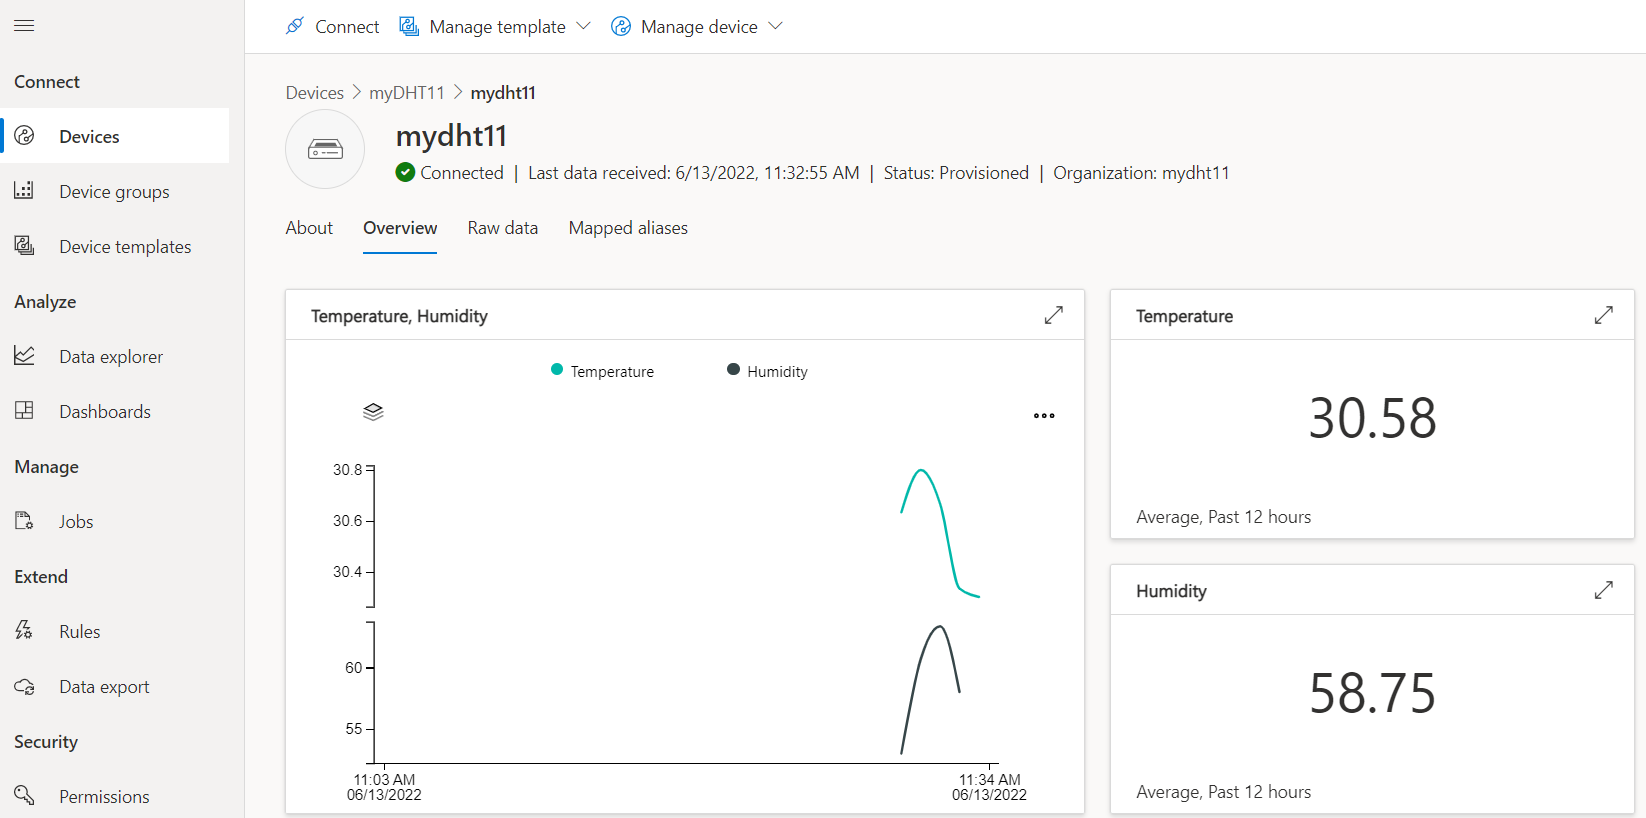
Now go to the overview tab of the device and there you can visualize the Sensor data from ESP8266.
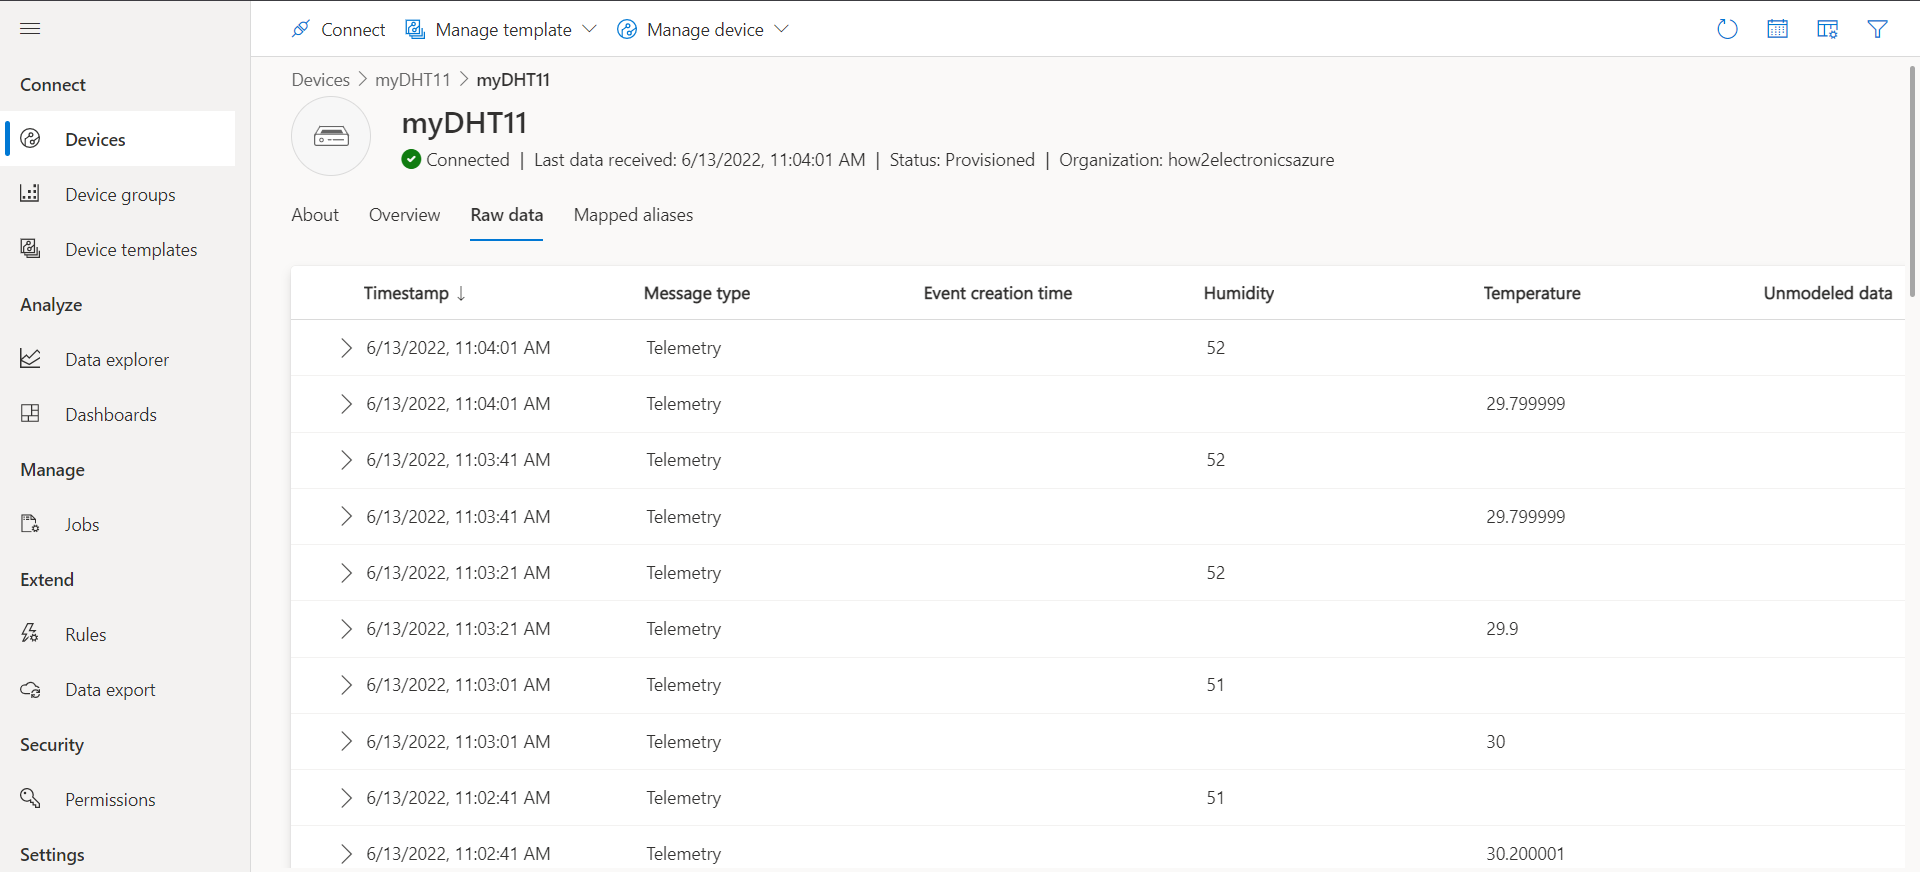
In the raw data tab, the records of temperature and humidity is stored in the form of telemetry. Examples of telemetry received from a device can include sensor data such as speed or temperature, an error message such as a missed event, or an information message to indicate the device is in good health.
This is how you can send the DHT11 Sensor data from ESP8266 to Microsoft Azure IoT Central.
Video Tutorial & Guide


3 Comments
errors on compilation
zureIoTCentral\DHTDataToAzureIoTCentral\DHTDataToAzureIoTCentral\src\iotc\arduino\iotc.cpp:84:10: error: ‘class BearSSL::WiFiClientSecure’ has no member named ‘setCACert’
84 | client.setCACert((const uint8_t*)SSL_CA_PEM_DEF,
any idea?
I get the same error.
I figured it out. Select version 2.7.4 of the ESP8266 from the Board Manager. Later versions do not work.