Close Menu
  • Articles
    • Learn Electronics
    • Product Review
    • Tech Articles
  • Electronics Circuits
    • 555 Timer Projects
    • Op-Amp Circuits
    • Power Electronics
  • Microcontrollers
    • Arduino Projects
    • STM32 Projects
    • AMB82-Mini IoT AI Camera
    • BLE Projects
  • IoT Projects
    • ESP8266 Projects
    • ESP32 Projects
    • ESP32 MicroPython
    • ESP32-CAM Projects
    • LoRa/LoRaWAN Projects
  • Raspberry Pi
    • Raspberry Pi Projects
    • Raspberry Pi Pico Projects
    • Raspberry Pi Pico W Projects
  • Electronics Calculator
Facebook X (Twitter) Instagram
  • About Us
  • Disclaimer
  • Privacy Policy
  • Contact Us
  • Advertise With Us
Facebook X (Twitter) Instagram Pinterest YouTube LinkedIn
How To Electronics
  • Articles
    • Learn Electronics
    • Product Review
    • Tech Articles
  • Electronics Circuits
    • 555 Timer Projects
    • Op-Amp Circuits
    • Power Electronics
  • Microcontrollers
    • Arduino Projects
    • STM32 Projects
    • AMB82-Mini IoT AI Camera
    • BLE Projects
  • IoT Projects
    • ESP8266 Projects
    • ESP32 Projects
    • ESP32 MicroPython
    • ESP32-CAM Projects
    • LoRa/LoRaWAN Projects
  • Raspberry Pi
    • Raspberry Pi Projects
    • Raspberry Pi Pico Projects
    • Raspberry Pi Pico W Projects
  • Electronics Calculator
How To Electronics
Home » Interface ENC28J60 Ethernet Module with Arduino Webserver
IoT Projects

Interface ENC28J60 Ethernet Module with Arduino Webserver

Mamtaz AlamBy Mamtaz AlamUpdated:August 22, 20223 Comments3 Mins Read
Share Facebook Twitter LinkedIn Telegram Reddit WhatsApp
Interface ENC28J60 Ethernet Module with Arduino
Share
Facebook Twitter LinkedIn Pinterest Email Reddit Telegram WhatsApp

Introduction:

In this article, we will learn how to Interface ENC28J60 Ethernet Module with Arduino Webserver to establish communication between computer to Arduino in a LAN or Wireless Network. We are interfacing the ENC28J60 Ethernet controller to Arduino so that our Arduino will be the one of a member of that network.

Once it will be done the Arduino can control things in that network or the Arduino can be controlled by the other devices of that network. To Interface ENC28J60 Ethernet Module with Arduino will further give us the freedom of using the internet on Arduino.

You can check this post as well: Control LED on Inernet using Arduino & ENC28J60 Ethernet Module


ENC28J60 Ethernet Module:

Introduction to ENC28J60:

The ENC28J60 Ethernet Module utilizes the Microchip ENC28J60 Stand-Alone Ethernet Controller IC featuring a host of features to handle most of the network protocol requirements. The board connects directly to most microcontrollers with a standard SPI interface with a transfer speed of up to 20MHz.

This Ethernet Breakout-Module is the simplest way to add LAN connectivity to your microcontroller-based products and projects.

  1. Use this module to enable an Ethernet interface for your product. It works with any microcontroller operating at 3. 3V or 5V.
  2. This module works at 3.3V and is compatible with 5V interface lines.
  3. Use the SPI process to interface with it.
  4. Host web server, ping the module, or add it to home automation via the internet.
  5. The heart of this module is the ENC28J60 Ethernet controller from Microchip.
  6. The use of RJ45 with Integrated magnetics has made it possible to reduce the size of the board.

Features:

  1. Ethernet LAN Module for Arduino/AVR/LPC/STM3
  2. ENC28J60 Ethernet chips
  3. Can be easily mounted with the MCU
  4. Network Interface: HR911105A
  5. Supply Voltage: 3.3 V (5V Tolerant DIO)
  6. 25Mhz crystal oscillator
  7. Size (L x W x H): Approx. 2.3 x 1.3 x 0.7 inch / 58 x 34 x 17 mm


Block Diagram & Connections:

This is the simple block diagram that explains how an Arduino & ENC28J60 module can be interfaced with Router and Computer.

Interface ENC28J60 Ethernet Module Arduino
Figure: Block Diagram

The Router should be connected with LAN and should have multiple input-output ports. From the router, one ethernet cable is connected to Computer System and another ethernet cable should be connected to the ENC28J60 Module. Similarly, the ENC28J60 Module is connected to Arduino. The connection between Arduino & ENC28J60 is given below.

Interface ENC28J60 Ethernet Module Arduino
Figure: Connection Between ENC28J60 & Arduino

How to Interface ENC28J60 Ethernet Module with Arduino Webserver:

  1. Download the Library for ENC28J60 from here: ENC28J60 Library

  2. Add the library files to your Arduino IDE library:

  1. Open Examples and choose the exapmple from Ethernet Master Library:

Interface ENC28J60 Ethernet Module with Arduino

  1. Compile & then upload the code to Arduino UNO Board:

  2. Open Serial Monitor and copy the IP address:

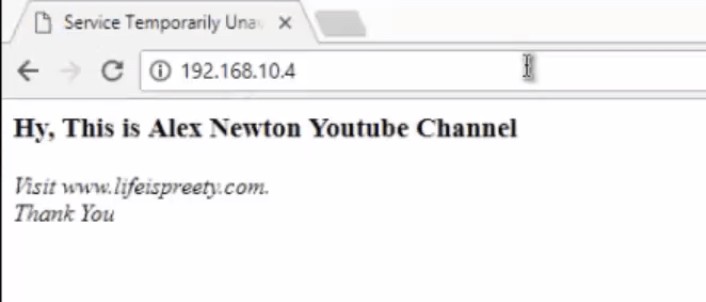
  1. Open google chrome or any other web browser and paste the IP address and hit enter:


Sample Code to Interface ENC28J60 Ethernet Module with Arduino:

1
2
3
4
5
6
7
8
9
10
11
12
13
14
15
16
17
18
19
20
21
22
23
24
25
26
27
28
29
30
31
32
33
34
35
36
37
38
39
40
41
42
43
44
45
46
47
48
49
50
51
52
53
54
55
56
57
58
59
60
#include <EtherCard.h>
 
#define STATIC 0 // set to 1 to disable DHCP (adjust myip/gwip values below)
 
#if STATIC
// ethernet interface ip address
static byte myip[] = { 192,168,1,200 };
// gateway ip address
static byte gwip[] = { 192,168,1,1 };
#endif
 
// ethernet mac address – must be unique on your network
static byte mymac[] = { 0x74,0x69,0x69,0x2D,0x30,0x31 };
 
byte Ethernet::buffer[500]; // tcp/ip send and receive buffer
 
const char page[] PROGMEM =
“HTTP/1.0 503 Service Unavailable\r\n”
“Content-Type: text/html\r\n”
“Retry-After: 600\r\n”
“\r\n”
“<html>”
“<head><title>”
“Service Temporarily Unavailable”
“</title></head>”
“<body>”
“<h3>This service is currently unavailable</h3>”
“<p><em>”
“The main server is currently off-line.<br />”
“Please try again later.”
“</em></p>”
“</body>”
“</html>”
;
 
void setup(){
Serial.begin(57600);
Serial.println(“\n[backSoon]”);
 
if (ether.begin(sizeof Ethernet::buffer, mymac) == 0)
Serial.println( “Failed to access Ethernet controller”);
#if STATIC
ether.staticSetup(myip, gwip);
#else
if (!ether.dhcpSetup())
Serial.println(“DHCP failed”);
#endif
 
ether.printIp(“IP: “, ether.myip);
ether.printIp(“GW: “, ether.gwip);
ether.printIp(“DNS: “, ether.dnsip);
}
 
void loop(){
// wait for an incoming TCP packet, but ignore its contents
if (ether.packetLoop(ether.packetReceive())) {
memcpy_P(ether.tcpOffset(), page, sizeof page);
ether.httpServerReply(sizeof page – 1);
}
}


Video Explanation & Demonstration:

ENC28J60 Arduino Tutorial - Interface ENC28J60 with Arduino & Create your own Server
Watch this video on YouTube.

Share. Facebook Twitter Pinterest LinkedIn Tumblr Email Reddit Telegram WhatsApp
Previous ArticleArduino SIM: Cellular Connectivity Service for Arduino IoT Cloud
Next Article Weighing Machine using Arduino Load Cell & HX711 Module

Related Posts

ESP32 Fingerprint Attendance System with Live Web Dashboard

Updated:June 14, 2026
IoT Based PM & Air Quality Monitoring System using ESP32

IoT Based PM & Air Quality Monitoring System using ESP32

Updated:June 14, 2026
DIY ESP32 MLX90640 IR Thermal Camera with Live Web Display

DIY ESP32 MLX90640 IR Thermal Camera with Live Web Display

Updated:May 10, 20261K
IoT Activity Tracker with ESP32 & Accelerometer Gyroscope

IoT Activity Tracker with ESP32 & Accelerometer/Gyroscope

Updated:May 2, 2026

ESP32 IoT Vehicle Motion Analyzer with MPU6050 & LIS3MDL

Updated:April 27, 20261K
High-Accuracy Pitch, Roll, Yaw with ESP32 & BNO08x IMU

High-Accuracy Pitch, Roll, Yaw with ESP32 & BNO08x IMU

Updated:April 27, 20262K
View 3 Comments

3 Comments

  1. Peter on July 29, 2018 5:47 AM

    When I connect the circuit, load the example “backSoone”. It does not work !

    After I search the begin function of EtherCard class, it uses default SS pin (pin 10). After I connect pin 10 to CS of ENC28J60 module. It works !!!

    Please update the connection diagram .

    Reply
  2. jalpa on June 16, 2021 3:44 PM

    No getting the required output,it stucks in loop.and also no ip change

    Reply
  3. nuzrath on February 4, 2022 7:48 PM

    yes that fix help, thank you for sharing .!

    Reply

CommentsCancel reply

Latest Posts

ESP32 Fingerprint Attendance System with Live Web Dashboard

June 14, 2026
IoT Based PM & Air Quality Monitoring System using ESP32

IoT Based PM & Air Quality Monitoring System using ESP32

June 14, 2026
DIY ESP32 MLX90640 IR Thermal Camera with Live Web Display

DIY ESP32 MLX90640 IR Thermal Camera with Live Web Display

May 10, 2026
IoT Activity Tracker with ESP32 & Accelerometer Gyroscope

IoT Activity Tracker with ESP32 & Accelerometer/Gyroscope

May 2, 2026
A Guide to Sourcing Obsolete ICs for Vintage Projects

Beyond AliExpress: A Guide to Sourcing Obsolete ICs for Vintage Projects

April 21, 2026

ESP32 IoT Vehicle Motion Analyzer with MPU6050 & LIS3MDL

April 27, 2026
Building a Smart Sensor Node with a BLE Microcontroller

Building a Smart Sensor Node with a BLE Microcontroller

February 26, 2026
High-Accuracy Pitch, Roll, Yaw with ESP32 & BNO08x IMU

High-Accuracy Pitch, Roll, Yaw with ESP32 & BNO08x IMU

April 27, 2026
Top Posts & Pages
  • IoT Based PM & Air Quality Monitoring System using ESP32
    IoT Based PM & Air Quality Monitoring System using ESP32
  • 12V DC to 220V AC Inverter Circuit & PCB
    12V DC to 220V AC Inverter Circuit & PCB
  • Buck Converter: Basics, Working, Design & Application
    Buck Converter: Basics, Working, Design & Application
  • How to use INA219 DC Current Sensor Module with Arduino
    How to use INA219 DC Current Sensor Module with Arduino
  • Designing of MPPT Solar Charge Controller using Arduino
    Designing of MPPT Solar Charge Controller using Arduino
  • High-Accuracy Pitch, Roll, Yaw with ESP32 & BNO08x IMU
    High-Accuracy Pitch, Roll, Yaw with ESP32 & BNO08x IMU
  • L293D Dual H-Bridge Motor Driver IC Pins, Circuit, Working
    L293D Dual H-Bridge Motor Driver IC Pins, Circuit, Working
  • IoT Based Electricity Energy Meter using ESP32 & Blynk
    IoT Based Electricity Energy Meter using ESP32 & Blynk
Categories
  • Arduino Projects (197)
  • Articles (60)
    • Learn Electronics (19)
    • Product Review (15)
    • Tech Articles (28)
  • Electronics Circuits (46)
    • 555 Timer Projects (21)
    • Op-Amp Circuits (7)
    • Power Electronics (13)
  • IoT Projects (205)
    • ESP32 MicroPython (7)
    • ESP32 Projects (82)
    • ESP32-CAM Projects (15)
    • ESP8266 Projects (76)
    • LoRa/LoRaWAN Projects (22)
  • Microcontrollers (38)
    • AMB82-Mini IoT AI Camera (4)
    • BLE Projects (18)
    • STM32 Projects (19)
  • Raspberry Pi (93)
    • Raspberry Pi Pico Projects (57)
    • Raspberry Pi Pico W Projects (12)
    • Raspberry Pi Projects (24)
Follow Us
  • Facebook
  • Twitter
  • Pinterest
  • Instagram
  • YouTube
About Us

“‘How to Electronics’ is a vibrant community for electronics enthusiasts and professionals. We deliver latest insights in areas such as Embedded Systems, Power Electronics, AI, IoT, and Robotics. Our goal is to stimulate innovation and provide practical solutions for students, organizations, and industries. Join us to transform learning into a joyful journey of discovery and innovation.

Copyright © How To Electronics. All rights reserved.
  • About Us
  • Disclaimer
  • Privacy Policy
  • Contact Us
  • Advertise With Us

Type above and press Enter to search. Press Esc to cancel.

Ad Blocker Enabled!
Ad Blocker Enabled!
Looks like you're using an ad blocker. Please allow ads on our site. We rely on advertising to help fund our site.