Close Menu
  • Articles
    • Learn Electronics
    • Product Review
    • Tech Articles
  • Electronics Circuits
    • 555 Timer Projects
    • Op-Amp Circuits
    • Power Electronics
  • Microcontrollers
    • Arduino Projects
    • STM32 Projects
    • AMB82-Mini IoT AI Camera
    • BLE Projects
  • IoT Projects
    • ESP8266 Projects
    • ESP32 Projects
    • ESP32 MicroPython
    • ESP32-CAM Projects
    • LoRa/LoRaWAN Projects
  • Raspberry Pi
    • Raspberry Pi Projects
    • Raspberry Pi Pico Projects
    • Raspberry Pi Pico W Projects
  • Electronics Calculator
Facebook X (Twitter) Instagram
  • About Us
  • Disclaimer
  • Privacy Policy
  • Contact Us
  • Advertise With Us
Facebook X (Twitter) Instagram Pinterest YouTube LinkedIn
How To Electronics
  • Articles
    • Learn Electronics
    • Product Review
    • Tech Articles
  • Electronics Circuits
    • 555 Timer Projects
    • Op-Amp Circuits
    • Power Electronics
  • Microcontrollers
    • Arduino Projects
    • STM32 Projects
    • AMB82-Mini IoT AI Camera
    • BLE Projects
  • IoT Projects
    • ESP8266 Projects
    • ESP32 Projects
    • ESP32 MicroPython
    • ESP32-CAM Projects
    • LoRa/LoRaWAN Projects
  • Raspberry Pi
    • Raspberry Pi Projects
    • Raspberry Pi Pico Projects
    • Raspberry Pi Pico W Projects
  • Electronics Calculator
How To Electronics
Home » ESP8266 SHT31 Humidity Temperature Monitoring on Thingspeak
ESP8266 Projects IoT Projects

ESP8266 SHT31 Humidity Temperature Monitoring on Thingspeak

Mamtaz AlamBy Mamtaz AlamUpdated:August 21, 20221 Comment4 Mins Read
Share Facebook Twitter LinkedIn Telegram Reddit WhatsApp
ESP8266 SHT31
Share
Facebook Twitter LinkedIn Pinterest Email Reddit Telegram WhatsApp

In this post we will interface SHT31 Humidity & Temperature Sensor with NodeMCU ESP8266 Board. Thus using Nodemcu ESP8266 & SHT31, we will monitor the temperature and humidity data online on thingspeak.


Overview

There are various humidity & temperature sensors like DHT11 & HTU21D. But while talking about the accuracy none of them are suitable for industrial level temperature humidity monitoring due to the accuracy and precision. They have poor accuracy as well as sensitivity. So here we will use the SHT31 Temperature/Humidity sensor. They are the finest & highest-accuracy devices you can get. It is a digital sensor with an I2C interface which makes for easy reading of humidity and temperature. The SHT31 sensor has an excellent ±2% relative humidity and ±0.3°C temperature accuracy for most uses.

In this project we will interface SHT31 Temperature/Humidity Sensor with Nodemcu ESP8266. We will send data to Thingspeak Server. ThingSpeak is an open-source Internet of Things application and API to store and retrieve data from things using the HTTP and MQTT protocol over the Internet or via a Local Area Network.

If you want to learn more about SHT31 you can check our earlier post:
1. Interfacing SHT3x Humidity & Temperature Sensor with Arduino
2. ESP32 SHT31 Temperature & Humidity Monitor on Web Server


Bill of Materials

Following are the components required for this simple IOT project. All the components can be easily purchased from Amazon. The component purchase link is given below.

S.N.Components QuantityPurchase Links
1NodeMCU ESP82661Amazon | AliExpress
2SHT31 Sensor1Amazon | AliExpress
3Connecting Wires5Amazon | AliExpress
4Breadboard1Amazon | AliExpress

SHT31 Humidity Temperature Sensor

SHT31 is the next generation of Sensirion’s temperature and humidity sensors. The SHT31 has increased intelligence, reliability, and improved accuracy specifications compared to its predecessor. Its functionality includes enhanced signal processing, temperature, and humidity that can be read out using I2C communications. This I2C Mini Module makes it easy to read temperature and humidity using our standardized sensor footprint. Plug into a Particle interface module for cloud access from anywhere in the world.

SHT31 Sensor

All I2C Mini Modules are designed to operate at 5V DC. Using a convenient 4-Pin plug, devices can be daisy-chained onto the I2C Bus, eliminating the need for soldering. Simply plug together the devices you need for your next automation application.

Features of SHT31 Sensor

1. Dual Purpose Temperature and Humidity Sensor
2. Accuracy of ±2% Relative Humidity
3. 0-100% Humidity Sensing Range
4. -40 to +125°C (-40 to +257°F) Operating Temperature
5. 8-Second Sensor Response Time
6. 0x44 Start Address
7. Modular SHT31 breakout board


Schematic: Interfacing SHT31 with Nodemcu ESP8266

Here is the schematic for Interfacing SHT31 Humidity Temperature Sensor with Nodemcu ESP8266.

Nodemcu ESP8266 SHT31

Connect the VCC pin of SHT31 to 3.3V of ESP8266 & GND to GND. Connect the SCL & SDA pin of SHT31 to ESP38266 SCL (D1) & SDA (D2) pin respectively as shown in the figure above.

Nodemcu SHT31


Setting Up Thingspeak

  1. Go to https://thingspeak.com/ and create an account if you do not have one. Login to your account if you have already.

  2. Create a new channel by clicking on the Create button. Enter basic details of the channel like field 1 & field2. Then Scroll down and save the channel.

  3. Then go to API keys copy and paste this key to a separate notepad file. You will need it later while programming.


Source Code/Program

The source code for Interfacing SHT31 with NodeMCU ESP8266 is given below. You can copy this code and upload it to ESP8266 Board. But before that you need library for SHT31 Sensor. So download the library from the link below.

Download SHT31 Library


1
2
3
4
5
6
7
8
9
10
11
12
13
14
15
16
17
18
19
20
21
22
23
24
25
26
27
28
29
30
31
32
33
34
35
36
37
38
39
40
41
42
43
44
45
46
47
48
49
50
51
52
53
54
55
56
57
58
59
60
61
62
63
64
65
66
67
68
69
70
71
72
73
74
75
76
77
78
79
80
81
82
83
84
85
86
#include <ESP8266WiFi.h>
#include <Arduino.h>
#include <Wire.h>
#include "Adafruit_SHT31.h"
 
String apiKey = "PW3AKTNO270BFQGT";    // Enter your Write API key from ThingSpeak
const char *ssid = "BYNARK";          // replace with your wifi ssid and wpa2 key
const char *pass = "bynark@123";
const char* server = "api.thingspeak.com";
WiFiClient client;
 
Adafruit_SHT31 sht31 = Adafruit_SHT31();
 
void setup()
{
Serial.begin(115200);
 
  while (!Serial)
  delay(10);             // will pause Zero, Leonardo, etc until serial console opens
 
Serial.println("Connecting to ");
Serial.println(ssid);
WiFi.begin(ssid, pass);
while (WiFi.status() != WL_CONNECTED)
{
  delay(500);
  Serial.print(".");
}
  Serial.println("");
  Serial.println("WiFi connected");
 
Serial.println("SHT31 test");
if (! sht31.begin(0x44))        // Set to 0x45 for alternate i2c addr
{
Serial.println("Couldn't find SHT31");
while (1) delay(1);
}
}
 
void loop()
{
  float t = sht31.readTemperature();
  float h = sht31.readHumidity();
 
 
if (client.connect(server,80))   //   "184.106.153.149" or api.thingspeak.com
      {  
       String sendData = apiKey+"&field1="+String(t)+"&field2="+String(h)+"\r\n\r\n";
      
       //Serial.println(sendData);
 
       client.print("POST /update HTTP/1.1\n");
       client.print("Host: api.thingspeak.com\n");
       client.print("Connection: close\n");
       client.print("X-THINGSPEAKAPIKEY: "+apiKey+"\n");
       client.print("Content-Type: application/x-www-form-urlencoded\n");
       client.print("Content-Length: ");
       client.print(sendData.length());
       client.print("\n\n");
       client.print(sendData);
      }
 
if (! isnan(t))      // check if 'is not a number'
{
Serial.print("Temp *C = ");
Serial.println(t);
 
}
else
{
Serial.println("Failed to read temperature");
}
 
if (! isnan(h))      // check if 'is not a number'
{
Serial.print("Hum. % = ");
Serial.println(h);
 
}
else
{
Serial.println("Failed to read humidity");
}
Serial.println();
delay(1000);
}


Monitoring Data on Thingspeak

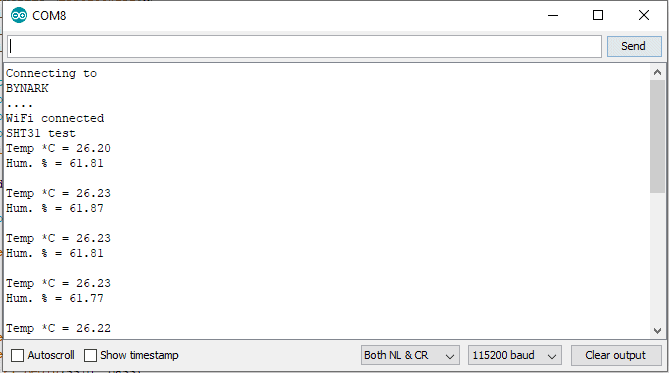
After uploading, open the Serial Monitor at a baud rate of 115200. Press the ESP8266 reset button. The wifi connecting status should be printed in the serial monitor along with the humidity and temperature value.

Now you can go to thingspeak private view and check the data online. The data is updated to thingspeak server after the interval of 15 seconds.

SHT31 Thingspeak

Share. Facebook Twitter Pinterest LinkedIn Tumblr Email Reddit Telegram WhatsApp
Previous ArticleBrain Computer Interface (BCI) System Overview & Applications
Next Article STM32 & DS3231 Based Real Time Clock with OLED

Related Posts

IoT Based PM & Air Quality Monitoring System using ESP32

IoT Based PM & Air Quality Monitoring System using ESP32

DIY ESP32 MLX90640 IR Thermal Camera with Live Web Display

DIY ESP32 MLX90640 IR Thermal Camera with Live Web Display

Updated:May 10, 20261K
IoT Activity Tracker with ESP32 & Accelerometer Gyroscope

IoT Activity Tracker with ESP32 & Accelerometer/Gyroscope

Updated:May 2, 2026

ESP32 IoT Vehicle Motion Analyzer with MPU6050 & LIS3MDL

Updated:April 27, 20261K
High-Accuracy Pitch, Roll, Yaw with ESP32 & BNO08x IMU

High-Accuracy Pitch, Roll, Yaw with ESP32 & BNO08x IMU

Updated:April 27, 20262K
DIY Colorimeter using AS7265x Spectroscopy Sensor & ESP32

DIY Colorimeter using AS7265x Spectroscopy Sensor & ESP32

Updated:February 1, 20261K
View 1 Comment

1 Comment

  1. Gamefanatic on October 3, 2021 3:25 AM

    Adafruit_I2CDevice.h was not identified as needing to be downloaded.
    Sketch > Include Library > Manage Libraries > Adafruit BusIO

    Reply

CommentsCancel reply

Latest Posts
IoT Based PM & Air Quality Monitoring System using ESP32

IoT Based PM & Air Quality Monitoring System using ESP32

May 31, 2026
DIY ESP32 MLX90640 IR Thermal Camera with Live Web Display

DIY ESP32 MLX90640 IR Thermal Camera with Live Web Display

May 10, 2026
IoT Activity Tracker with ESP32 & Accelerometer Gyroscope

IoT Activity Tracker with ESP32 & Accelerometer/Gyroscope

May 2, 2026
A Guide to Sourcing Obsolete ICs for Vintage Projects

Beyond AliExpress: A Guide to Sourcing Obsolete ICs for Vintage Projects

April 21, 2026

ESP32 IoT Vehicle Motion Analyzer with MPU6050 & LIS3MDL

April 27, 2026
Building a Smart Sensor Node with a BLE Microcontroller

Building a Smart Sensor Node with a BLE Microcontroller

February 26, 2026
High-Accuracy Pitch, Roll, Yaw with ESP32 & BNO08x IMU

High-Accuracy Pitch, Roll, Yaw with ESP32 & BNO08x IMU

April 27, 2026
DIY Colorimeter using AS7265x Spectroscopy Sensor & ESP32

DIY Colorimeter using AS7265x Spectroscopy Sensor & ESP32

February 1, 2026
Top Posts & Pages
  • 12V DC to 220V AC Inverter Circuit & PCB
    12V DC to 220V AC Inverter Circuit & PCB
  • IoT Based PM & Air Quality Monitoring System using ESP32
    IoT Based PM & Air Quality Monitoring System using ESP32
  • Buck Converter: Basics, Working, Design & Application
    Buck Converter: Basics, Working, Design & Application
  • IoT AC Energy Meter with PZEM-004T & ESP32 WebServer
    IoT AC Energy Meter with PZEM-004T & ESP32 WebServer
  • ECG Graph Monitoring with AD8232 ECG Sensor & Arduino
    ECG Graph Monitoring with AD8232 ECG Sensor & Arduino
  • How to use INA226 DC Current Sensor with Arduino
    How to use INA226 DC Current Sensor with Arduino
  • IoT Based ECG Monitoring with AD8232 ECG Sensor & ESP32
    IoT Based ECG Monitoring with AD8232 ECG Sensor & ESP32
  • How to use INA219 DC Current Sensor Module with Arduino
    How to use INA219 DC Current Sensor Module with Arduino
Categories
  • Arduino Projects (197)
  • Articles (60)
    • Learn Electronics (19)
    • Product Review (15)
    • Tech Articles (28)
  • Electronics Circuits (46)
    • 555 Timer Projects (21)
    • Op-Amp Circuits (7)
    • Power Electronics (13)
  • IoT Projects (204)
    • ESP32 MicroPython (7)
    • ESP32 Projects (81)
    • ESP32-CAM Projects (15)
    • ESP8266 Projects (76)
    • LoRa/LoRaWAN Projects (22)
  • Microcontrollers (38)
    • AMB82-Mini IoT AI Camera (4)
    • BLE Projects (18)
    • STM32 Projects (19)
  • Raspberry Pi (93)
    • Raspberry Pi Pico Projects (57)
    • Raspberry Pi Pico W Projects (12)
    • Raspberry Pi Projects (24)
Follow Us
  • Facebook
  • Twitter
  • Pinterest
  • Instagram
  • YouTube
About Us

“‘How to Electronics’ is a vibrant community for electronics enthusiasts and professionals. We deliver latest insights in areas such as Embedded Systems, Power Electronics, AI, IoT, and Robotics. Our goal is to stimulate innovation and provide practical solutions for students, organizations, and industries. Join us to transform learning into a joyful journey of discovery and innovation.

Copyright © How To Electronics. All rights reserved.
  • About Us
  • Disclaimer
  • Privacy Policy
  • Contact Us
  • Advertise With Us

Type above and press Enter to search. Press Esc to cancel.

Ad Blocker Enabled!
Ad Blocker Enabled!
Looks like you're using an ad blocker. Please allow ads on our site. We rely on advertising to help fund our site.