

In this tutorial we will learn about how to Control LED using Google Firebase & ESP8266.
Overview: IoT Based LED Control using Google Firebase & ESP8266
Using the IoT hardware & cloud platform, we can control the IoT devices including LEDs from any part of the world. This mini IoT Based Projects deals with LED Control using Google Firebase Console & NodeMCU ESP8266 wifi Module. There are various methods of controlling of the LED such as using Web Server or Webpage, Blynk Application and using other API based services. But here we will only focus on Google Firebase
Google Firebase is a Google-backed application development software used for creating, managing,and modifying data generated from any android/IOS application, web services, IoT sensors & Hardware. To learn more about the Google Firebase Console, you can read the official Google Firebase Documentation from Google Firebase

Bill of Materials
Following are the components required for making this project. All the components can be easily purchased from Amazon. The component purchase link is given below.
| S.N. | Components Name | Quantity | Purchase Links |
|---|---|---|---|
| 1 | NodeMCU ESP8266 Board | 1 | Amazon | AliExpress |
| 2 | LED 5mm Any Color | 1 | Amazon | AliExpress |
| 3 | Resistor 220-ohm | 1 | Amazon | AliExpress |
| 4 | Power Supply 5V | 1 | Amazon | AliExpress |
| 5 | Connecting Jumper Wires | 10 | Amazon | AliExpress |
| 6 | Breadboard | 1 | Amazon | AliExpress |
Setting Up Hardware & NodeMCU LED Circuit
Here is a circuit diagram for connecting LED with NodeMCU ESP8266 Board. Connect the positive terminal of LED to GPIO5, i.e D1 of NodeMCU ESP8266 via 220ohm resistor as shown in the figure below.

Installing Firebase & JSON Library
FirebaseArduino is a library to simplify connecting to the Firebase database from Arduino clients. It is a full abstraction of Firebase’s REST API exposed through C++ calls in a wiring friendly way. All JSON parsing is handled by the library and you may deal in pure C/Arduino types.
The library cannot work standalone. So you need to add the ArduinoJSON library as well.
1. ArduinoJSON Library
So first go to the library manager and search for “JSON” & install the library as shown in the figure below.

Note: The latest JSON library might not work with the code. So you may need to downgrade the library to version v5.13.5
2. Google FirebaseExtended Library
Now you need to install Google Firebase library as well. So, download the library from below link and add it to Library folder after extraction.
Setting up Google Firebase
To Control the LED using Google Firebase & Nodemcu ESP8266, you need to setup the Google Firebase first. The step is little long but don’t be panic, because I have explained all the steps below.
Step 1: If you have Gmail id then you are already Sign Up for firebase. But if you don’t have Gmail id then first Sign Up for Gmail: https://gmail.com/
Step 2:Now visit https://firebase.google.com/ and click on Go to Console on the Top Right.

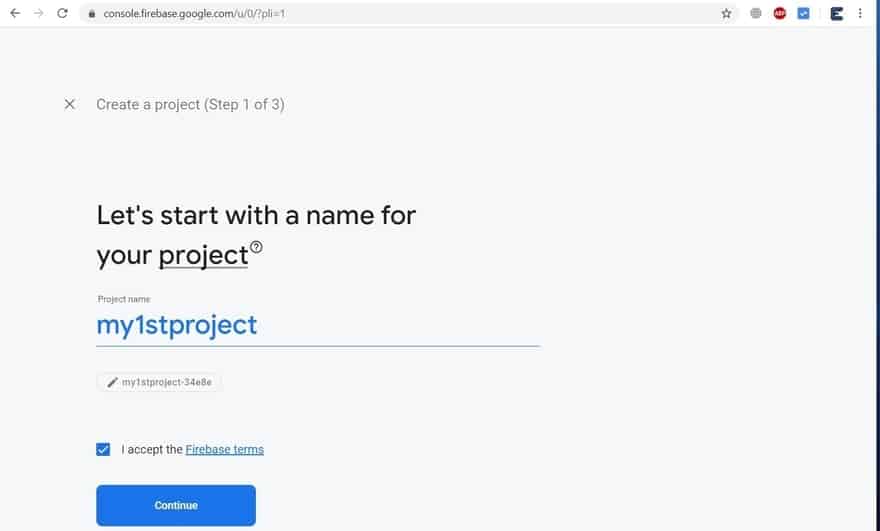
Step 3: Click on “Create a Project”.

Step 4: Give your “Project name”, then tick the “I Accept the Firebase Terms” & finally Click on “Continue”.
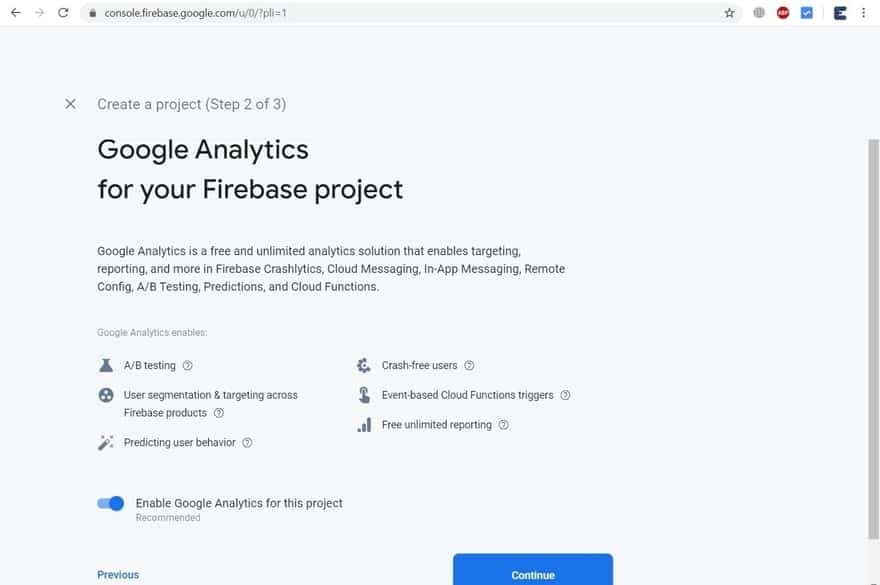
Step 5: Now, another window will appear. So click on “Continue”.
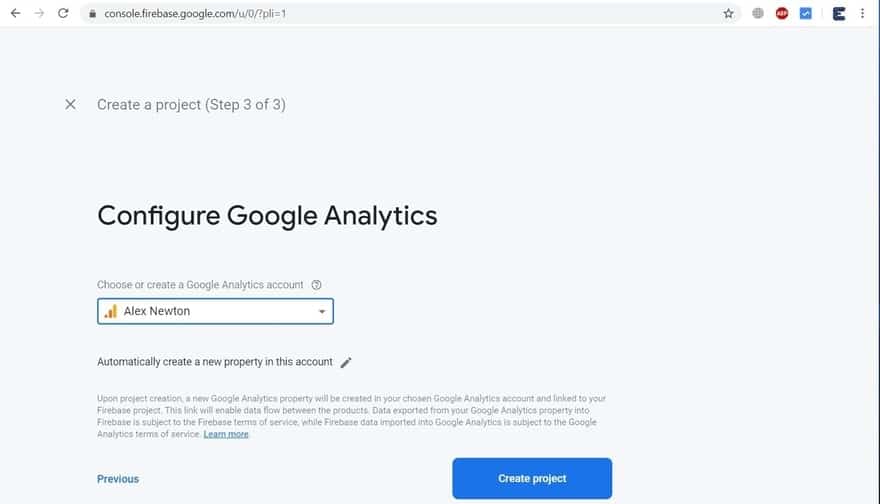
Step 6: Select the “google Analytics Account” that is made using the Gmail ID. And then click on “Create Project”.
Step 7: Your project is ready now. So you will get the following window. Click on “Continue”.

Step 8: Now click on “Project Setting”.

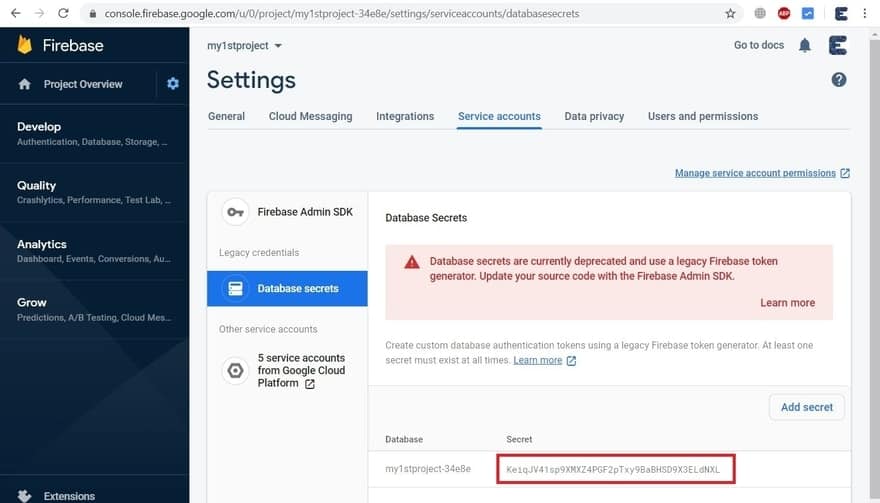
Step 9: Under Project Setting, Click on “Service Accounts”. Copy the secret key from below. The code is required in the Arduino Code.
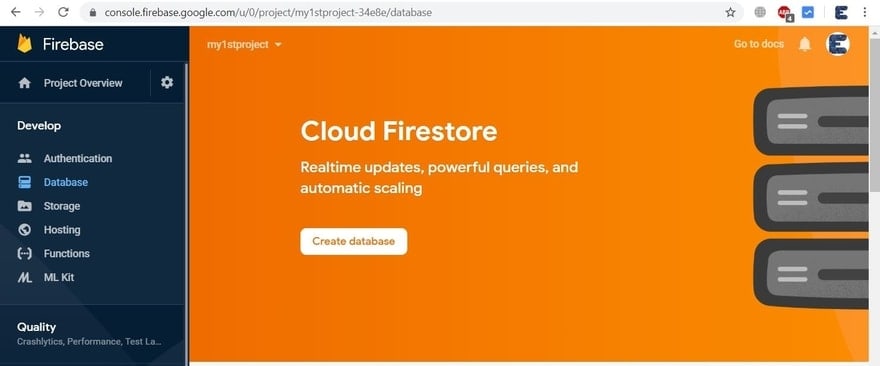
Step 10: Click on “Create Database”.
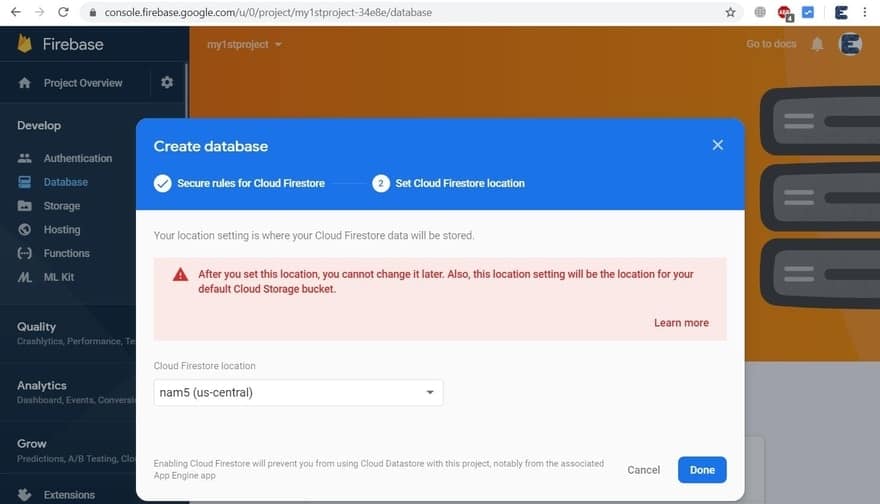
Step 11: Choose “Start in Test Mode” and then click on “Next”.

Step 12: Now click on “Done” & from left side click on “Database”.
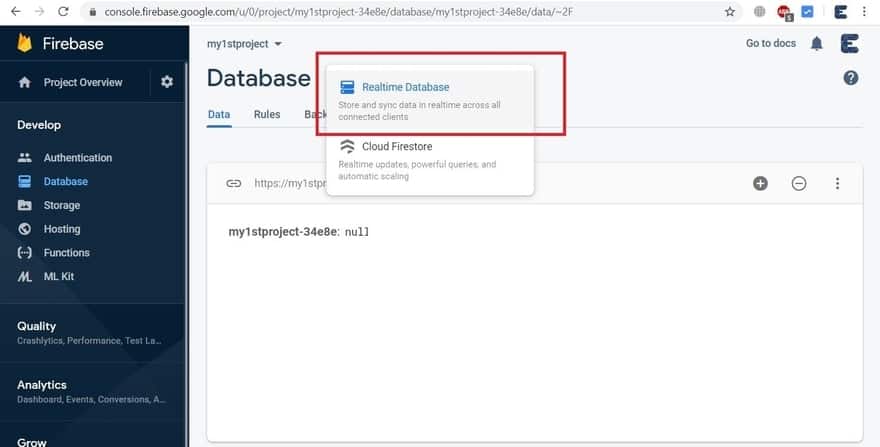
Step 13: Select the “Realtime Database” option from the Database List.
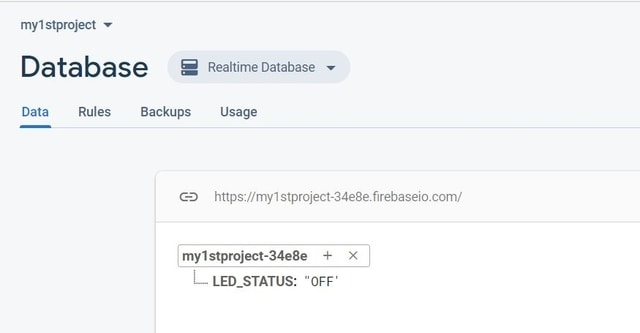
Step 14: Now your final project is ready. You can modify the “ON/OFF” line from the list.

Step 15: Copy the “secret key” & “Project name“. This are required in the Arduino code. The Project name looks something like this “https://your_project_name.firebaseio.com/”
LED Control using Google Firebase & ESP8266
Now we are done with the hardware setup & Google Firebase Setup both. You can upload the code to the NodeMCU ESP8266 Board. The complete code is given below.

You can write “ON” to turn on the LED using Firebase. Similarly, if you want to turn ofF the LED you need to write “OFF”.
Source Code: IoT Based LED Control using Google Firebase & ESP8266
Here is a Source Code/Program for Control of LED using Google Firebase Control & ESP8266. Copy the code and upload it to the NodeMCU ESP8266 Board.
|
1 2 3 4 |
#define FIREBASE_HOST "my1stproject-34e8e.firebaseio.com" #define FIREBASE_AUTH "KeiqJV41s********************LdNXL" #define WIFI_SSID "Alexahome" #define WIFI_PASSWORD "12345678" |
Before uploading the code, make changes to the following parameters like FIREBASE_HOST, FIREBASE_AUTH, WIFI_SSID & WIFI_PASSWORD.
|
1 2 3 4 5 6 7 8 9 10 11 12 13 14 15 16 17 18 19 20 21 22 23 24 25 26 27 28 29 30 31 32 33 34 35 36 37 38 39 40 41 42 43 44 45 46 47 48 49 |
#include <ESP8266WiFi.h> #include <FirebaseArduino.h> #define FIREBASE_HOST "my1stproject-34e8e.firebaseio.com" // the project name address from firebase id #define FIREBASE_AUTH "KeiqJV41s********************LdNXL" // the secret key generated from firebase #define WIFI_SSID "Alexahome" #define WIFI_PASSWORD "12345678" String fireStatus = ""; // led status received from firebase int led = 5; void setup() { Serial.begin(9600); delay(1000); pinMode(led, OUTPUT); WiFi.begin(WIFI_SSID, WIFI_PASSWORD); Serial.print("Connecting to "); Serial.print(WIFI_SSID); while (WiFi.status() != WL_CONNECTED) { Serial.print("."); delay(500); } Serial.println(); Serial.print("Connected to "); Serial.println(WIFI_SSID); Firebase.begin(FIREBASE_HOST, FIREBASE_AUTH); // connect to firebase Firebase.setString("LED_STATUS", "OFF"); //send initial string of led status } void loop() { fireStatus = Firebase.getString("LED_STATUS"); // get ld status input from firebase if (fireStatus == "ON") { // compare the input of led status received from firebase Serial.println("Led Turned ON"); digitalWrite(led, HIGH); // make external led ON } else if (fireStatus == "OFF") { // compare the input of led status received from firebase Serial.println("Led Turned OFF"); digitalWrite(led, LOW); // make external led OFF } else { Serial.println("Command Error! Please send ON/OFF"); } } |
Code Explanation
First, we include the libraries for using ESP8266 and firebase.
|
1 2 |
#include <ESP8266WiFi.h> #include <FirebaseArduino.h> |
Then we define the two parameters FIREBASE_HOST & FIREBASE_AUTH. We get these parameters from Google Firebase Setup. These two parameters are very important to communicate with firebase. This enables the data exchange between the ESP8266 and firebase.
|
1 2 |
#define FIREBASE_HOST "my1stproject-34e8e.firebaseio.com" #define FIREBASE_AUTH "KeiqJV41s********************LdNXL" |
Then we define the WiFi SSID & Password. Replace SSID and password with your network SSID and password. The Nodemcu will connect to the network & communicates with Google Firewall.
|
1 2 |
#define WIFI_SSID "Alexahome" #define WIFI_PASSWORD "12345678" |
This code will make Nodemcu ESP8266 connect to the network. Once connected it will display the WiFi SSID name.
|
1 2 3 4 5 6 7 8 |
WiFi.begin(WIFI_SSID, WIFI_PASSWORD); Serial.print("Connecting to "); Serial.print(WIFI_SSID); while (WiFi.status() != WL_CONNECTED) { Serial.print("."); delay(500); } |
This statement lets the Nodemcu connect with the firebase server. If the host address and authorization key are correct then it will connect successfully
|
1 |
Firebase.begin(FIREBASE_HOST, FIREBASE_AUTH); |
This is the class provided by the firebase library to send a string to the firebase server. The status of LED is changed using this.
|
1 |
Firebase.setString("LED_STATUS", "OFF"); |
Under the loop function, after sending one status string to the firebase path, write this statement to get the status of LED from the same path and save it to a variable.
|
1 2 3 4 5 6 7 8 9 10 11 12 |
fireStatus = Firebase.getString("LED_STATUS"); = if (fireStatus == "ON") { Serial.println("Led Turned ON"); digitalWrite(led, HIGH); } else if (fireStatus == "OFF") { Serial.println("Led Turned OFF"); digitalWrite(led, LOW); } else { Serial.println("Command Error! Please send ON/OFF"); } |
The LED will turn ON/OFF depending upon the String received as “ON” or “OFF respectively. If any other character is sent, the serial monitor will display “Command Error! Please send ON/OFF”
This was all about the controlling of LED using Google Firebase. Now there is another side of the tutorial, what if you want to send the sensor data to google Firebase? So for that, you can follow this post.
Video Tutorial & Complete Guide

Home Automation using Google Firebase & NodeMCU ESP8266
 & Live Dashboard")


4 Comments
sir i cant make the connection between firebase(server) and nodemcu 🙁 please help
Not appear Database secret key.
Database secrets are currently deprecated and use a legacy Firebase token generator. Update your source code with the Firebase Admin SDK.
how can i add secret key in arduino codes?
How to add Firebase Admin SDK to Arduino Code ? please help !
Compilation error: exit status 1
please help me