


Overview
In this guide, you’ll learn about ESP8266 EEPROM Manual Wifi Configuration without Hard-Code Network Credentials. You will also learn how to configure wifi settings in the ESP8266 board manually without hard coding again and again by saving. Here we will use an EEPROM library that will allow you to connect your ESP8266 to different Access Points (AP) without having to hard-code and upload new code to your board. ESP8266 Wifi-Manager Library is one of the ways for configuring manually but here we will not be using it.
All the IoT Products acts like this only. Initially, they all act as a hotspot. Then you need to connect your phone or PC to that hotspot. Once the hotspot is connected, then go to the particular IP Address (192.168.4.1) and then enter the Wifi Credentials and then automatically it gets connected to a home router or wifi. So most of the IoT devices are built using the ESP8266, which allows you to set up the network configuration (e.g. SSID, and password of a WiFi router ) through a form and store it in its memory.
ESP8266 Manual Wifi Configuration with EEPROM
Here we will build an IoT device, using the ESP8266, that allows you to set up the network configuration (e.g. SSID, and password of a WiFi router ) through a form and store it in its EEPROM memory. This is a bit harder to do then Arduino Boards. The ESP8266 does not really have an EEPROM like all the real Arduino boards have. This is why most of us struggle to use the EEPROM library with the ESP8266 development board.
By using this feature you no longer have to hard-code your network credentials (SSID and password). Your ESP will automatically join a known network or set up an Access Point that you can use to configure the network credentials. Here’s how this process works:
1. When your ESP8266 boots, it is set up in Station mode and tries to connect to a previously saved Access Point (a known SSID and password combination).
2. If this process fails, it sets the ESP into Access Point mode;
3. Using any Wi-Fi enabled device with a browser, connect to the newly created Access Point.
4. After establishing a connection with the newly created Access Point, you can go to the default IP address 192.168.4.1 to open a web page that allows you to configure your SSID and password.
5. Once a new SSID and password is set, the ESP reboots and tries to connect.
6. If it establishes a connection, the process is completed successfully. Otherwise, it will be set up as an Access Point.
What is Access Point?
An access point is a device that creates a wireless local area network. Or WLAN, usually in an office or large building. An access point sometimes connects to a wired router, switch, or hub via an Ethernet cable, and projects a Wi-Fi signal to a designated area. It is also used for users to configure IoT devices for first-time use or password changes.

System & Code Working
The working of ESP8266 Manual Wifi Configuration with EEPROM has 3 sections. The first One (The EEPROM Conundrum), where we will look at how to write data to the ESP8266 memory.
Writing values other than integers to ESP8266 memory can be problematic. The main reason is that the standard EEPROM library does not work, because the ESP8266 does not have an EEPROM. The library we use simply emulates an EEPROM but in real life, we are writing to the FLASH Memory.
|
1 2 3 4 5 6 7 8 9 10 11 12 13 14 15 16 17 18 19 20 21 |
#include <ESP8266WiFi.h> #include <ESP8266HTTPClient.h> #include <ESP8266WebServer.h> #include <EEPROM.h> //Variables int i = 0; int statusCode; const char* ssid = "text"; const char* passphrase = "text"; String st; String content; //Function Decalration bool testWifi(void); void launchWeb(void); void setupAP(void); //Establishing Local server at port 80 whenever required ESP8266WebServer server(80); |
Anything we write to the ESP8266 memory will have to be a string, and we can write them one character at a time. First, we declare a String variable called st and content and few integers and const char*.
Then we will declare three different functions as:
|
1 2 3 |
bool testWifi(void); void launchWeb(void); void setupAP(void); |
|
1 2 3 4 5 6 7 8 9 10 |
Serial.begin(115200); //Initialising if(DEBUG)Serial Monitor Serial.println(); Serial.println("Disconnecting previously connected WiFi"); WiFi.disconnect(); EEPROM.begin(512); //Initialasing EEPROM delay(10); pinMode(LED_BUILTIN, OUTPUT); Serial.println(); Serial.println(); Serial.println("Startup"); |
First, initiate the EEPROM function with EEPROM.begin(512). And then set the size of the storage as well. Next cycle through the string value.
|
1 2 3 4 5 6 7 8 9 10 11 12 13 14 15 16 17 18 19 20 21 22 23 24 25 26 27 28 29 30 31 32 33 34 35 36 37 38 39 40 41 |
String esid; for (int i = 0; i < 32; ++i) { esid += char(EEPROM.read(i)); } Serial.println(); Serial.print("SSID: "); Serial.println(esid); Serial.println("Reading EEPROM pass"); String epass = ""; for (int i = 32; i < 96; ++i) { epass += char(EEPROM.read(i)); } Serial.print("PASS: "); Serial.println(epass); WiFi.begin(esid.c_str(), epass.c_str()); if (testWifi()) { Serial.println("Succesfully Connected!!!"); return; } else { Serial.println("Turning the HotSpot On"); launchWeb(); setupAP();// Setup HotSpot } Serial.println(); Serial.println("Waiting."); while ((WiFi.status() != WL_CONNECTED)) { Serial.print("."); delay(100); server.handleClient(); } |
Initially, the ESP8266 is set up in Station mode and tries to connect to a previously saved Access Point from EEPROM memory. If the access point and network are found, then it will connect to it.
If this process fails, it sets the ESP8266 into Access Point mode and creates a hotspot.
|
1 2 3 4 5 6 7 8 9 10 11 12 13 14 15 16 |
void loop() { if ((WiFi.status() == WL_CONNECTED)) { for (int i = 0; i < 10; i++) { digitalWrite(LED_BUILTIN, HIGH); delay(1000); digitalWrite(LED_BUILTIN, LOW); delay(1000); } } else { } |
In this section, you can put your own code whatever action you will like to do. For now, I will just blink the LED.
|
1 2 3 4 5 6 7 8 9 10 11 12 13 14 15 16 17 18 19 20 21 22 23 24 |
void createWebServer() { { server.on("/", []() { IPAddress ip = WiFi.softAPIP(); String ipStr = String(ip[0]) + '.' + String(ip[1]) + '.' + String(ip[2]) + '.' + String(ip[3]); content = "<!DOCTYPE HTML>\r\n<html>Hello from ESP8266 at "; content += "<form action=\"/scan\" method=\"POST\"><input type=\"submit\" value=\"scan\"></form>"; content += ipStr; content += "<p>"; content += st; content += "</p><form method='get' action='setting'><label>SSID: </label><input name='ssid' length=32><input name='pass' length=64><input type='submit'></form>"; content += "</html>"; server.send(200, "text/html", content); }); server.on("/scan", []() { //setupAP(); IPAddress ip = WiFi.softAPIP(); String ipStr = String(ip[0]) + '.' + String(ip[1]) + '.' + String(ip[2]) + '.' + String(ip[3]); content = "<!DOCTYPE HTML>\r\n<html>go back"; server.send(200, "text/html", content); }); |
Using any Wi-Fi-enabled device with a browser, connect to the newly created Access Point. After establishing a connection with the newly created Access Point, you can go to the default IP address 192.168.4.1 to open a web page that allows you to configure your SSID and password.

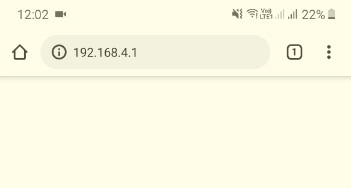
Once a new SSID and password is set, the ESP reboots and tries to connect. If it establishes a connection, the process is completed successfully. Otherwise, it will be set up as an Access Point.


Source Code/Program
The above-explained final code is here. The by this code ESP8266 Manual Wifi Configuration with EEPROM completes.
|
1 2 3 4 5 6 7 8 9 10 11 12 13 14 15 16 17 18 19 20 21 22 23 24 25 26 27 28 29 30 31 32 33 34 35 36 37 38 39 40 41 42 43 44 45 46 47 48 49 50 51 52 53 54 55 56 57 58 59 60 61 62 63 64 65 66 67 68 69 70 71 72 73 74 75 76 77 78 79 80 81 82 83 84 85 86 87 88 89 90 91 92 93 94 95 96 97 98 99 100 101 102 103 104 105 106 107 108 109 110 111 112 113 114 115 116 117 118 119 120 121 122 123 124 125 126 127 128 129 130 131 132 133 134 135 136 137 138 139 140 141 142 143 144 145 146 147 148 149 150 151 152 153 154 155 156 157 158 159 160 161 162 163 164 165 166 167 168 169 170 171 172 173 174 175 176 177 178 179 180 181 182 183 184 185 186 187 188 189 190 191 192 193 194 195 196 197 198 199 200 201 202 203 204 205 206 207 208 209 210 211 212 213 214 215 216 217 218 219 220 221 222 223 224 225 226 227 228 229 230 231 232 233 234 235 236 237 238 239 240 241 242 243 244 245 246 247 248 249 250 251 252 |
#include <ESP8266WiFi.h> #include <ESP8266HTTPClient.h> #include <ESP8266WebServer.h> #include <EEPROM.h> //Variables int i = 0; int statusCode; const char* ssid = "text"; const char* passphrase = "text"; String st; String content; //Function Decalration bool testWifi(void); void launchWeb(void); void setupAP(void); //Establishing Local server at port 80 whenever required ESP8266WebServer server(80); void setup() { Serial.begin(115200); //Initialising if(DEBUG)Serial Monitor Serial.println(); Serial.println("Disconnecting previously connected WiFi"); WiFi.disconnect(); EEPROM.begin(512); //Initialasing EEPROM delay(10); pinMode(LED_BUILTIN, OUTPUT); Serial.println(); Serial.println(); Serial.println("Startup"); //---------------------------------------- Read EEPROM for SSID and pass Serial.println("Reading EEPROM ssid"); String esid; for (int i = 0; i < 32; ++i) { esid += char(EEPROM.read(i)); } Serial.println(); Serial.print("SSID: "); Serial.println(esid); Serial.println("Reading EEPROM pass"); String epass = ""; for (int i = 32; i < 96; ++i) { epass += char(EEPROM.read(i)); } Serial.print("PASS: "); Serial.println(epass); WiFi.begin(esid.c_str(), epass.c_str()); if (testWifi()) { Serial.println("Succesfully Connected!!!"); return; } else { Serial.println("Turning the HotSpot On"); launchWeb(); setupAP();// Setup HotSpot } Serial.println(); Serial.println("Waiting."); while ((WiFi.status() != WL_CONNECTED)) { Serial.print("."); delay(100); server.handleClient(); } } void loop() { if ((WiFi.status() == WL_CONNECTED)) { for (int i = 0; i < 10; i++) { digitalWrite(LED_BUILTIN, HIGH); delay(1000); digitalWrite(LED_BUILTIN, LOW); delay(1000); } } else { } } //-------- Fuctions used for WiFi credentials saving and connecting to it which you do not need to change bool testWifi(void) { int c = 0; Serial.println("Waiting for Wifi to connect"); while ( c < 20 ) { if (WiFi.status() == WL_CONNECTED) { return true; } delay(500); Serial.print("*"); c++; } Serial.println(""); Serial.println("Connect timed out, opening AP"); return false; } void launchWeb() { Serial.println(""); if (WiFi.status() == WL_CONNECTED) Serial.println("WiFi connected"); Serial.print("Local IP: "); Serial.println(WiFi.localIP()); Serial.print("SoftAP IP: "); Serial.println(WiFi.softAPIP()); createWebServer(); // Start the server server.begin(); Serial.println("Server started"); } void setupAP(void) { WiFi.mode(WIFI_STA); WiFi.disconnect(); delay(100); int n = WiFi.scanNetworks(); Serial.println("scan done"); if (n == 0) Serial.println("no networks found"); else { Serial.print(n); Serial.println(" networks found"); for (int i = 0; i < n; ++i) { // Print SSID and RSSI for each network found Serial.print(i + 1); Serial.print(": "); Serial.print(WiFi.SSID(i)); Serial.print(" ("); Serial.print(WiFi.RSSI(i)); Serial.print(")"); Serial.println((WiFi.encryptionType(i) == ENC_TYPE_NONE) ? " " : "*"); delay(10); } } Serial.println(""); st = "<ol>"; for (int i = 0; i < n; ++i) { // Print SSID and RSSI for each network found st += "<li>"; st += WiFi.SSID(i); st += " ("; st += WiFi.RSSI(i); st += ")"; st += (WiFi.encryptionType(i) == ENC_TYPE_NONE) ? " " : "*"; st += "</li>"; } st += "</ol>"; delay(100); WiFi.softAP("how2electronics", ""); Serial.println("softap"); launchWeb(); Serial.println("over"); } void createWebServer() { { server.on("/", []() { IPAddress ip = WiFi.softAPIP(); String ipStr = String(ip[0]) + '.' + String(ip[1]) + '.' + String(ip[2]) + '.' + String(ip[3]); content = "<!DOCTYPE HTML>\r\n<html>Hello from ESP8266 at "; content += "<form action=\"/scan\" method=\"POST\"><input type=\"submit\" value=\"scan\"></form>"; content += ipStr; content += "<p>"; content += st; content += "</p><form method='get' action='setting'><label>SSID: </label><input name='ssid' length=32><input name='pass' length=64><input type='submit'></form>"; content += "</html>"; server.send(200, "text/html", content); }); server.on("/scan", []() { //setupAP(); IPAddress ip = WiFi.softAPIP(); String ipStr = String(ip[0]) + '.' + String(ip[1]) + '.' + String(ip[2]) + '.' + String(ip[3]); content = "<!DOCTYPE HTML>\r\n<html>go back"; server.send(200, "text/html", content); }); server.on("/setting", []() { String qsid = server.arg("ssid"); String qpass = server.arg("pass"); if (qsid.length() > 0 && qpass.length() > 0) { Serial.println("clearing eeprom"); for (int i = 0; i < 96; ++i) { EEPROM.write(i, 0); } Serial.println(qsid); Serial.println(""); Serial.println(qpass); Serial.println(""); Serial.println("writing eeprom ssid:"); for (int i = 0; i < qsid.length(); ++i) { EEPROM.write(i, qsid[i]); Serial.print("Wrote: "); Serial.println(qsid[i]); } Serial.println("writing eeprom pass:"); for (int i = 0; i < qpass.length(); ++i) { EEPROM.write(32 + i, qpass[i]); Serial.print("Wrote: "); Serial.println(qpass[i]); } EEPROM.commit(); content = "{\"Success\":\"saved to eeprom... reset to boot into new wifi\"}"; statusCode = 200; ESP.reset(); } else { content = "{\"Error\":\"404 not found\"}"; statusCode = 404; Serial.println("Sending 404"); } server.sendHeader("Access-Control-Allow-Origin", "*"); server.send(statusCode, "application/json", content); }); } } |
Video Tutorials/Guide







8 Comments
I tried your code but I am getting garbage characters when I send the WiFi Credentials to the ESP8266 board, making it unable to connect to my WiFI router.
It’s very good, what I can add to the code to add two field to change the device IP Address, and the gateway
Fantastic! This is just what I was looking for. I also made some tweaks to the HTML code so that simply tapping/clicking on a network name copies it to the SSID input field. I’m thinking of doing some more styling and making the scan button refresh the page after a few seconds as well. I might even break this out into its own library. Can I modify and post this code in GitHub? If so, what requirements do you have for attribution, licensing, …?
Thats really great to know. You can share the code in github and probably attach the orginal link as a reference
Can you help me to setup access point name and password configuration without hard coding it?
I am having a problem on compiling the code. Even an simple example. Its saying there is some problem with <EEPROM.h> library. So how to download and add it
Wonderful! Thank you for publishing this very comprehensive code. Now I can implement this idea in 1 of my projects.
this makes no sense. what do you use to run this? invalid syntax x 4000 :/